Monthly Archives: July 2013

Garden Dip


I think I’ve told you about the weekly get- together most Friday nights, just to chat and socialize with some women.   We discuss world affairs, local affairs, and general chit-chat.   We also bring snacks, and since I love to experiment play in the kitchen, I have fun most Friday’s.

I’ve made hummus and brought it, last week I brought this killer Feta Dip, and this week I brought this:
Garden Dip.

Well it got renamed last night, I had it in my recipe file as Garbage Dip, but they all decided it was too good to be called that.   And of course me being me, I had to play with the original recipe, which is simplicity itself, well it is if you have all the right ingredients to hand.  Which I sorta did.

Here is the recipe with the original ingredients to the side in parenthesis and in blue.

1 cup light sour cream                (1 pint sour cream)
1 sweet onion, finely chopped     (1 small onion, chopped)
1 1/2 tomato, finely chopped      (1 tomato, chopped)
1/2 cup ranch dressing               (1 package dry ranch dressing)
2 cloves garlic, minced               (1/2 tsp. Garlic Salt)
1/2 teaspoon Cavenders Greek Seasoning
1/4 package Sazon Tropical Seasoning, this could be optional

Mix all ingredients together and let sit for an hour, in the fridge before serving with either chips or with some fresh bread.

I thought I’d made a lot, but most of it was eaten and enjoyed.

I will make this again, and maybe add some cilantro, which was a suggestion made by one of the ladies.  At any rate, have fun with it yourself.

Now to go and figure out what I’m making for Tapas this week, gotta think on that one.

Æbleskiver (Danish Pancake Balls)


I love æbleskiver, and in fact make them for myself every so often, they do take a little planning, but then again, it’s for me and I’m worth it.    And gee, sometimes I just plain crave a taste from my childhood.

Mom used to make these in the summer when we were haying, she’d make them as a kind of fourth meal, and they would be inhaled.   Or she’d make them as a special breakfast from time to time, but would make a couple of pans first, then start serving them, cause gee, they would disappear rapidly, and we’d all be waiting in breathless anticipation for the next batch to come out of the pan.

To make æbleskiver, you need a special pan.   I have two, one which my mom gave me after I got married and the second one is one that my husband’s grandmother gave me.

She actually gave me her pan, the one she’d been using for many years.    Grandma not only knew what aebleskiver were, she’d made them.   When she found out I knew how to make them as well, she gave me her pan.  And I treasure it.   And yes, I did make her some æbleskiver from time to time as well.   In fact, on one memorable occasion, I made a batch, took them to her in the nursing rehab facility where she was staying at one time, and let her feast on them.   I think I was in danger of being mugged by her fellow inmates, they were jealous, as were the nurses.     That’s OK, Grandma got a nice dinner that night.

Sorry, I get sidetracked sometimes.

At any rate, I store my pans in brown paper sacks, the kind you get from the grocery store.  Keeps them rust-free and clean.  I think that’s the way my mom stored hers as well.

2 cups buttermilk
2 cups flour
1/2 tsp. baking soda
4 eggs, separated
1/4 cup sugar
2-3 tablespoons melted butter
1/4 teaspoon salt
** 2 tablespoons sour cream (optional)
1/4 stick clarified butter for frying, or peanut oil.

Separate eggs, whip egg whites til dry, and set aside.
Sift flour, baking soda and salt together, set aside.
Mix egg yolks with sugar and beat til the sugar is dissolved and the eggs yolks look almost white.   The sugar crystals should be dissolved into the yolks.
Mix the egg yolks and sugar with the buttermilk, blend well.  Add the melted butter.

Fold in the dry ingredients, mixing as little as possible, you will still have chunks of dry in there, and that’s OK.   Fold in the egg whites, cutting it through just four times.

By which I mean, you put the whites in the bowl, cut through the center and fold towards you, turn the bowl 1/4 way, fold once again, turn bowl, fold again, and finish by folding it through one last time.    Just be careful to not overmix.   You will have chunks of egg whites, but they will be small, and you do want them there.

** I added two tablespoons of sour cream this time round and really liked the taste.   I would say this would be optional, nah, from now on, I’m adding sour cream to this recipe.   I’ve been seeing a lot of pancake recipes with sour cream in them, and wanted to try it out.  I just love being a guinea pig  tastetester.

 Just like this.

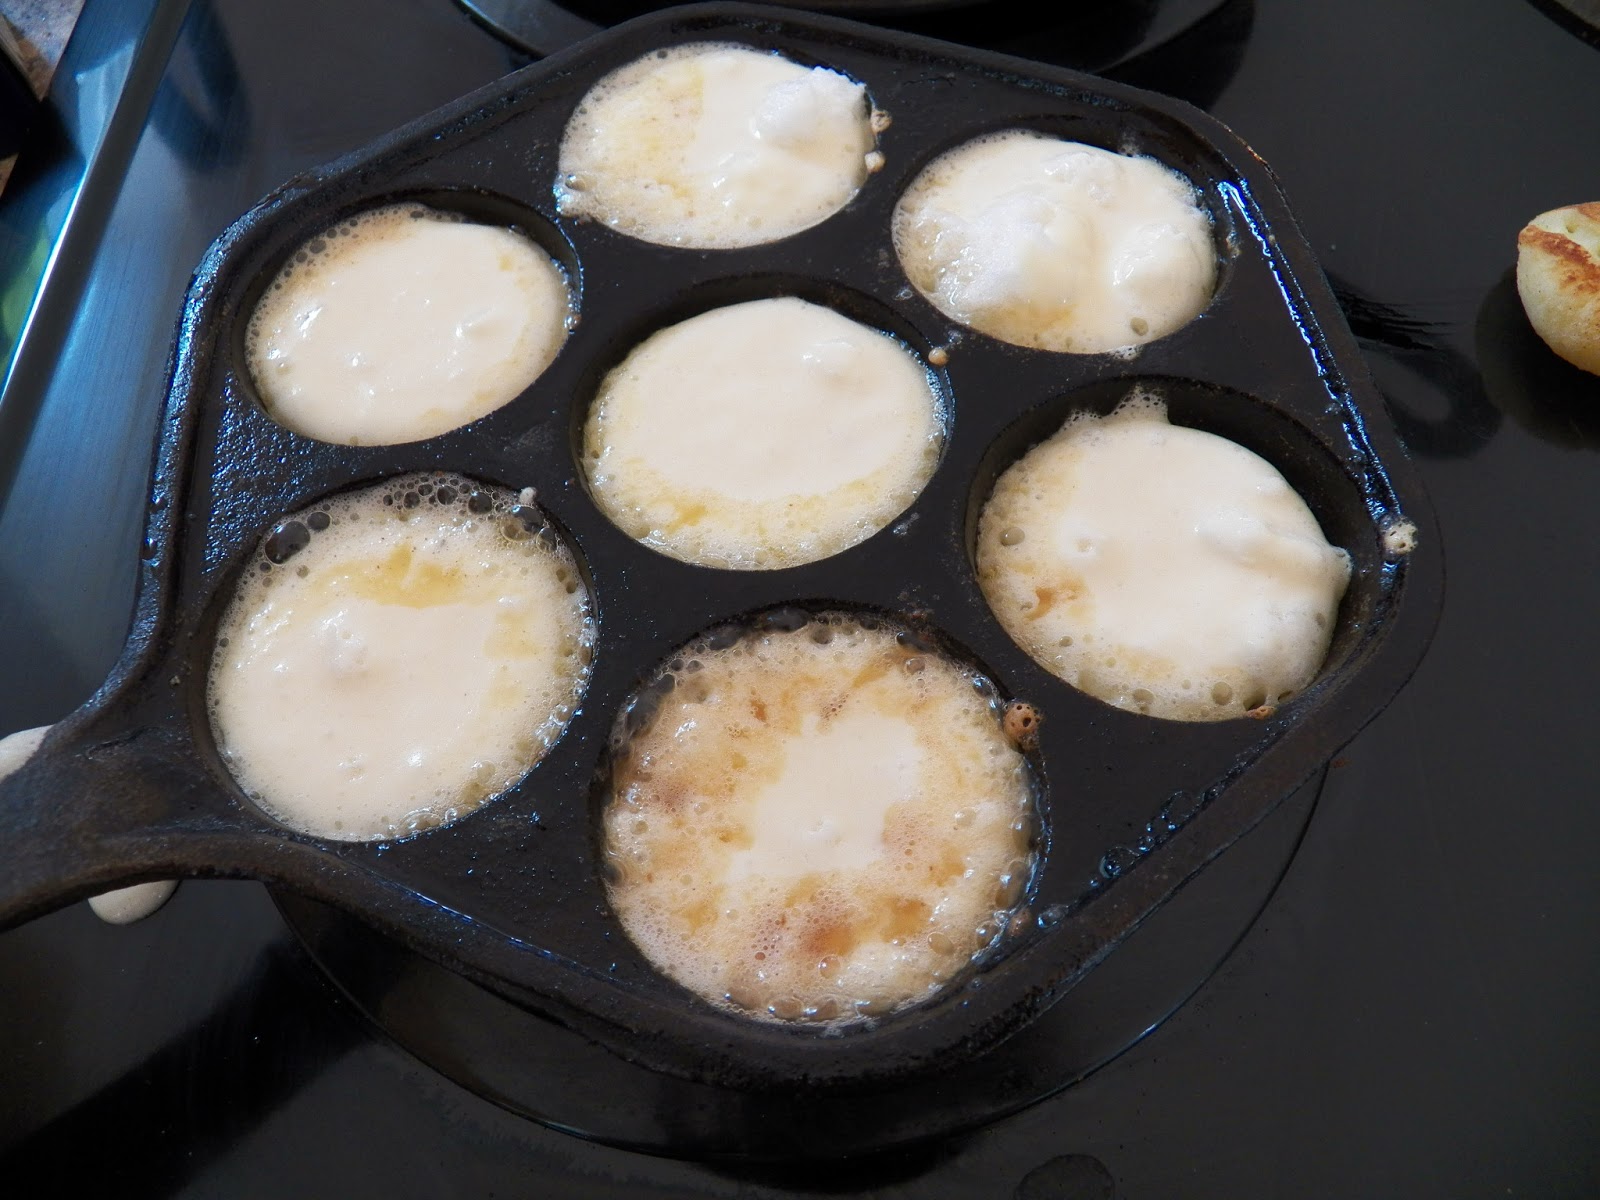
Heat pan, and place a little clarified butter in each indentation, let heat.      Don’t worry if you have chunks of egg whites in the batter, they will cook just fine.   This was my husband’s grandmother’s pan.  I think she would love the idea it was being featured here.

Have a knitting needle or a wooden skewer handy or even a fork.

As soon as you’ve finished pouring the batter in the last indentation, the first aebleskiver will be ready for turning.

And I forget to take a picture of me turning them.

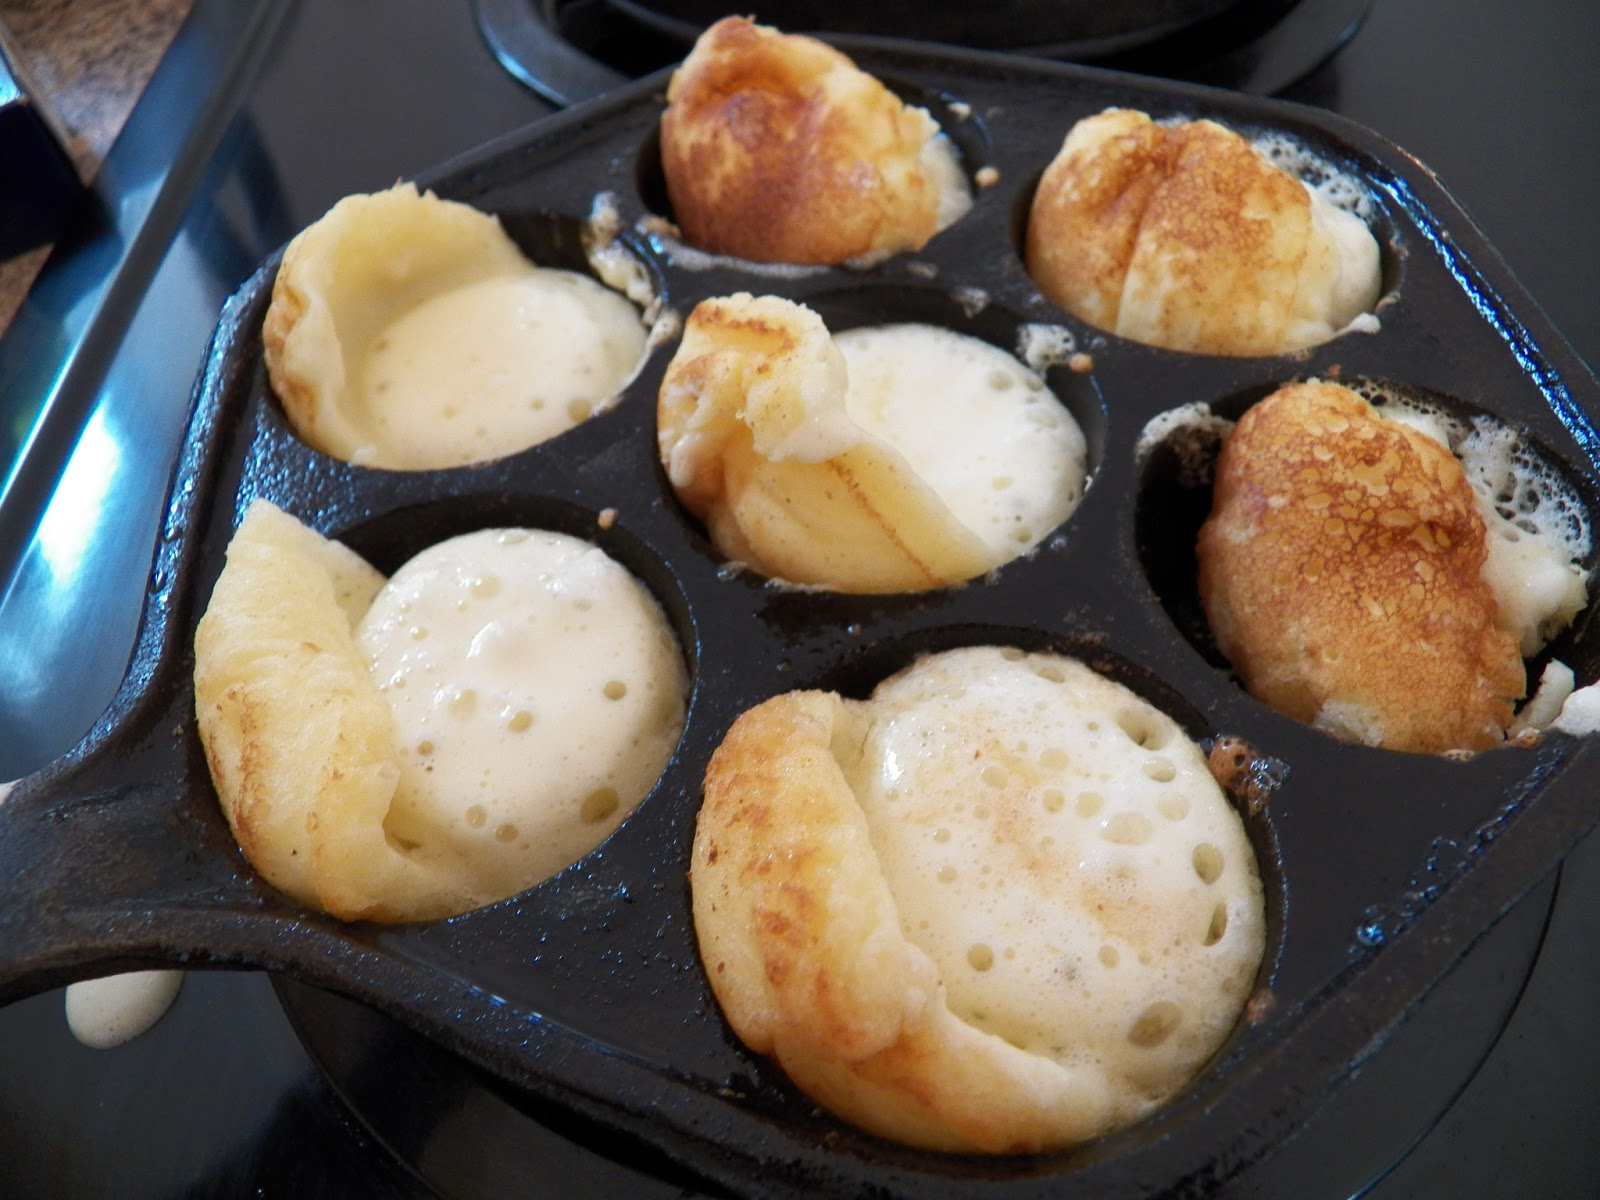
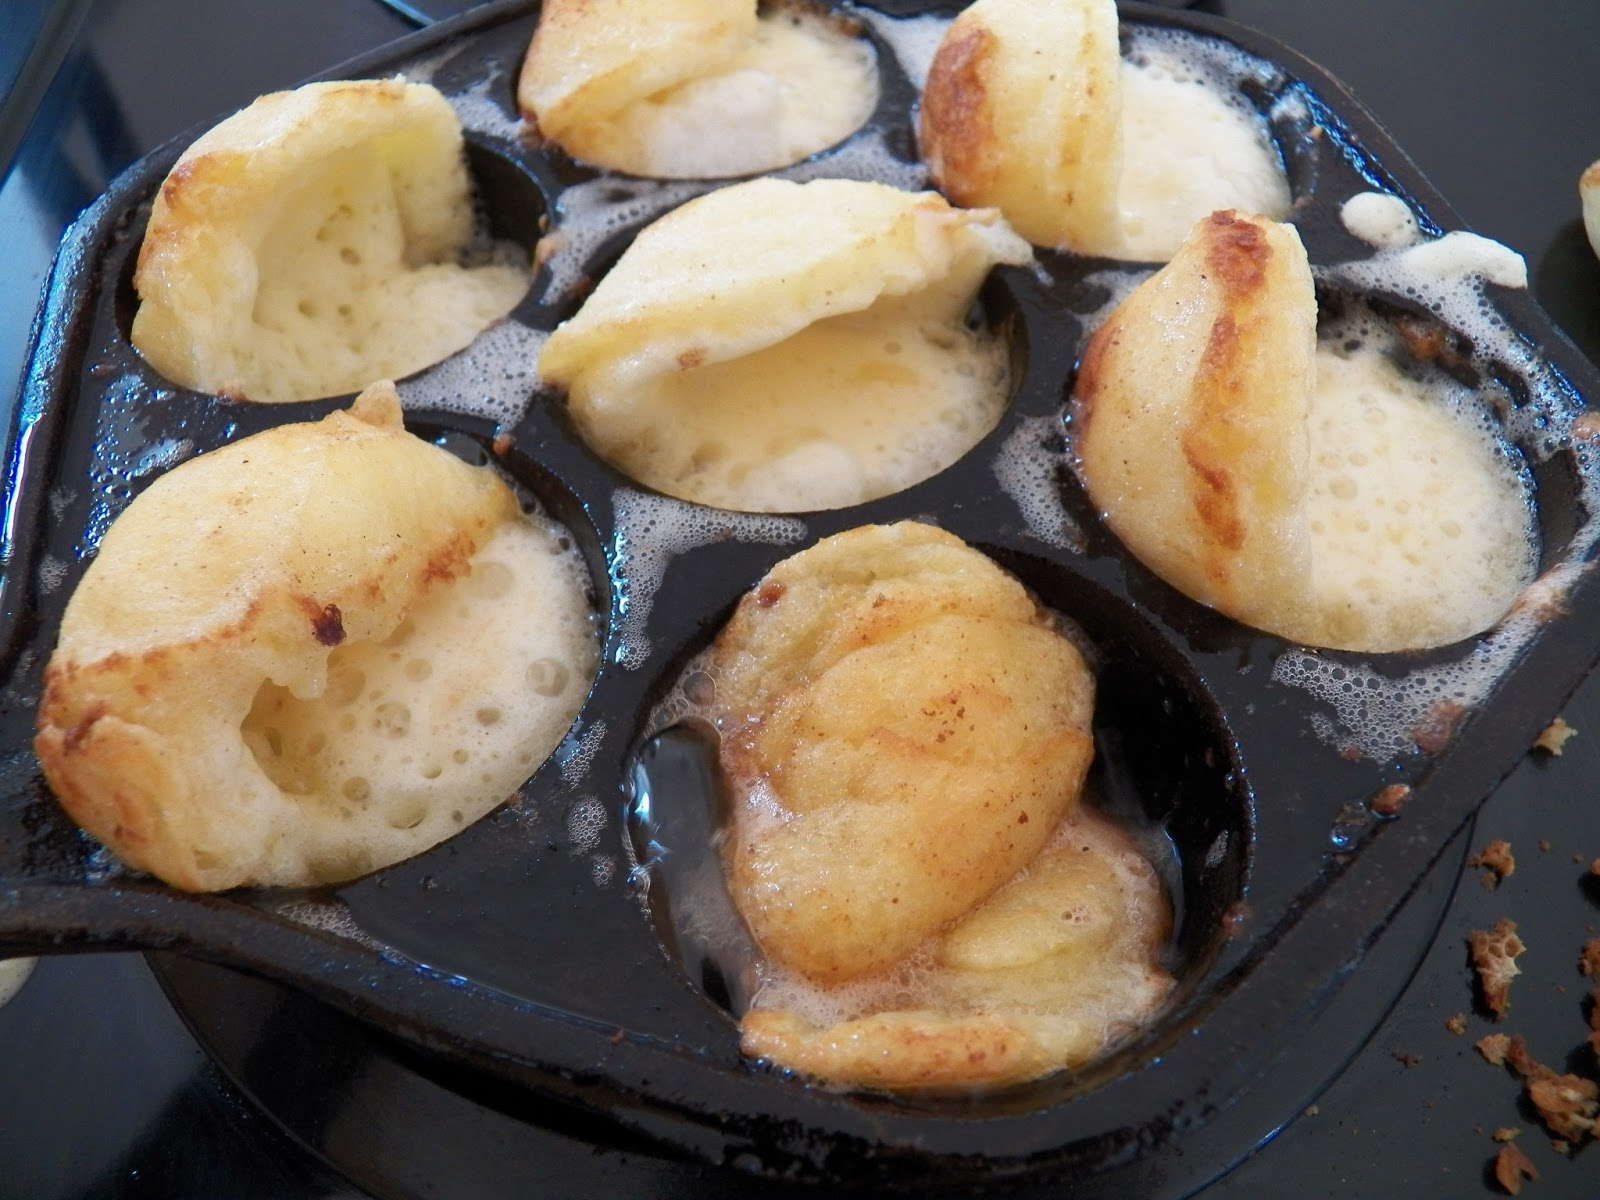
You lift up the edge, turning the ball a little and letting the batter flow from the middle to the bottom of the indentation.  Proceed around the whole pan, turning each one just about a quarter turn.  You do need some practice on this, and be ready to sacrifice a pan full getting the hang of it.   I usually screw up the first pan full as well, but I eat the mistakes so no one ever knows.  Just don’t tell anyone, OK?

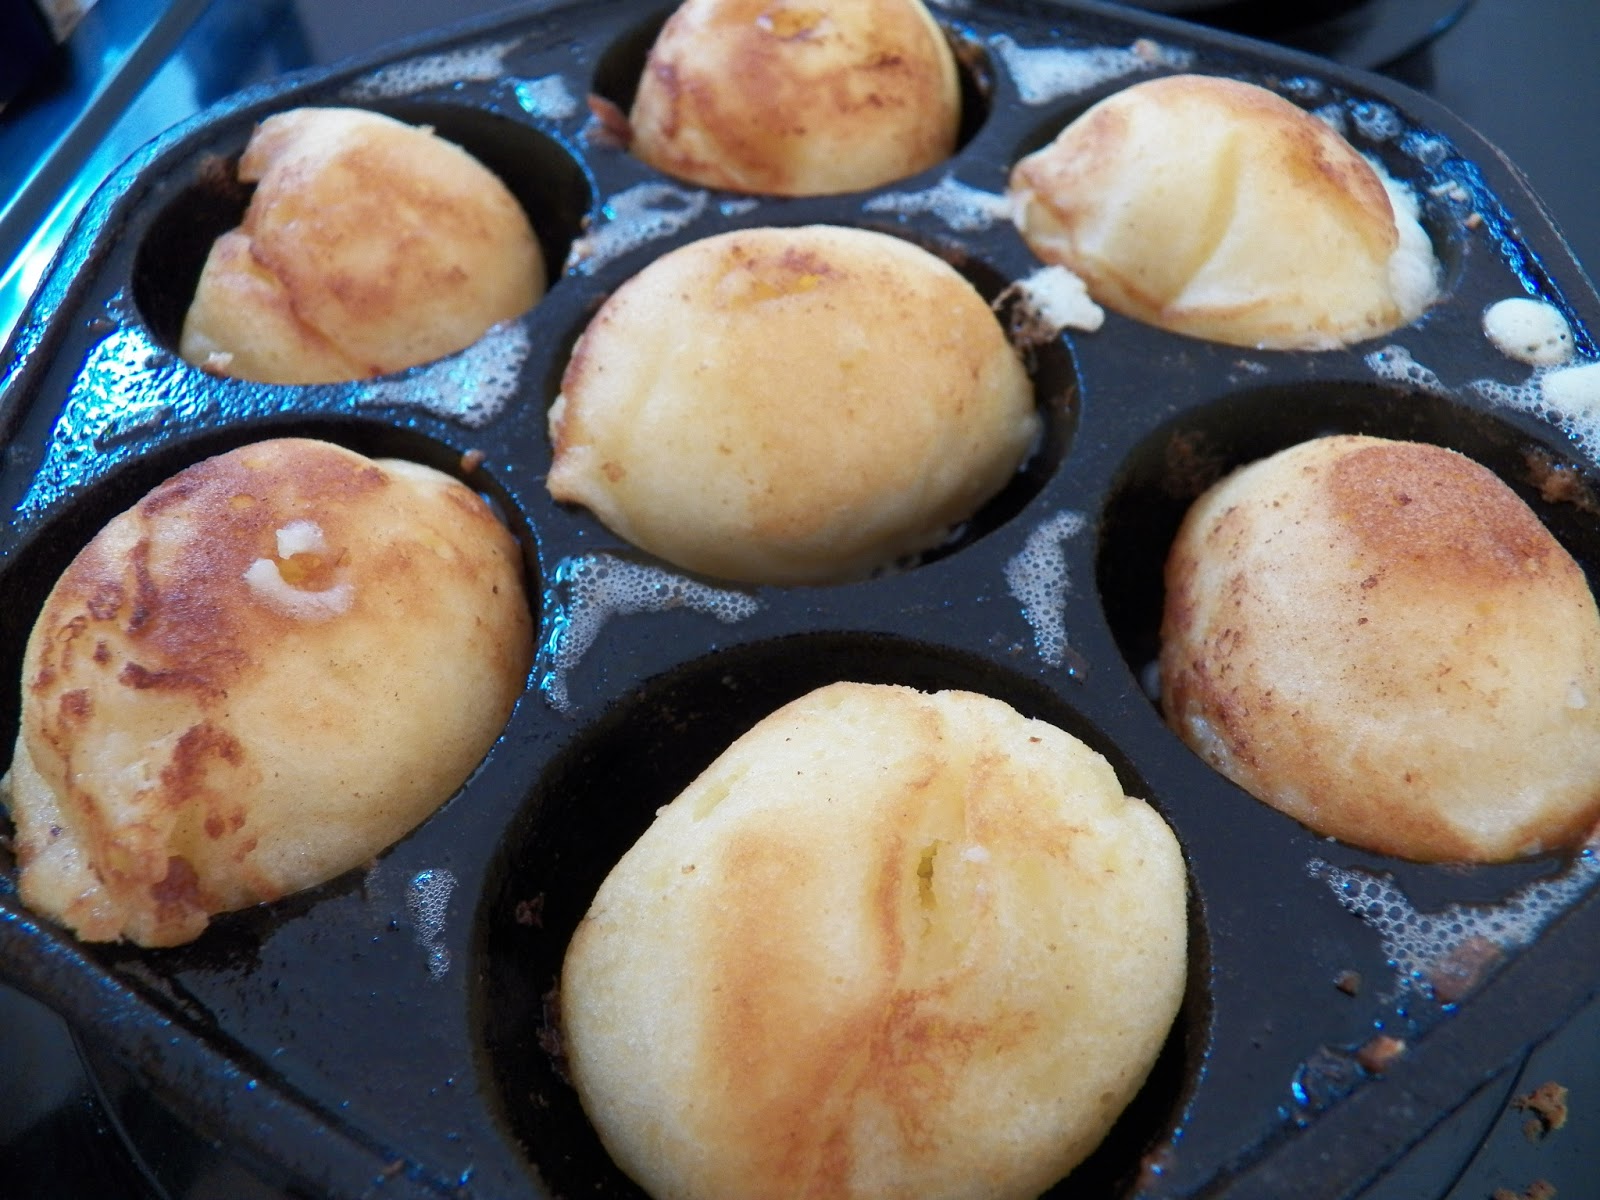
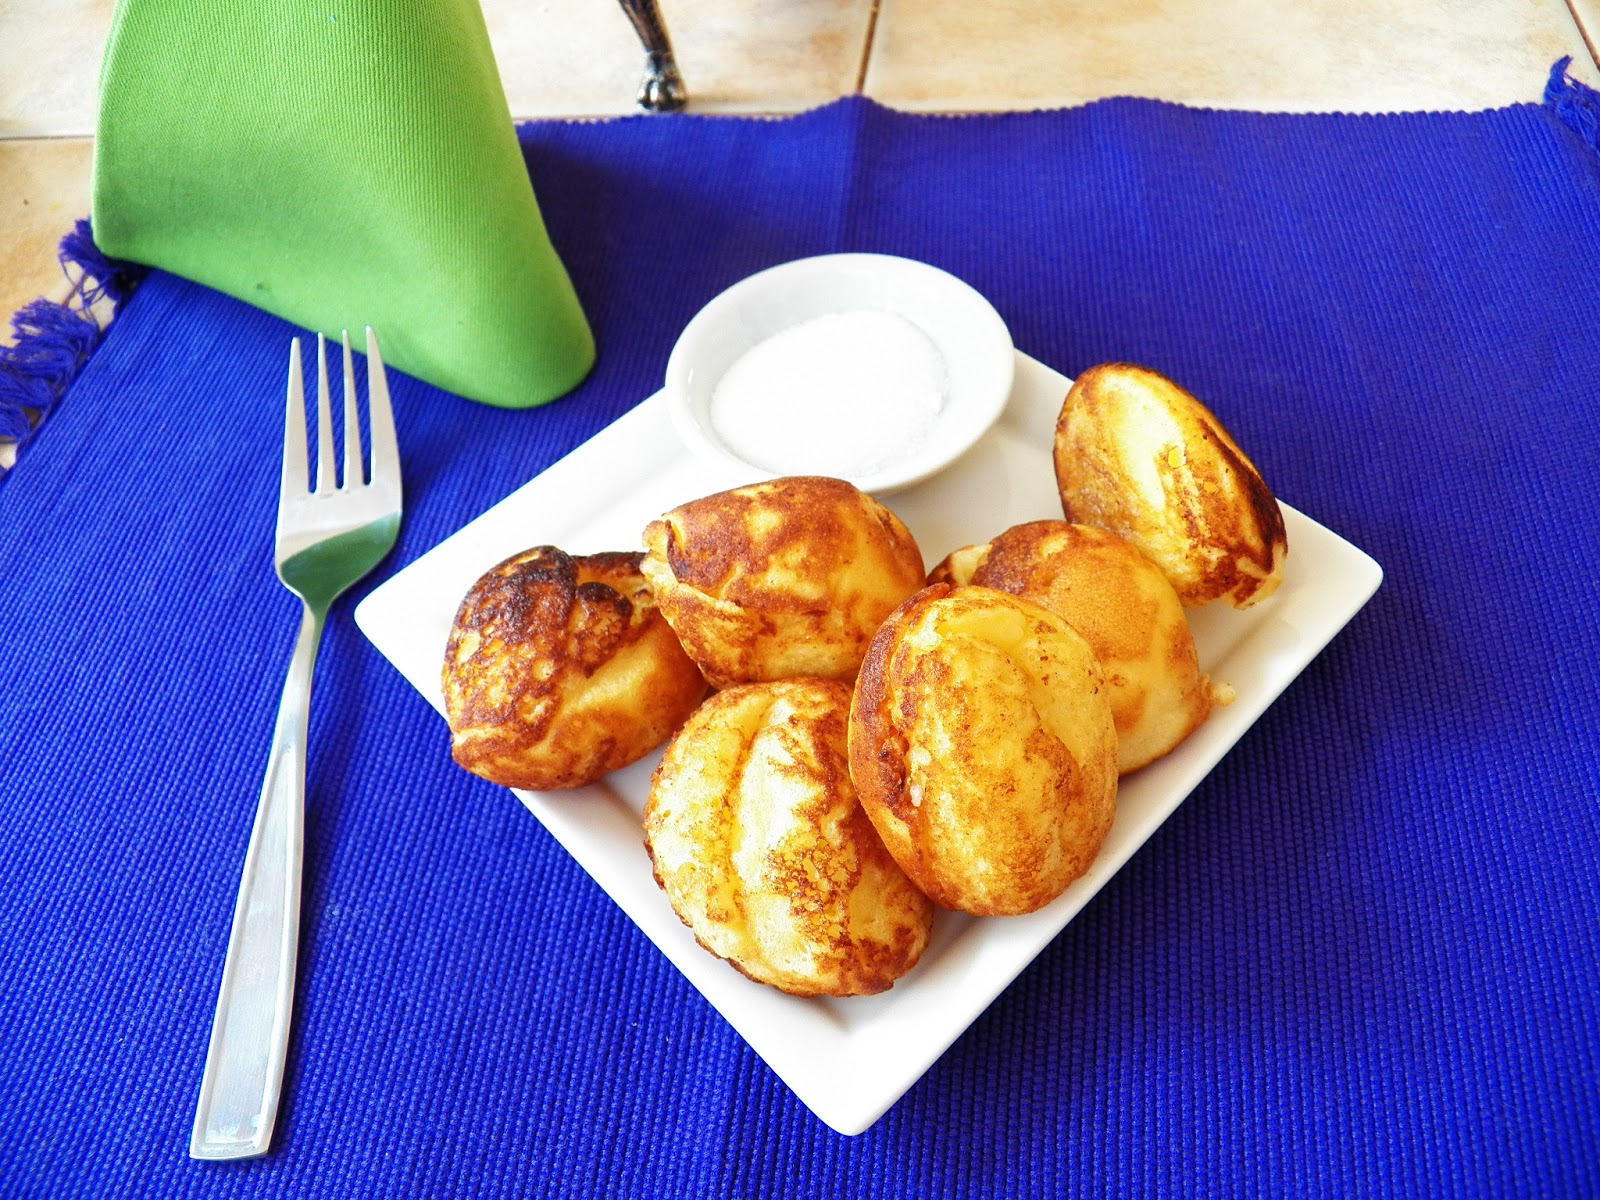
By the time you’ve finished turning them all once, they should be a nice golden brown, and spherical in shape.  Take them out and place them onto a heated platter or just onto the plates and serve.

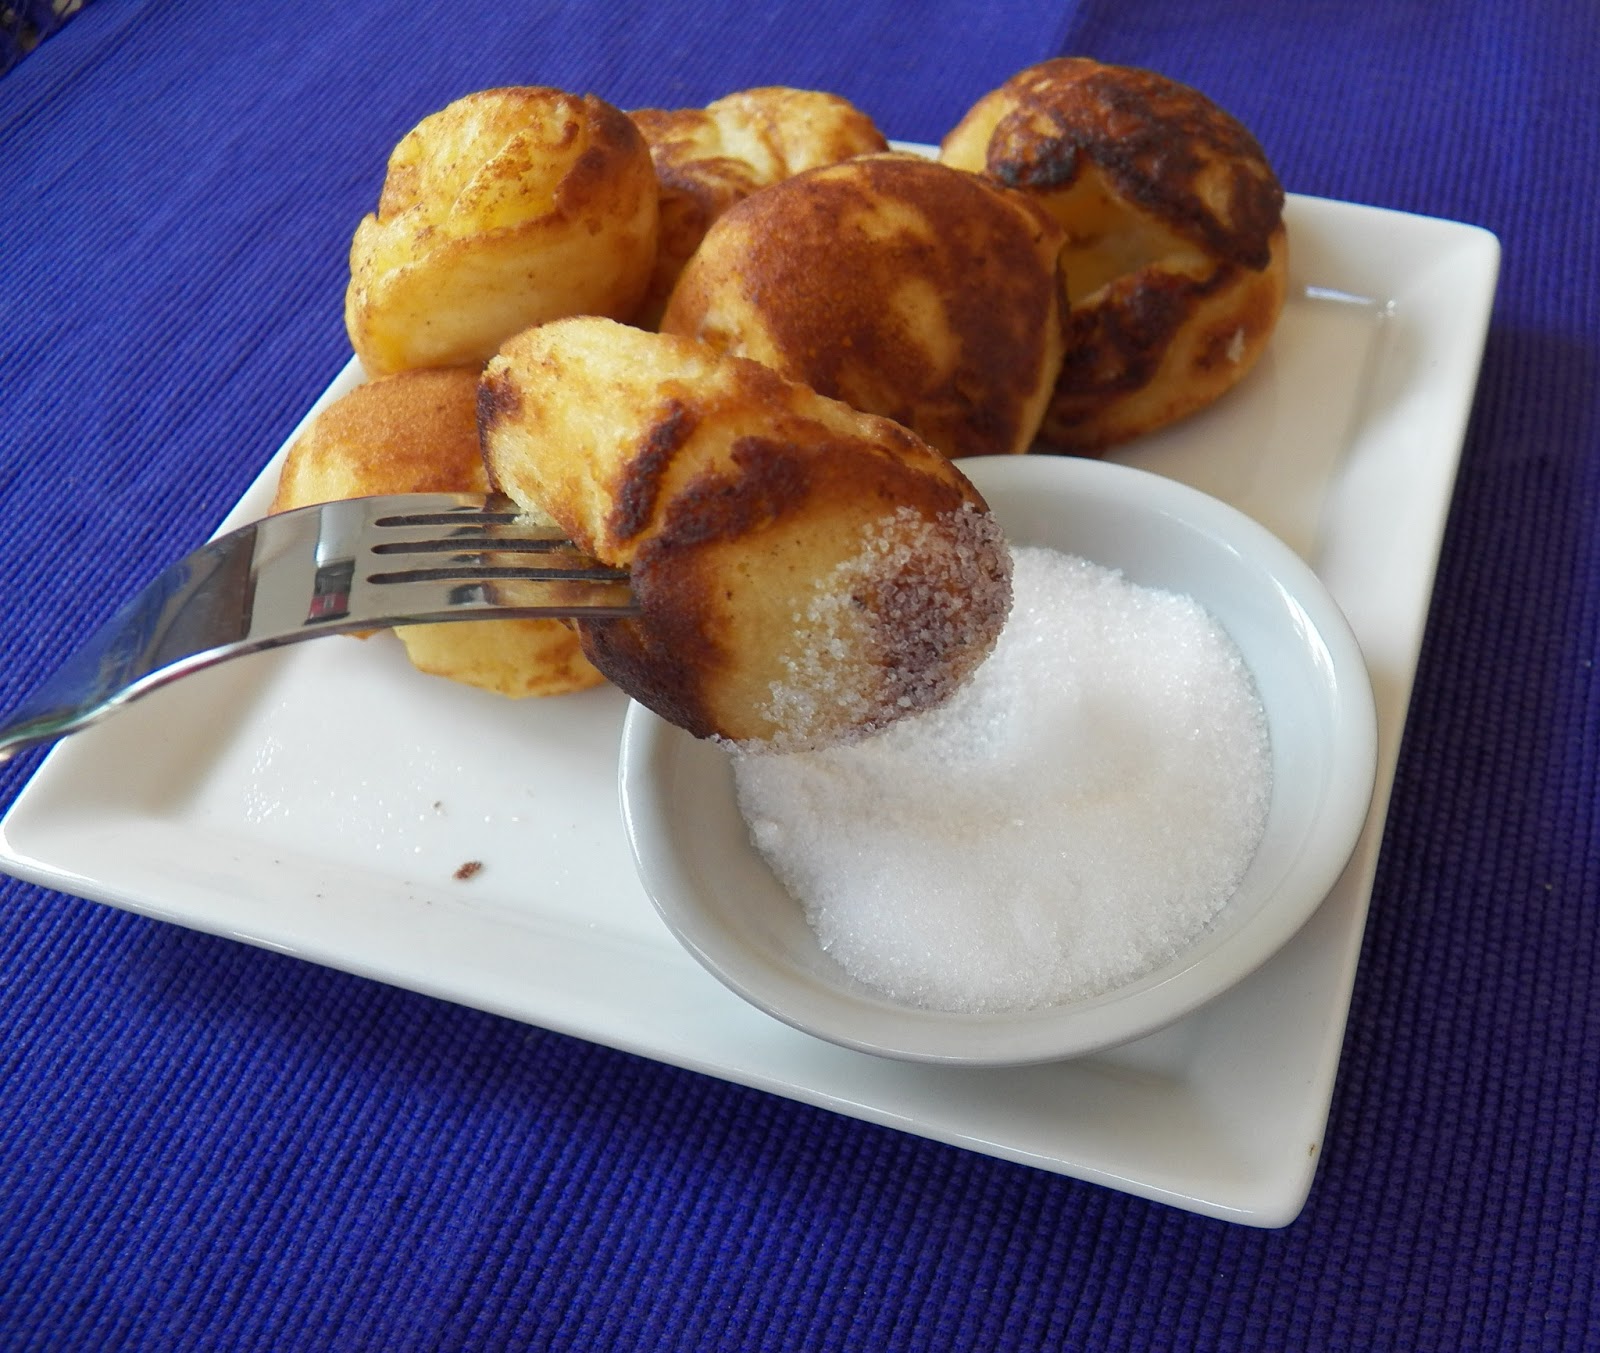
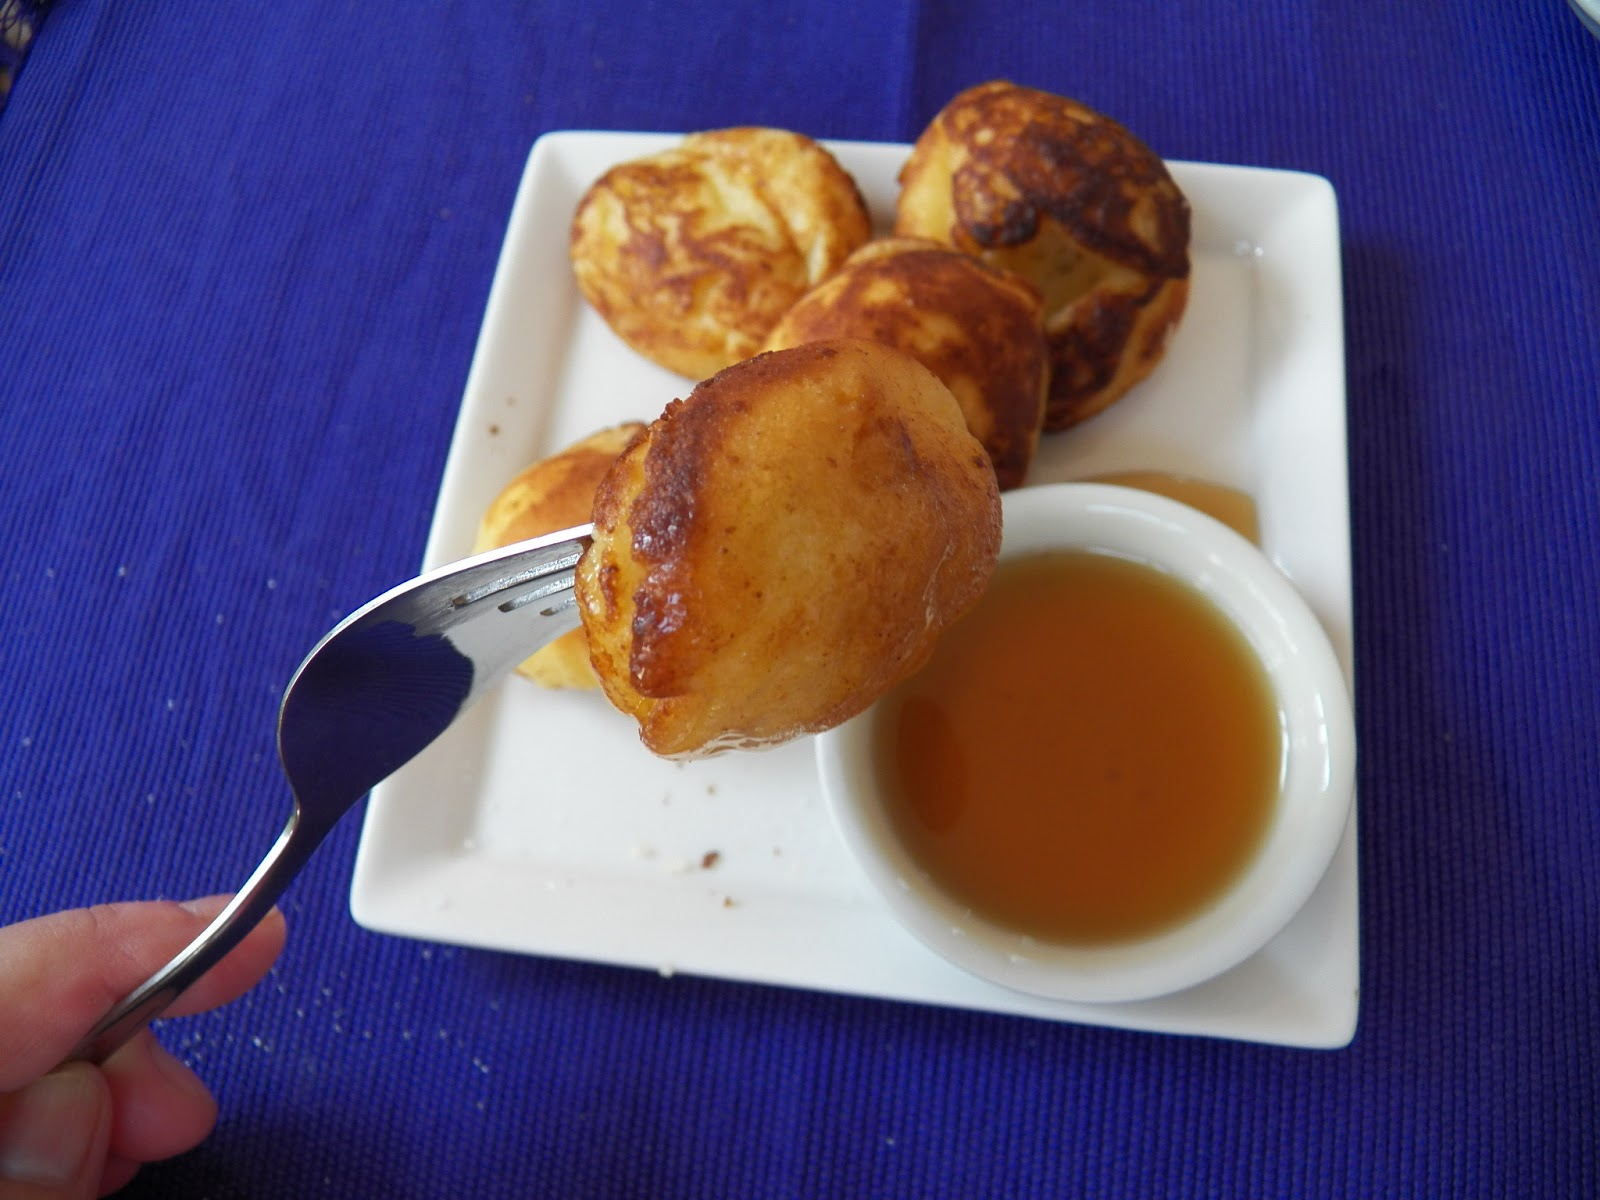
Traditionally these are served with Raspberry Jam and a sprinkle of powdered sugar.   I like mine with Strawberry Jam or syrup or just dipped in some sugar, there is no wrong way to eat æbleskiver.

Mango Papaya Salsa with Salmon


I got so excited last week when I was in a ‘big’ city grocery store and found Papaya’s and Mango’s for sale.  OK, I know they probably sell them all the time, but I needed both of them to be at the same ripeness for this meal.   And last night, after several days of sitting on my counter, resting, they were ready.

It’s the little things that get me excited.  Fruit ripening on schedule, WOO HOO.

This dish is actually one we used to get from time to time at Coogie’s Beach Cafe in Malibu.   I loved going there, the food was great and the star watching, even better.    You never knew who was going to come in there to eat.

Personally I loved their Steak Sandwich, but from time to time we’d order their Salmon with Mango Salsa.  The menu now says they poach it, but when we used to order it, it was baked and then sat on top of a lemon beurre blanc sauce and was served with garlic mashed potatoes and asparagus.

And you know, that’s just the way I do it now.

Why mess with the tried and true?

For this I used half of a papaya and two mango’s, in a fine dice.


Here’s a hint about Mango’s.   They’re pretty slippery when you peel them, and I’ve almost lost appendages trying to cut them after they’ve been peeled.  So now I just cut them down the side, on each side of the pit, and then score the mango as you can see here   > > > > > > > > > > > >
and then cut it from the peel.

I then squeezed a fresh lime over it all, and let it sit for an hour before I baked the salmon in the oven.   The lime tends to ‘punch’ up the papaya and adds some lovely notes.   I’ve tried using lemon in the past and it’s just not the same.  (and I bet this would be totally awesome with a finely minced jalapeno added in, just saying…)

The salmon baked in 400 degree oven for about 15 minutes, until it was just done.  I put a pat of butter on top of each fillet, this adds moistness and then I squeezed a lemon over it about 10 minutes into the cooking process.    As the salmon was baking,  I also mashed some taters and cooked up the asparagus.

And ended up with a lovely meal.

Now, doesn’t that look yummy?

It was.

Garlic Feta Dip


You ever play around in the kitchen and come up with something that tastes sooo good you just want to share?   I did that last night.

I join a group of ladies at a local establishment on Friday nights and we bring snacks to nibble on while we get caught up on the weeks happenings, and de-stress a little along the way.   I had some flavoured pita chips I wanted to try but I thought they needed a little something to be dipped into.   So I had some fun.

I took some cream cheese, greek yoghurt, Feta cheese, a little mayo, a little garlic and some Cavenders Greek Seasoning and mixed it all together.  And then watched people practically licking the bowl when it was about empty.  And since they seemed to like it a lot, I thought I would share the how to’s with you here.

Recipe
4 oz. Cream Cheese (I used the Neufchatel)
3 tablespoons Feta Cheese (use as much as you like)
2-3 tablespoons plain Greek Yoghurt
1-2 tablespoons Mayonnaise
1/4 teaspoon Cavender’s Greek Seasoning (or add a few sprinkles at a time to taste)

2 finely minced green onions, use part of the tops as well.
2 cloves garlic, finely minced

Mix all together and serve with some Pita Chips.

So there you have it, quick, simple and very tasty.

Sweet Wings


I made some wings, chicken wings that is, for Tapas last week and I have to say they didn’t turn out quite the way I thought they should, but they were still tasty.    At least I assume they were, cause most of them were eaten.

I’ve been craving a sweet/spicy/asian type wing the last little while.  So, I thought I would try making some.   I didn’t succeed getting the taste I was after, but hey, I can always try again.   But, the wings were eaten, and enjoyed.  I think I figured out what I am going to do differently the next time.

I used some Hoisin Sauce, Ken’s Asian Soy Ginger dressing, sesame seed oil, and some grated fresh ginger and then mixed in some blackberry/raspberry jelly.   I wanted some hot in there, and added a tablespoon of Tiger Sauce.   Mixed it all together  and heated it in a little and poured it over some baked chicken wings.

Tossed them around a little and then baked them for awhile, then basted them again with the sauce.  And let them bake a few more minutes.

Recipe:

1/4 cup Hoisin Sauce
1/4 cup Sesame Seed Oil
1/2 cup Ken’s Soy and Ginger Dressing
1/2 cup blackberry and raspberry jelly
1 tablespoon Tiger Sauce
1/2 teaspoon grated Ginger

Mix all together in a sauce pan, heat until the jelly melts, then pour over cooked wings, toss to coat evenly.   Place wings on well greased pan, and bake for 20 minutes at 375 degrees.   Baste wings with remaining sauce and bake an additional 10 minutes or so.   The exterior will get a deep brown laquered look and they will still be sticky and good.

I have to say the sauce, while good, was not what I wanted.  However, after all of this, I went into my fridge and spotted the Sweet Hot chile sauce, and I think if I’d added that to the mixture, it would have put it over the top.  If I do it again, I will add some of that.  gee, hmmm, maybe I will do that soon.   I still haven’t satisfied that craving.

Kro Pork with Grapes


In Denmark a Kro is an inn which offers not only lodging but also meals.    Some Kro’s are just inns, whereas others offer meals which can be, like many restaurants either really good or just so so.   Many years ago I was lucky enough to taste this dish.   My cousin got the recipe from a Kro they liked to go to from time to time, and she recreated it.

Well, I was young then, but not a dummy.   I wrote down the recipe, and somewhere in the process of living, I managed to misplace it.

Well, you move a couple of times, put stuff in storage, it’s easy to lose stuff.  I’m still searching for some stuff I know I had.  One of these days, I’ll find it or not.

In the meantime, I was looking for my mom’s recipe for Asier a few weeks ago, and guess what I found instead.  A whole file full of recipes.  At one time I had the delusion I’d actually write a cookbook and I’d actually made a good start on it, and this recipe was in that file.

And when I read it again, my mouth started to water and I knew I had to make it.  Could not find tenderloin that wasn’t already seasoned, so I got a nice piece of loin instead, and that was alright.   And I found some nice red grapes, on sale so I used them as well.   I think green grapes do work better, at least visually.

I made this last week, and you know, it was as good as I remembered it.   I think though, I will add some herbs to it the next time I make it, I think that would send it over the top.  But in the meantime, this works.

1 whole pork tenderloin (about 2 pounds) cut into medallions (I used a Loin cut this time)
2 tomatoes, cut into eights
1 large onion, quartered and then cut again into eights (I think you could also use small onions here)
1 1/2 cups water
1 lb.  seedless green grapes, cut in half
salt and pepper to taste
1 tbsp. olive oil
1 tablespoon butter

Heat olive oil and butter in a skillet til hot, then brown the pork medallions in small batches, setting them aside to rest while you brown the rest.

Add water to pan, and scrape up all the little bits of browned goodies at the bottom.  Add the meat,  and let simmer for about  ten minutes.  Next up, add the onion, and simmer an additional ten minutes, then add the tomatoes and let cook another 5-7 minutes.   Thicken the sauce with a little cornstarch and water slurry, then add the grapes and bring to a simmer.    Simmer a couple of minutes and dish this up with some rice, either white or brown.

This really is a quick and easy meal, and you can get the rice on and let it cook while the meat is simmering.

The next time I make this, I am going to add some marjoram and savoury to the simmering meat.   I think it will really punch up the flavour and make this even better.

I really enjoyed my meal, I even remembered to take pictures of it.    (and best of all, there were leftovers, so I threw them in the freezer for lunch in the future.  )