Tag Archives: Bacon

Kentish Pie


I’m not too sure how to describe this dish, it’s like a cross between a pie and a quiche and totally delicious.
I found the recipe on Jenny Eatwell’s Rhubarb and Ginger site via Carole’s Chatter Food on Fridays.    She has a fun idea, she asks bloggers to link a recipe or recipes, every Friday.  Each Friday has a theme and guess what it was a couple of weeks ago, yup Pies and Tarts, in fact, here’s the link,   Carole’s Chatter Food on Friday: Pies and Tarts.    There were over 250 recipes submitted.     I looked at a few of them,  I saw this.

A Kentish Pie.

I had to look, and when I did,  I decided that this was just fun enough and different enough to make for Tapas Night.   So I did.   Make it that is.

And it got eaten.    There weren’t even any leftovers.

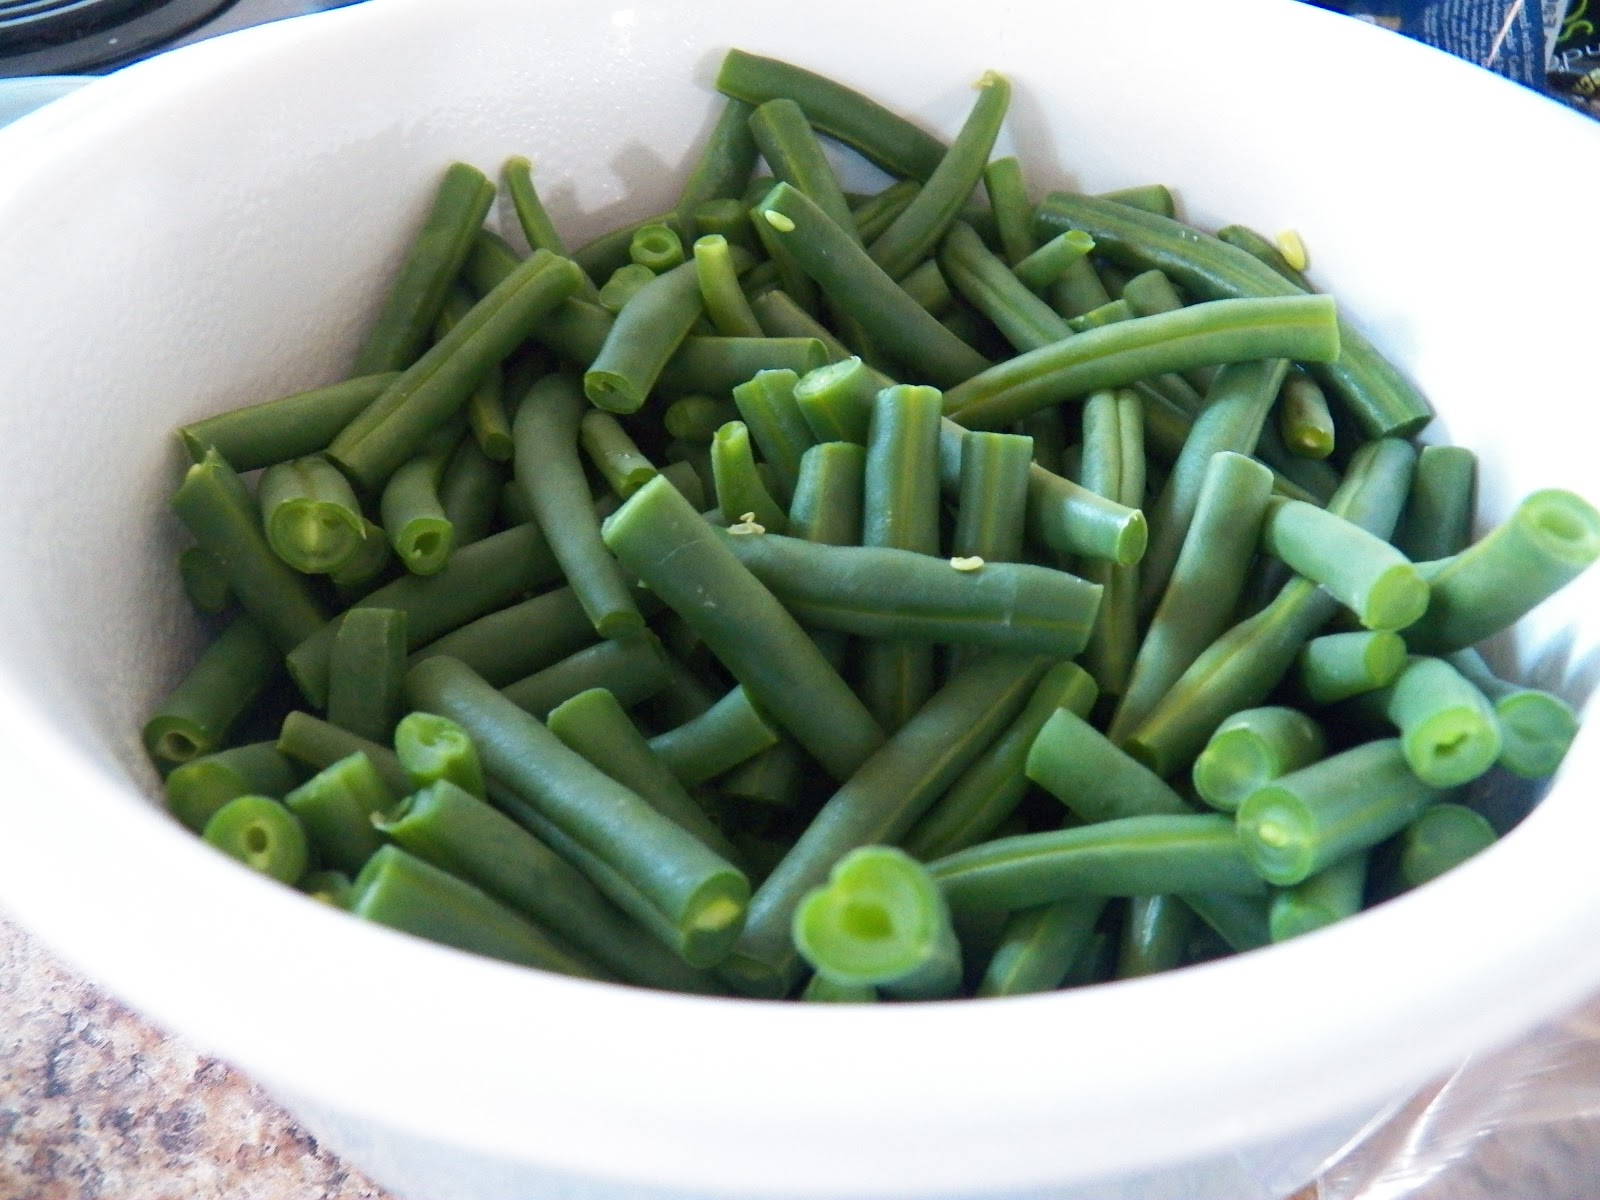
I think this would make a fantastic dinner meal, served with a side of veggies, but it’s also a good potluck dish.   And you can bake it beforehand, take it out of the pie pan, and serve it at room temperature.  How cool is that?  Especially down here in the South where you don’t want the oven going and heating up the house in the afternoon.

I also made a short crust from scratch, mainly cause I wanted to keep my hand in.   And now I think I’m going to make a couple more batches and keep in the freezer, for the times I make a chicken pot pie.  This was one of the best recipes I’ve ever made.   I found the recipe here, and while I did tweak it a little, it was great.  I’ll share the recipe in a separate post.

Gotta keep you reading here, one way or another.

Now for the Pie.
It has Apples, Bacon and Cheddar in it.   I know, what a combination, but oh so very good.   However I have to say this up front, I did not cut the apple slices thick enough.  Next time, they will be thicker.   And next time, I would like slightly thicker bacon as well.    I think it would be tastier.

Pie Pastry, enough for the top and bottom of the pie  (I’ll be posting my recipe in the next day or so for this, but go ahead and use commercial pie crust).
12-14  slices good meaty bacon, cooked slightly crisp and chopped or broken into pieces.
8 oz.  Good Sharp cheddar cheese, cut into small pieces
2 apples, peeled, cored and cut into slices
8 eggs, lightly beaten, plus one egg yolk for glazing.  (I used the extra egg white in with the other eggs.)
3 tablespoons heavy cream (if you’re in Europe, use Double Cream)
Fresh ground Black Pepper

Preheat oven to 350 degrees.

Roll out or place one sheet of pie crust in a pie pan.   Cut off any overhangs with a sharp knife.  Or you can leave it rustic looking.    You can either put some pie weights, or some dried beans on the bottom of the crust to keep it from puffing up or just prick the bottom with a fork.   I pricked it with a fork cause I don’t have either dried beans or pie weights.  Bake for about 15 minutes, or until it is just done.   Set aside to cool.   Roll out the other sheet of pie crust and set aside for a few minutes.

While it is baking, fry the bacon up and set aside to cool.   Prepare the apples, peeling, coring and slicing them,

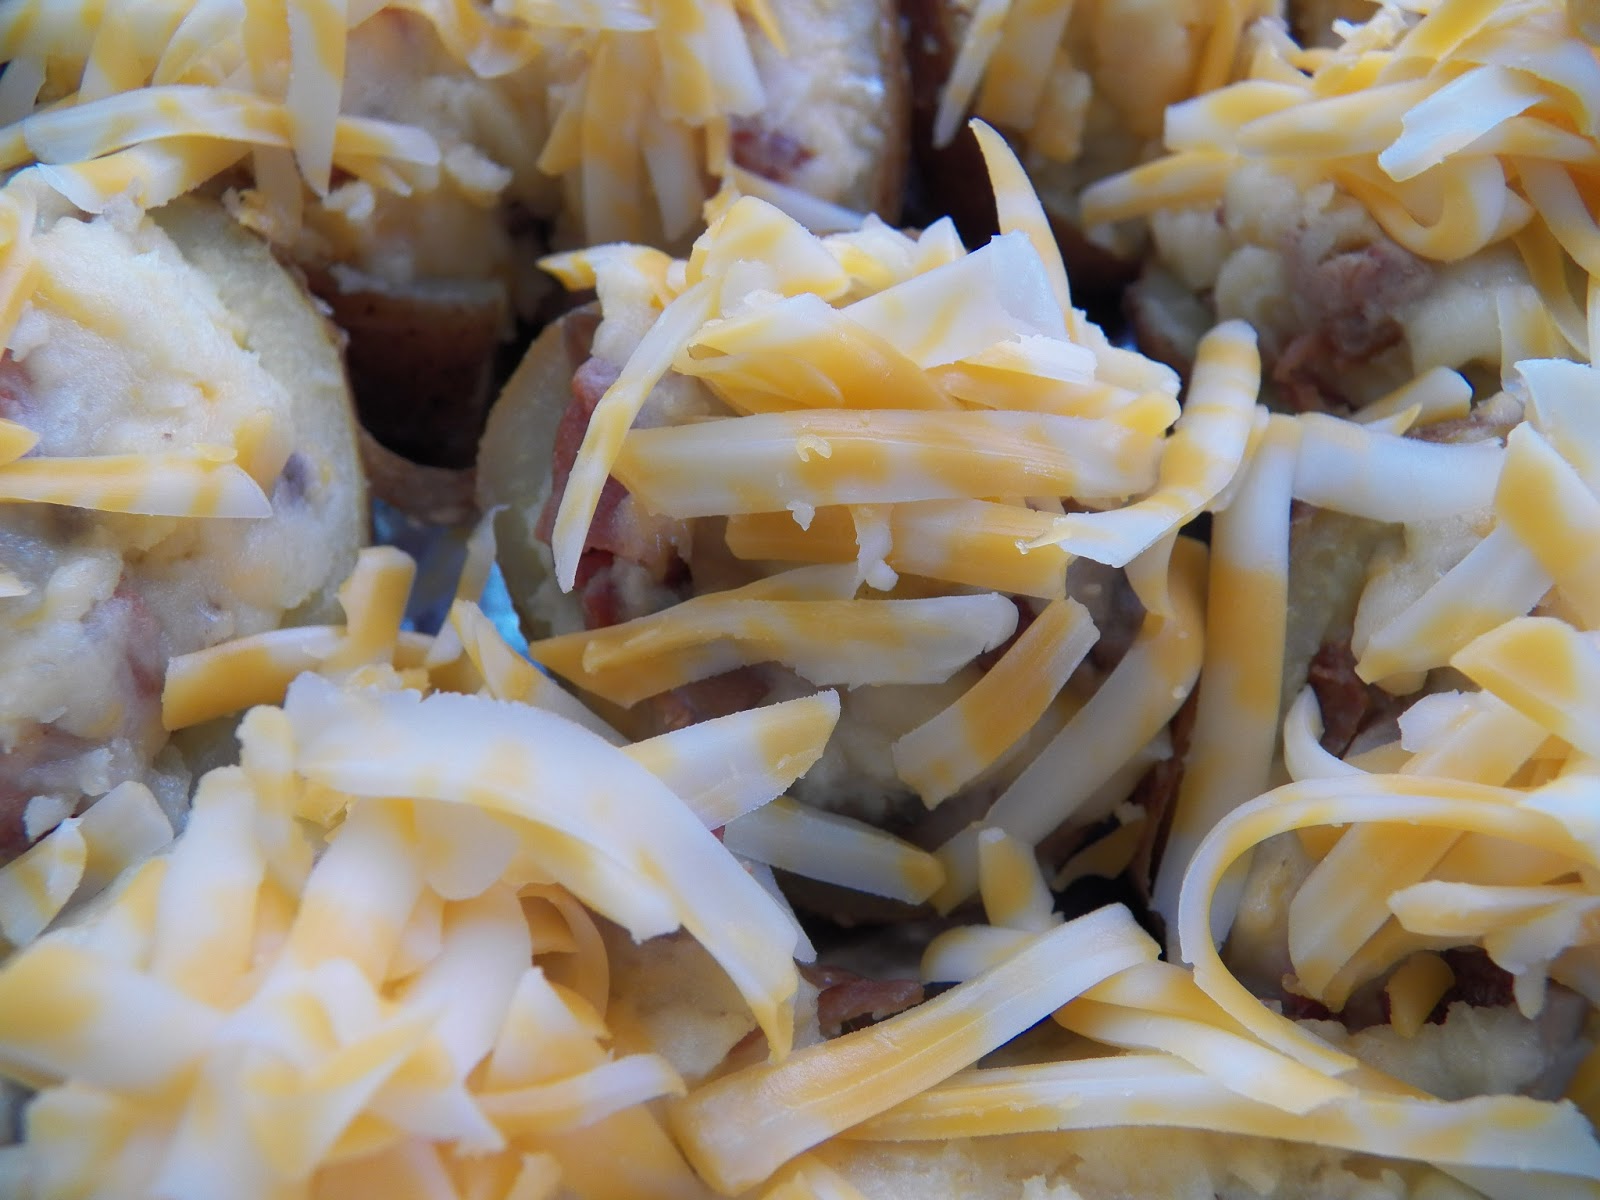
and then cut the cheese into small chunks.

Whisk eggs and cream together with a few good grinds of pepper.  You know how much you like in your food, and as for me, I did about a half-dozen grinds.  Don’t really know how much that was.

Place a layer of bacon first into the cooked pie shell,

then add a layer of cheese,

then the apple slices.

Repeat with another layer of each.

Pour the lightly beaten eggs over the top,


and kind of shake the pie pan a little so there aren’t any air bubbles in there.  I picked up the pie pan and set it sharply down on the counter a couple of times.  Like you do when baking a cake, you don’t want any large bubbles in that either.  Brush the edge of the cooked crust with some of the egg yolk, this will help to ‘glue’ the top crust to it.

Place the second sheet of pie crust on top, and crimp the edges together lightly.  Cut off the excess pie dough if you like and use to make decorations with it.

Cut a couple of slits in the top, to let the steam escape, and then brush the whole thing with rest of the egg yolk.

Not only does this make it look pretty, but you can now ‘glue’ any decorations to it, that you made with some of the leftover dough.

Place in oven.   I usually put either a sheet of aluminum foil under to catch any drips or just place it on a larger cooking sheet.

Bake for about 50 minutes at 350 degrees.   Take out of oven and let cool to room temp.   Serve.

This pie was very easy to take out of the tin, once it had cooled, which made it much easier to slice and serve.

I am going to make this again, but I’m going to tweak it a little more.   I really liked the combination of flavours, but the cheese got kinda lost in there.   I think next time I will add a little more cheese, and in fact will change it up a little and use some Colby Jack Cheese.     And as I said before, I will also cut the apple slices a little thicker, they kinda got lost inside.

Go ahead and try this for a nice change of pace.   Personally, I think I’m going to try taking this on a picnic.  It’s hearty, substantial and fun.

Bacon Crackers


I was tossing around ideas on what to make for our Boat Club Potluck this month and narrowed it down to three choices.  However, I didn’t want to make something I’d made before. Cause gee, what’s the fun in that?

So I’m looking in my pantry, searching my freezer and pulling my hair out trying to figure it out.
I had some lovely Hoagie rolls in the freezer, as well as some chicken and then there were the club crackers in the pantry.    Decisions, decisions, decisions.   Sigh…

I kept trying to make those three ingredients go together, but nothing gelled.   We don’t eat Club Crackers that often, but I had heard of this appetizer that incorporates Club Crackers, bacon and Parmesan Cheese.

I mean bacon, where do you go wrong with bacon?

So I decided to make these Bacon and Club Cracker Appetizers.   They’re a little labor intensive cause you have to wrap each one of those crackers with bacon, but OMG, they are so worth it.

You wouldn’t believe how good my kitchen smelled.   I did make extra for tasting purposes only, you understand.    Well, gee, you make a new recipe you have to taste it, doncha?

Here’s the how-to’s:

Unwrap the crackers and place them on a large baking sheet.   I used most of one sleeve.

Then top each one of the crackers with a teaspoon, even a heaping teaspoon of Parmesan cheese.    Then take out  your package or in my case, two packages of thinly sliced bacon.   I’m making these for a crowd.   And as I said, I needed a few extra for tasting purposes.
Cut the package of bacon in half, crosswise, then peel off a slice and wrap the cracker very carefully, making sure that the cheese stays mostly on the cracker and that the bacon folds around it, all around it.  Just like this;

Place on a rack on a backing sheet, then place in 250 degree oven for 2 hours.   YUP,  two hours.   Take out and serve.     Or in my case take out and transport immediately to the party.

And there they are, at least for a few minutes before they were eaten.

If I make them again, I’ll use a leaner bacon, and will also use more cheese, and it will be freshly grated, not the powdery stuff out of the jar.   But, it was fun  to try something new.

Baked Stuffed Potatoes


Potatoes have to be one of the most versatile foods around.  Think about it, you can boil, fry, mash, bake, sauté, stuff, smash, sky’s the limit.     I made Baked Stuffed Potatoes for the January Boat Club the other day and they were good.  Even if I do say so myself.   And I know they were good cause out of the 5 pounds of potatoes I made, I only got to take home 1 1/2 potatoes. sigh.  But that’s OK.  I watched people really enjoying them so that’s a good thing.

5 Pounds Red Butter Potatoes, baked (mine were on the small side)
1 lb. grated Monterey Jack Cheese
1/8 lb. butter
1/2 cup heavy whipping cream
1/2 lb. sautéed Mushrooms
1/2 cup chopped cooked bacon, or more to taste
2 Tablespoons EVOO
1 tsp. sea salt

I took the five pounds of Red Butter potatoes out of my pantry, dumped them into a sink full of water and scrubbed them very well.  After I dried them off, I placed them on a rimmed baking pan and poured some EVOOl over them.  Rolled them in the EVOO to coat and then ground some sea salt over them.

I baked the potatoes for just over an hour, checked them at the hour point for tenderness, OK, so I pulled one out of the oven and ate it.  It was lunch, so there!   They needed a few more minutes so I put them back into the oven.   While they were finishing baking, I grated up a pound of cheese, I used Monterey Jack Cheese cause I had some.

sautéed the mushrooms til they were golden brown, I wanted to get as much flavour out of them as I could.    And chopped up some extremely flavourful bacon I had on hand.

I pulled the potatoes out of the oven, and let them sit for a few minutes, just long enough to cool down so I could handle them.   I cut them in half, and scooped out the innards, leaving a rim around the edge.    The scooped out potatoes were placed in a large bowl, and when I finished scooping out all the potatoes I used my ricer and riced the potatoes.  ( My first time using it, and it was fun. Made the potatoes nice and even, no lumps).   I heated the butter and cream together and folded it into the potatoes.   Hint:  If you are making mashed potatoes, heat the milk or cream and butter together before adding to the potatoes, it makes for a lighter fluffier mash.

Folded the grated cheese into the potatoes, then added the mushrooms and bacon to it.
I then mounded some of the mashed potato mixture into each potato half and topped them all with some more grated cheese.   Nothing like excess where cheese is concerned.  Just sayin…


Don’t they look purty?

I then baked them off for about 40 minutes, long enough for the cheese to melt and for the potatoes to be heated through.

Wrapped them up well, and took them to Boat Club where they disappeared in short order.  I had a pan and a half with me, and only took home 1 1/2 potatoes.  (three pieces in other words).   Which was a good thing.

I just had to do a close up, you can see the steam rising from the the lovely gooey potatoes.

There’s the latest Boat Club offering.   Now I have to start thinking about what to make for Tapas night.    I’m sure I’ll come up with something.

In the meantime, have fun with your food, it tastes better when you’re having fun in the kitchen.

Æggekage (Danish baked Omelette)


We’ve been eating a lot of heavy meals lately, and I want, no I need to have something lighter for dinner to balance out the stews, casseroles, etc.

Mom used to make this for dinner from time to time, I loved it, and never realized that she might have made it to help stretch out the food dollar, or maybe we’d had a lot of heavy meals the previous week, or maybe she just didn’t feel like cooking.   I don’t know which it might have been and it really doesn’t matter.

Bacon and Eggs is a nice change for dinner, but as much as I like a nice fried egg, I really want something a little different, so many times I’ll make a simple meal of Bacon and Eggs for dinner, but for myself I’ll put together an Æggekage.  I used to make this for DH when we first got married, and think I was making him something very special, when in reality, he’d rather have had the plain old bacon and eggs.  Mom would serve this with strips of bacon on top, or some lovely mushrooms and always, always with some chopped chives on top.

Without further ado, take two eggs per person, beat them together with a couple of tablespoons of flour, and a couple of tablespoons milk,some salt and pepper to taste, pour into a greased (I use a little bacon grease) preheated pan, and let it cook for a minute or so on top of the stove, then place in a 375 degree oven for about 12-15 minutes for two eggs, or 15-20 minutes for 4 or 6 eggs, and cook.    This will puff up and expand and look so pretty for about 10 seconds after you pull it out of the oven, but then it collapses into itself.   It still tastes good though, and is something you can prepare for a crowd if necessary.   Mom used to serve it cut into wedges, and garnished with some bacon and chives.    I just serve it like this.

Preheat oven to 375, and preheat a pan with a little bacon grease.
Per person
2 eggs, lightly beaten
2 tablespoons flour beaten with 2 tablespoons milk
Salt
Pepper

Beat the flour mixture into the eggs and pour into the preheated pan, the eggs will start cooking right away, then place the pan into the oven, (turn on the light so you can watch the magic), and bake for about 15 minutes or so.

The eggcake will puff up and start to look almost like a giant puff, and this is a good thing.    Take out of oven and place on a plate, garnish with some chopped chives, a little bacon, some mushrooms (cooked of course) or even some sliced tomatoes.  Serve with toast and enjoy.

Brunkål med Flæsk


Shhhh, don’t tell anyone but I am so happy for cooler weather.   I not only get to dress warmly, but I get to cook totally differently.   And with the cooler weather, I also get to make some comfort food, at least it’s comfort food for this Dane.

Brunkål med Flæsk

To begin with take a head of cabbage, core it and then slice it thinly.
As soon as you’ve finished, put a large pot or pan on the stove and spread some sugar in the bottom of it.  About a quarter cup or so.    You really don’t need taht much, the cabbage actually becomes quite sweet when it’s cooked long and slow.  You want to caramelize the sugar, get it nice and brown, before you add the cabbage to it.

After adding the cabbage to the pan, stir it around a little and let the caramelized sugar coat the cabbage.

While that’s happening get a couple slices of nice thick bacon out and slice it into thirds.   I like to let the cabbage cook a little, maybe five minutes or so before I add the bacon to the pot.  I know I said a couple of slices, and the picture shows a lot more, but hey, a little bacon is good, but more is better.

Add the bacon to the pot, give it another stir, turn the heat down low and let it cook.

You don’t need to add water or anything else at this point, the cabbage releases enough water to keep it moist and the bacon will release some of it’s fat as well.

At this point, let it cook down for a couple or three hours, until the cabbage is very soft and mushy.   Check on it from time to time and give it a stir but basically, just let it cook.

Almost ready, and if you can see, through the steam, that the cabbage has reduced by quite a bit and the bacon has also rendered down a lot.    I was hungry at this point, and the smells were so good, that I took it off the hob and dished some up.

When it’s done, just take a nice big spoonful of it, place it on a slice of rye bread and eat it.   As you can see, I was hungry and forgot to take a picture of it before I dove in.  Sorry.


This is how my mom used to make it, at least as memory serves me, of course I add a little more bacon to it, just cause I like bacon.   And when I serve this, after taking a bite, I can go back in time a little and remember lunches and dinners with my parents, especially my dad.   He loved this meal.  I even made this for my uncle when he came for a visit from Denmark once, and he was very appreciative, as Uncle Helge said, it’s nice to have some familiar food, after eating all that foreign food.  Canadian food was a little too exotic for his tastes, he liked the familiar taste from home.

Totally Awesome Green Bean Casserole


Hi, I know we just had Thanksgiving, and all that fun stuff is over with, including the infamous Green Bean Casserole.    You know the one I mean, it’s got canned Mushroom Soup, canned Green Beans and is topped with French Fried Onions.   Which actually is probably the only thing I like about it.    However, a few years ago I stumbled on this recipe at the Pioneer Woman’s website.   It changed my opinion about Green Bean Casserole forever.    And if you happen to have a vegetarian or two to serve, this can be adapted for them.   For me, I’m  a hopeless carnivore and also love my bacon so I make it as written.    Oh, and if you’re doing it Gluten Free, just thicken the Bechamel sauce with some cornstarch or potato starch.

Wash your beans and then chop off the ends and stems, and either cut them in half or leave them whole, it’s your call.   (forgot to take pictures of this, but you can figure it out, right?)

Blanch your beans for a couple of minutes, then take them off the heat and cool them down with some ice water.     Set them aside while you get the rest together.   And then put them into a greased casserole dish.


Cut the bacon into lardons and cook in a skillet until they start to brown, then add a chopped onion, cook until the onions start to carmelize, and turn a lovely shade of caramel, then add the garlic and cook another minute or so.    Set aside.

Grate two cups of cheese, cheddar, sharp cheddar, colby Jack, whatever you like.  Personally I prefer Colby Jack cheese.  Set aside while you make a basic white sauce.(a lot of setting asides here, huh?)    A couple cups of milk or half and half, some butter and flour (or cornstarch if you are gluten free).

Cook until thick, then add the grated cheese, stir that around until the cheese is melted, than add the bacon and onion you just cooked.  Taste it, then add some cayenne and some salt and pepper to taste.   I usually put in 1/4 teaspoon of Cayenne to start with, then add more if I think it needs it.   You can also use mustard instead.   Both of them will ‘amp up’ or intensify the cheese flavour.  Give it a stir and for the final touch, add some chopped pimento’s.  Just for color, and they do add a little flavour as well.

Now for the final step, well next to last, well OK, so there is a couple more steps here.   Sheesh, stop counting.

Pour the sauce over the cooked beans and give them a stir so that the sauce coats each bean with love and cheese.

Spread some buttered Panko bread crumbs over the top, (omit this if you’re going gluten free, or use gluten free bread crumbs).   Or just dot it with some butter like this.

Place in a hot oven, about 350 degrees for 30-45 minutes.   Remove and serve.   Oh and don’t get surprised if even your kids love this, it is that good.

.

The first time I made this, there were six of us at dinner, and this is all that was left

Almost half of it eaten.   The next time I made it,  I took it to a potluck and people were scraping the bowl, personally I think they would have picked it up and licked it, the sauce is so good.

I just had a thought.  Make the sauce by itself and serve over some baked potatoes.   Now that would be an awesome meal.

Here’s the recipe.

2 pounds Fresh Green Beans, ends cut off
4 slices bacon, cut into lardons or strips    *** Vegetarian instructions at bottom
1 small onion, diced
3 cloves garlic, minced
4 tablespoons butter
4 tablespoons flour  ** or 2 tablespoons Corn or Potato Starch
2 1/2 cups whole milk
1/2 cup half and half
1/2 teaspoon salt or to taste
Fresh ground pepper to taste
1/8-1/4 teaspoon cayenne pepper, to taste
1 cup grated Monterey Jack Cheese (or a little more if you like, which I do)
1 jar sliced pimento’s, drained (4 oz. jar)
extra milk for thinning if necessary
1 cup Panko Bread Crumbs
2 tablespoons butter

Cook the beans for about 4 minutes, drain and dump into some ice water to stop the cooking process, then drain and place in a well greased casserole dish.
Cook the bacon until almost done, then add the onions, continuing to cook them until they begin to caramelize a little.   Add the garlic and cook for another minute or so.    Set aside while you make the sauce.

Make the white sauce, melting the butter and whisking flour into the butter, letting it cook a minute or so to get the raw taste of the flour out.  ** Gluten Free instructions at end.   Then add a half cup of milk, whisk that in, then add the rest of the milk and half and half, whisking it well.  Let it cook, continuing to stir until the sauce thickens.    After it has thickened, continue to cook for another minute or two, then add the cheese, pimento’s, cooked bacon and onions, and the seasonings.  Stir together and pour over the green beans.  Stir to combine, and top with the Panko bread crumbs and dot with butter.  Or melt the 2 tablespoons of butter in a pan, then stir in the bread crumbs and combine.   Sprinkle on top of casserole and bake for 30-45 minutes in a 350 degree oven.   Serve.

** Gluten Free.   If you’re making this gluten free, whisk the Corn or potato starch into the milk and heat, until thickened.   You can also add a couple of tablespoons of butter towards the end.  If you need it a little thicker, add a little more cornstarch mixed in with some cold milk,  and whisk it in.

***  Vegetarian, substitute Mushrooms for the bacon and follow the other instructions.

Bacon Wrapped Jalapeno Popper Chicken


Awhile back I was talking with a friend and comparing notes on using our George Foreman grills.   I have one and use it a lot.   And I do mean a lot.    I don’t own a proper BBQ grill anymore, and have to say that for the most part I don’t miss it.   She was telling me how easy bacon wrapped shrimp were to do on the grill.    And it sounded so good.   But then I ran across this recipe on  the Charbroil grill site.    Bacon Wrapped Jalapeno Popper Stuffed chicken breasts.  YUM.

I thought that it might just work out on my George Forman grill so I decided to make them for dinner one night.   Now, I did not chill the filling, and the jalapeno’s I used were way too mild for our taste, but on the whole, not a bad dish.

I had two big chicken breasts in the freezer so I pulled them out, let them thaw for a little while, then while they were still a little frozen cut them into cutlets, and then proceeded to cut pockets into the cutlets.   Believe me when I say these were BIG chicken breasts.   And it worked very well.

  I had the filling made, cream cheese, chopped jalapeno’s and then decided to add some Shredded Pepper Jack to the mixture.   And if you’ve read any of my posts in the past, you know I always have frozen jalapeno’s in the freezer.  Never know when you’re going to need them.

Now, at this point I should have stuffed the chicken breasts and then put them into the fridge to firm up, but hey, it was late, I wanted to get dinner made and on the table so I just stuffed them and wrapped them in bacon.

I had my grill heated up, and placed the chicken breasts on the grill, and had my handy, dandy wired thermometer stuck in the largest of the chicken breasts to check the temp.

Well, the filling kinda leaked out, and the grill didn’t cook them as evenly as I would have liked, but the flavour wasn’t bad.   I think if I make this again, I’ll change the ratio of cheese a little, more grated cheese, and instead of chopping the jalapeño peppers up, I’ll just stuff the pepper, then put it inside the chicken breast.   I think the filling will stay in place better.   And I will par cook the bacon a little as well.   Because I used the grill, the bacon didn’t cook as well as it could have.   But it was still pretty darn good.

And we ate them all…

Peas n’ Rice


It’s been awhile since I’ve had some Peas n’ Rice so I thought I would make some this week.    I’m lucky in that I have access to Pigeon Peas here, but if you don’t have any in your store, just use some black eyed peas.   They work very well.    And my version of this dish isn’t as totally authentic as it could be, but I make it to our taste, and we like it this way.   Most recipes call for salt pork, but we like the flavour of ham in this dish.   This is a great way to stretch a little bit of ham to feed a lot of people.

To start with, get your ham out and cut it into little bitty pieces.  Throw in a couple of slices of bacon as well, bacon goes with everything.  You want a fine dice here.    You need about 4 oz. or more.   As I said, this is a great recipe for stretching a bit of meat.   And with the rice and peas, you’re actually getting a lot of protein as well as some complex carbs.   It’s all good.
Saute it in the pan until golden brown,

stir it once in a while as you’re chopping up a green pepper, a stalk or two of celery, and an onion til they are also a fine dice.

Throw them into the pan with the sautéed meat and cook until the veggies have cooked  through, and are getting a little mushy.
When they are just a little mushy, add the tomato paste and stir in to the pan, and let it cook down for a few more minutes, stirring frequently.

And then add the can of drained Pigeon Peas,

And another couple of tablespoons of Tomato Paste, if desired.   I like my Peas n’ Rice with a fair amount of tomato paste.

Then stir it and let it cook for another couple of minutes before adding the rice, water and thyme.   If you have fresh thyme, place 4 or 5 sprigs on top after the rice is added.     Cover and cook for 15 minutes or until the rice is cooked through.

Serve alongside some Bahamian Mac n’ Cheese, and enjoy with a nice cold Kalik.

Recipe

4 slices bacon, finely diced
2-4 oz. ham, finely diced
1 whole green pepper, finely diced
1 small white onion, finely diced
1-2 stalks celery, finely diced
4 tablespoons tomato paste
1 15 oz. can Pigeon Peas  (or substitute Black eyed peas)
1 cup rice
2 cups water
4 sprigs fresh thyme or
1/2 teaspoon thyme

Saute the bacon and ham until they are nicely browned, add the veggies and sauté lightly, cover and let cook for about 10 minutes on low heat, stirring occasionally.   Add the tomato paste and continue to cook, stirring frequently.    Add the Pigeon Peas and continue to cook for a few more minutes.  Finally add the rice and water as well as the thyme, cover and let cook until the rice is done.    Serve alongside a grilled meat or Mac n’ Cheese.

One of my treasured cook books is this one:

And this is where I go for the recipes, of course I had to put my spin on the Peas n’ Rice.   I’ve made this the ‘proper’ way before, but really like the smoked flavour of the bacon and ham better.

Try this for a little different dish, and something you can share with your family.

Haluska and Seniors Lunches


I can’t say I’ve cared for Cabbage all that well in the past.  I mean I love my Brun Køl, Coleslaw, Red Cabbage (Rødkål), Danish Style  as well as sautéed cabbage for soup.  But until I moved to the south, I had no idea how much people liked their cabbage dishes and I have to admit, I have come to love this humble vegetable.

We get a lot of cabbage as a donation through Farmshare, which we’ve used in many dishes, and this week I made some Haluska, which is basically Cabbage with Noodles and Bacon.   A dish I was introduced to while visiting friends in Pennsylvania, and fell in love with.   So I thought it would be a good dish to make for one of our lunches at the Senior’s center.   And it was well received, with the only complaints I received being that I didn’t get enough cabbage in the dish.   So, the next time I make it, I’m going to put three times the amount of cabbage in there.    I have said it before, I will let you know when I make a mistake  need to make a dish differently.   I am still learning how to gauge the right amount of food to prepare for a lunch, or maybe I should put this another way, learning to gauge the proportions of what is needed for our lunches, and prepare it so.

Let me catch you up on the past few lunches.   Last week the Lion’s Club made a donation of Ham for us so we had fun.  We baked the hams with a brown sugar and mustard glaze.   Carved it up and served it with some Baked Yams, made some Cornbread, Turnip Greens, Carrot Salad and Dot’s famous Deviled Eggs.
We had enough ham left over that we can make some scalloped potatoes and ham, some Lima Beans and Ham and other good stuff as well.   We don’t waste much around here.   Robin and I are both very good at making food stretch until it screams.

Last month we also had a very nice donated lunch as well.   The local prison’s staff made some wonderful Pulled Pork and Chicken for us, as well as some Potato Salad, and Green Beans.

All we (kitchen staff) had to do that day was to make the breads and desserts.   So we did.   And I had fun.   I made some Cheese Danish which were well received, at least by the kitchen staff.  Just kidding, we did put some out on the dessert table.

And we’re planning on Fried Chicken this week, with Potato Salad, a Macaroni Salad and some Stuffed Green Peppers, and maybe some Collard Greens as well.     Robin will be doing her fabulous Fried Chicken, and I’ll be making some Stuffed Green Peppers since we have a bounty of green peppers from Farmshare.   We will also be putting out some cherry tomatoes that came from Farmshare.

And now for the Haluska recipe

2 heads green cabbage, cored and sliced
1 lb. bacon,
2 onions, sliced
2 packages (12 oz) egg noodles, cooked.

Cook the bacon a little in the pan, you want it cooked, but not totally browned.   Remove from pan and do a rough chop and throw it into a large pot, which has been placed over low heat.   Take out all but a tablespoon or so of the bacon grease from the pan and reserve.   Fry the cabbage in the bacon grease, adding more bacon fat if needed.  When the cabbage has wilted, add to the pot with the bacon, then fry the onion in the remaining bacon fat.   If you need more fat, add a tablespoon or so of olive oil.  As soon as the onion has cooked to the translucent stage add it to the cabbage.  Place a lid on the pot and let it cook for a little while, then add the cooked noodles, stir together and serve.    This is one of those dishes, well, let me put it like this, I could eat this every day for a week.  Come to think of it, I probably will the next time I make it.

Rouladen


Some years ago my DH was listening to a radio show and the hosts were talking about this dish that they loved.  And I was asked to make it.   So I did, even though my brain kept telling me that the list of ingredients was weird.  And I really didn’t see how they could come together and taste good.  I mean really, dill pickles, bacon, mustard, flank steak?  I mean on a hamburger, ok, but inside?  I was wrong, big time wrong.   I made it and it was totally awesome.   Served with some lovely mashed potatoes, corn and well, all I can say is, we finished it off in short order.   That dish is now part of my repertoire, and gets made every so often when I can find a good flank steak on sale.    If you’ve been paying attention to beef prices lately, you know what I mean.  The prices, well, let me put it like this, we’re eating less beef these days.   Chicken is our new best friend.   Just kidding, beef and pork are in the running as well.  Sheesh!

The pickles and bacon are so good inside the meat.  Even if the meat fell apart on me.

To start with, you need a flank steak.   Get your pickles, bacon and mustard ready, you need them handy.

And some butchers twine if you have it or I just use a heavy-duty cotton thread, I cut a long piece and double it.   (trust me, you don’t want to be trying to cut the thread when you’re rolling the flank steak up). Unroll the steak if it’s rolled up or folded and flatten it out with your hands.

You did wash your hands first, right?   OK, and this does get messy, so if you need to put gloves on, go ahead, I’ll wait.    Ready?

Spread the mustard on the inside of the flank steak,

You could write your name with the mustard here, if it isn’t too long a name.


Pastry brushes are fun to play with, giggle.

then line it with the dill pickle slices,

I know I showed Vlasic pickles at first, but they were all rind, so I switched to Mt. Olive pickles.

you don’t need to go all the way to the edges with the pickles.   Then on top of the pickles, place some bacon slices,

it all depends on how big your flank steak is.   Then, and this is the fun part, you get to roll it up.    And you’ll want to roll it lengthwise, so that the long meat fibers can be cut when you slice it.

Notice the string under the steak on the left side?


See the toothpicks, it’s a good idea to take them out after the Rouladen is done.  They don’t taste good.

When you’ve wrestled the meat together tie it off.    You could also use some toothpicks to close it if you like, I’ve used both in the past.   And did again.    Toothpicks are not cheating, you want the insides of the flank steak to stay inside.

Then brown it a little on both sides before placing in an oven proof dish.

Do they make oblong fry pans?  Just wondering?

Deglaze your fry pan with some water, no point in wasting any of that delicious fond.   Add enough water to come half way up the roll.

My dish was a little big for this guy, (too small a fry pan, and too big a roasting pan, hmmm

Cover and let it cook for at least two hours in a 325 deg. oven.    (I let mine cook a little long yesterday, but it was still really good).   If you can, turn the flank steak roll at least twice during the cooking process, this keeps it from drying out.   A flank steak doesn’t have much fat, well it shouldn’t have much fat.   You do have the bacon on the inside, but that’s on the inside.  I take the cover off the last 20 minutes or so.   Just cause I like it browned a little more.

Please ignore the messy stove top, I did.

After it’s cooked, take out and let it rest while you make gravy.    Make a slurry of water and flour and add to the liquid in the pan.   Taste at this point, you’ll probably need to add some water, and if you add the water the potatoes cooked in, this helps to add just a little more texture and flavour to the sauce.    Taste it to make sure.   I find that the gravy is pretty darn intense, and have never added salt.
Slice the Rouladen, and serve with some lovely home made mashed potatoes and that great gravy.

See the pickles and bacon inside, they are so good.

Recipe:
Flank Steak
Mustard
Dill Pickles
Bacon
String and toothpicks to tie it up with.
Water and flour slurry to make gravy

Pepper if you like, but you don’t need salt.  The pickles and bacon have enough in them.

How simple is that, and you’ve got all the how to’s in pictures above.