Tag Archives: Garlic

Deviled Ham Spread


If you’re like me, and maybe you’re not, but if you are…

You still have ham left over from Christmas and you may even be sick and tired of eating it.

I’m not, but I still have a lot of ham to get through.   I did make some lovely Split Pea soup the other day from the ham bone, and we’ve had Hot Ham and Cheese Sandwiches and Ham and Eggs for breakfast and a couple of sandwiches along the way as well.

Gosh it kinda feels like the everlasting leftover turkey at this point.

Which leaves me approximately 6 pounds to go through.

I’m kidding, we’ve only got 2.8 lbs left.

And even less after today.

At any rate, there are a bunch of us who gather together most Sundays and I subjected them to some of my leftover ham last weekend.

But not just leftover Ham, I wanted to have fun with it, and since I love that spread you can buy in the can.
OK, so I’ve been known to buy a can and eat it all.

So I went down to the kitchen and …

I swear sometimes you shouldn’t let me loose in the kitchen.   I have way too much fun.

Here’s my take on Deviled Ham

Recipe:

2 cups cubed cooked ham
8 oz. cream cheese, softened
1/2 cup Creme Fraiche or Sour Cream
2 tablespoons mayonnaise
1 teaspoon Grey Poupon Mustard
1 1/2 teaspoons Yellow Mustard
2 shallots, finely minced
2 garlic scapes, or one small garlic clove minced

Put the ham into the food processor, and process until it’s all broken up.  I actually tried just chopping it with my knife, but decided to try my little processor and it worked.  Yay!!!!

Place the softened cream cheese into a bowl and add the mustard, mayonnaise and creme fraiche.

Add the minced garlic and shallots  (you can also let them have a quick whirl in food processor if you like).
Mix together and then add the ham.   Mix until all the ingredients are combined.   Taste at this point and add more mustard or creme fraiche if you like.


Put the ham mixture into the fridge and let it set there for a couple of hours, let the shallots and garlic get acquainted with the ham.

Serve with crackers.

And get out of the way, you don’t want to get trampled.

I’ll be making this again soon, or at least the next time I make a large baked ham.

Samosa’s, Gluten Free and Regular


First off, I don’t eat Gluten Free, nor am I vegan, or vegetarian.    However, I do like healthy foods.

Mostly.

And since I do have some friends who are either vegetarian, pescatarian or gluten-free, I try to find recipes that they can eat as well.

My assigned blog a few months ago for Secret Recipe Club was Judee Gluten Free.     I had fun going through her recipes.   And if you read this blog at all, you know I love my appetizers.

Really, I do.

And I had a heck of a time deciding what to make for SRC that time, there were too many recipes I wanted to try.   I ended up making the Green Goddess Hummus,  and it was very good, but I didn’t stop there, I wanted to try to make these Samosa’s which I decided were perfect for one of our gatherings.     So I made these up.

Eggless Buttermilk Crust:
Ingredients:
2 1/2 cups of gluten-free all-purpose flour ( or if you are not gluten-free regular flour)
1 cup buttermilk, plain yogurt or (coconut or rice milk with a teaspoon of lemon juice added)
1/2 tsp salt

Directions:
Mix flour, buttermilk, and salt and work with a fork until dough can form into a ball. Dough will be soft. Refrigerate for 5-10 minutes if too soft to work with. Divide dough into quarters and roll out thinly.   Use a 4 inch cookie cutter to make circles.

This dough is hard to work with, so I took a tip I got from another website and used sheets of wax paper to keep the dough from sticking to the rolling-pin as well as the pastry sheet.

Sweet Potato Filling

2 large sweet potatoes, steamed and cubed
1/2 cup frozen peas, thawed
1 Tablespoon cumin seeds
1/2 cup onion , chopped small
3/4 cup tomatoes, chopped small ( or chopped tomatoes with some juice from a can)
1 clove of garlic, chopped
1 Tablespoon fresh ginger, grated  ( I used the ginger root I keep in the freezer, and used my Microplane to get the tablespoon of ginger needed)
1 teaspoon turmeric
1 tsp. curry powder
1 tsp cumin
cayenne pepper ( optional)
1 Tablespoon cilantro, chopped fine
2 Tablespoons raisins, soaked for about 20 minutes
2 tsp olive oil and olive oil spray
Directions
Mix chopped onion, garlic, fresh ginger, cilantro, tomatoes, curry powder and turmeric and 2 tsp of olive oil together .

Steam sweet potatoes whole with skin until soft.  Peel and chop up a little before adding to the other ingredients.

I put the peas, onion, garlic and tomato in a bowl, then added the warm sweet potatoes.

Saute cumin seeds or mustard seeds in olive oil spray in a frying pan for about 1 minute. Pour chopped vegetable mixture over cumin seeds and cook on low heat until onion and garlic are soft.

Add the rest of the ingredients and cook for another minute or so.  (Next time I make this, and I will make the filling again, I will add a little more moisture in the form of another tomato cause it did need it.  But this was my fault for not getting a juicy tomato to begin with.)
Spoon 1 tsp. of mixture into each crust. Fold dough around filling and seal edges with fingers. Press edges together with fork for decoration.

Bake for about 20-25 minutes until browned.

Dip into raita,

Raita Ingredients
1 small Kirby cucumber, grated
1 cup plain yogurt
1 tsp dried mint, crushed
salt, pepper, garlic to taste

Grate your vegetables; add to yogurt  and mix well by hand

To be honest here, I did not like these at all, the filling was wonderful but the samosa shells, not so much.  They baked up kind of weird, and tasted funny to me.   I did serve them anyway, and some people tried them.   However, I think I need to work with gluten-free flour some more and try to get something more edible out of it.

I had so much filling left over, I hurried up and made some not-gluten free dough.
Samosa Dough
2 cups flour
1/4 cup butter
1/2 cup greek yoghurt
1 teaspoon baking powder

1-3 tbsp. water

I was in a hurry so did not ‘rub’ the butter into the flour, I just threw the butter, yoghurt, flour and baking powder into the Kitchenaid and turned it on.  As the butter and yoghurt mixed into the flour, I dribbled in a little water to help the dough come together.   Just a couple of tablespoons.  As soon as it formed a nice ball, I changed to the dough hook and let it knead together for a couple of minutes.  I knew I wanted a soft, silky dough.  I then let it rest for ten minutes before rolling it out.
Cut circles with my cookie cutter, and filled them with the remaining filling.


Don’t they look pretty?   I then placed some plastic wrap over them, and put them into the fridge for a couple of hours.
This dough was wonderful to work with, it stretched beautifully, and is one I will make again and again.

Just before our guests arrived, I heated some oil in the pan and fried them until they were golden brown, on each side.    And let me tell you, they were so good, fresh out of the pan.   I did serve them with the dip, but really, you didn’t need it.

Green Onion Spread


Many years ago I fell in love with this spread.  It was only available in limited amounts at a local grocery store.   They actually would make it and sell it at holiday’s but for some reason only made limited amounts at a time.

It was oniony, spicy, and oh so very good.    Lately I’ve been on a kind of kick of trying to replicate foods that I really like.   Why I never thought I could try to do this before, I have no idea.   100_7318

I made this last weekend and took it to a weekly gathering I attend, and watched people just inhale this.  OK, so they scooped it up with crackers, but they loved the taste.


Ingredients

8 oz Cream Cheese, low-fat is fine here
4 oz. low-fat sour cream
2 tablespoons mayonnaise
1 bunch green onions, minced
2 cloves garlic, minced
1/2 jalapeño, minced  (or you could add more)
1-2 ounces finely shredded Pepper Jack Cheese
To start with, chop up a bunch of green onions, or scallions if you choose.   I cut them lengthwise into quarters, and them sliced them across so they were minced.   You really don’t want chunks of onions if you can help it.   I then took a clove of garlic, from the elephant garlic I had bought, and minced that finely.   I went to the freezer and took out a half of a frozen jalapeño and minced it.   Dumped it into the bowl and added an 8 oz. block of room temperature cream cheese, mixed that together with the onions, garlic and jalapeño.
100_7313
Add the sour cream, grated Pepper Jack Cheese, and mayonnaise.    Taste at this point and you can add more Jalapeno or more cheese or just leave it as is.
I served this with some Pretzel crackers but it also tasted great with Tortilla Chips.     I also think this would be awesome on some baked potato’s, or some fresh french bread or ….
Gotta stop now, and go make some more.   I’m getting all kinds of ideas.

Garden Dip


I think I’ve told you about the weekly get- together most Friday nights, just to chat and socialize with some women.   We discuss world affairs, local affairs, and general chit-chat.   We also bring snacks, and since I love to experiment play in the kitchen, I have fun most Friday’s.

I’ve made hummus and brought it, last week I brought this killer Feta Dip, and this week I brought this:
Garden Dip.

Well it got renamed last night, I had it in my recipe file as Garbage Dip, but they all decided it was too good to be called that.   And of course me being me, I had to play with the original recipe, which is simplicity itself, well it is if you have all the right ingredients to hand.  Which I sorta did.

Here is the recipe with the original ingredients to the side in parenthesis and in blue.

1 cup light sour cream                (1 pint sour cream)
1 sweet onion, finely chopped     (1 small onion, chopped)
1 1/2 tomato, finely chopped      (1 tomato, chopped)
1/2 cup ranch dressing               (1 package dry ranch dressing)
2 cloves garlic, minced               (1/2 tsp. Garlic Salt)
1/2 teaspoon Cavenders Greek Seasoning
1/4 package Sazon Tropical Seasoning, this could be optional

Mix all ingredients together and let sit for an hour, in the fridge before serving with either chips or with some fresh bread.

I thought I’d made a lot, but most of it was eaten and enjoyed.

I will make this again, and maybe add some cilantro, which was a suggestion made by one of the ladies.  At any rate, have fun with it yourself.

Now to go and figure out what I’m making for Tapas this week, gotta think on that one.

Home Made Spaghetti Sauce


Have you ever looked at the labels on commercial Spaghetti Sauce?   Next time you’re out shopping, pick up a can or jar of it and read the label.    Notice the presence of sugar in there, whether it’s in the form of sugar or high fructose corn syrup or something else that means sugar.    I don’t know about you, but I try not to buy anything with HFCS in it and quite frankly, why do you need so much sugar in something that is basically just tomatoes and herbs?

I started making my own spaghetti sauce years ago and we like it much better than any of the commercial brands out there.    I also use it as a base for lasagna, so when I make sauce, I make a lot.   I figure if I’m going to be spending time in the kitchen, I am going to make it count for something.     If you have your own home canned tomatoes, tomato sauce and tomato paste, I applaud you, I don’t so I go to the store and buy tomatoes in several different forms.

As you can see from the picture, I open cans, and then add it to the browned meat, and after that, correct for seasonings.   And I only use the No Salt added tomato products.   We don’t need the salt and certainly don’t miss it either in this recipe.    Check out how much sodium is in those other cans of tomatoes.

I’m waiting.      Surprised?

Now add that to the sugar in prepared sauce, yuck, right?

Begin by chopping up a large onion, I like a fairly fine dice.   Throw it in the pan with some olive oil and cook it till it just starts to change color, then add a couple or three crushed and chopped cloves of garlic.  Put in as much garlic as you like here.   Cook for just a minute or so, and then remove from heat, and reserve in a separate dish.  If using fresh mushrooms, throw them in the pan and just let them cook just for a minute before you add your meat to the pan, brown it and cook until it is no longer pink.   Break it up a little with your spatula and then add the onions and garlic to the meat, let it cook for a few minutes more, then add the Italian herbs to the meat mixture.

Sorry, blurry picture, but you get the drift.

I just found a great product called Gourmet Garden Italian Herbs blend. Check the link out here, http://www.gourmetgarden.com/us/  It comes in a tube and you can find it in the refrigerated section of the veggie section in your grocery store.   It is a little pricey, but well worth it for the fresh taste.     Or you can add some dried Italian seasoning to the meat as you’re browning it, this seems to help open up the flavour of the dried herbs.     While the meat is browning open up those cans of diced tomatoes, tomato sauce and tomato paste.   If using canned mushrooms, go ahead and add them with the tomatoes.  Dump the tomatoes into a large pot, mix it up with your spoon until the tomato paste is incorporated and when the meat is ready, add it to the pot.   Taste it here to help correct the seasoning, and if necessary add more herbs.  You can also add a rich full bodied red wine at this point, just a cup or two.   Add a few tbsp. freshly grated parmesan cheese and then simmer for about an hour over low heat, stirring from time to time.     Cook up your favourite pasta, whether it be spaghetti, linguine, or angel hair and serve the sauce over the pasta or however you like to serve it.    And it makes a lot.

I freeze the remainder and pull it out when we’re in the mood for Spaghetti or Lasagna.

HINT: If using plastic dishes to freeze in, line them with some plastic wrap, this keeps the sauce from staining, plus when it’s frozen, throw that block into a plastic bag, and save the plastic container for something else.  Or just spoon the sauce into a ziploc bag, squeeze out the excess air and freeze flat.
If I’m making Lasagna, I add an additional can of diced tomatoes and then layer it with cheeses and noodles.

This is also a very company friendly dish.  You can stretch it with a couple cans more of tomatoes, a tad more seasoning, cook up lots of spaghetti and serve with a green salad and a loaf or two of garlic bread.

Here’s the recipe;

1lb. lean ground beef (feel free to use Ground Turkey instead)
1 lb. Italian sausage, removed from casing
1 lg. onion, diced
2-5 cloves garlic, minced (to your taste)
8 oz. fresh mushrooms, sliced or 2 small cans mushrooms
3  16 oz. cans diced tomatoes, no salt added
2-3  6 oz. cans tomato sauce, or 1 lg. can, no salt added kind
3 cans regular tomato paste
1 can tomato paste with Italian herbs added
1/4 tsp. (or more) red pepper flakes to taste.
3-4 tbsp.  Gourmet Garden Italian Herbs, or 1-2 tsp.  dried Italian Seasoning.
1-2  tbsp.  Amore Double Concentrated Tomato Paste 
2-4 tbsp. freshly grated Parmesan Reggiano cheese
Olive oil for browning.

You can also add a couple of cups of a good red wine to the sauce, my DH doesn’t care for the taste, but it does add a richness that can’t be beat.

Totally Awesome Green Bean Casserole


Hi, I know we just had Thanksgiving, and all that fun stuff is over with, including the infamous Green Bean Casserole.    You know the one I mean, it’s got canned Mushroom Soup, canned Green Beans and is topped with French Fried Onions.   Which actually is probably the only thing I like about it.    However, a few years ago I stumbled on this recipe at the Pioneer Woman’s website.   It changed my opinion about Green Bean Casserole forever.    And if you happen to have a vegetarian or two to serve, this can be adapted for them.   For me, I’m  a hopeless carnivore and also love my bacon so I make it as written.    Oh, and if you’re doing it Gluten Free, just thicken the Bechamel sauce with some cornstarch or potato starch.

Wash your beans and then chop off the ends and stems, and either cut them in half or leave them whole, it’s your call.   (forgot to take pictures of this, but you can figure it out, right?)

Blanch your beans for a couple of minutes, then take them off the heat and cool them down with some ice water.     Set them aside while you get the rest together.   And then put them into a greased casserole dish.


Cut the bacon into lardons and cook in a skillet until they start to brown, then add a chopped onion, cook until the onions start to carmelize, and turn a lovely shade of caramel, then add the garlic and cook another minute or so.    Set aside.

Grate two cups of cheese, cheddar, sharp cheddar, colby Jack, whatever you like.  Personally I prefer Colby Jack cheese.  Set aside while you make a basic white sauce.(a lot of setting asides here, huh?)    A couple cups of milk or half and half, some butter and flour (or cornstarch if you are gluten free).

Cook until thick, then add the grated cheese, stir that around until the cheese is melted, than add the bacon and onion you just cooked.  Taste it, then add some cayenne and some salt and pepper to taste.   I usually put in 1/4 teaspoon of Cayenne to start with, then add more if I think it needs it.   You can also use mustard instead.   Both of them will ‘amp up’ or intensify the cheese flavour.  Give it a stir and for the final touch, add some chopped pimento’s.  Just for color, and they do add a little flavour as well.

Now for the final step, well next to last, well OK, so there is a couple more steps here.   Sheesh, stop counting.

Pour the sauce over the cooked beans and give them a stir so that the sauce coats each bean with love and cheese.

Spread some buttered Panko bread crumbs over the top, (omit this if you’re going gluten free, or use gluten free bread crumbs).   Or just dot it with some butter like this.

Place in a hot oven, about 350 degrees for 30-45 minutes.   Remove and serve.   Oh and don’t get surprised if even your kids love this, it is that good.

.

The first time I made this, there were six of us at dinner, and this is all that was left

Almost half of it eaten.   The next time I made it,  I took it to a potluck and people were scraping the bowl, personally I think they would have picked it up and licked it, the sauce is so good.

I just had a thought.  Make the sauce by itself and serve over some baked potatoes.   Now that would be an awesome meal.

Here’s the recipe.

2 pounds Fresh Green Beans, ends cut off
4 slices bacon, cut into lardons or strips    *** Vegetarian instructions at bottom
1 small onion, diced
3 cloves garlic, minced
4 tablespoons butter
4 tablespoons flour  ** or 2 tablespoons Corn or Potato Starch
2 1/2 cups whole milk
1/2 cup half and half
1/2 teaspoon salt or to taste
Fresh ground pepper to taste
1/8-1/4 teaspoon cayenne pepper, to taste
1 cup grated Monterey Jack Cheese (or a little more if you like, which I do)
1 jar sliced pimento’s, drained (4 oz. jar)
extra milk for thinning if necessary
1 cup Panko Bread Crumbs
2 tablespoons butter

Cook the beans for about 4 minutes, drain and dump into some ice water to stop the cooking process, then drain and place in a well greased casserole dish.
Cook the bacon until almost done, then add the onions, continuing to cook them until they begin to caramelize a little.   Add the garlic and cook for another minute or so.    Set aside while you make the sauce.

Make the white sauce, melting the butter and whisking flour into the butter, letting it cook a minute or so to get the raw taste of the flour out.  ** Gluten Free instructions at end.   Then add a half cup of milk, whisk that in, then add the rest of the milk and half and half, whisking it well.  Let it cook, continuing to stir until the sauce thickens.    After it has thickened, continue to cook for another minute or two, then add the cheese, pimento’s, cooked bacon and onions, and the seasonings.  Stir together and pour over the green beans.  Stir to combine, and top with the Panko bread crumbs and dot with butter.  Or melt the 2 tablespoons of butter in a pan, then stir in the bread crumbs and combine.   Sprinkle on top of casserole and bake for 30-45 minutes in a 350 degree oven.   Serve.

** Gluten Free.   If you’re making this gluten free, whisk the Corn or potato starch into the milk and heat, until thickened.   You can also add a couple of tablespoons of butter towards the end.  If you need it a little thicker, add a little more cornstarch mixed in with some cold milk,  and whisk it in.

***  Vegetarian, substitute Mushrooms for the bacon and follow the other instructions.

Shrimp Piccata and Tapa’s night for August.


We had our monthly Tapa’s Night this past Saturday, and as usual had fun as well as enjoyed some great food.
I made a Shrimp Piccata as my contribution this month, as well as putting out a couple other items.

And I will share the recipe a little later.   I’m kicking myself I didn’t get pictures of the awesome Pineapple Surprise cake or the Carrot cake that was brought, but hey, it’s my party and I can have fun if I want to, and forget to take pictures sometimes.

So here goes:

Zucchini Bake

This dish was so light and flavourful, so good.

The Spanish Omelette was really good as well, and I didn’t get a picture of the Sofrito sauce that was to be served with it.      I thought the omelette was pretty just on its own.

Spanish Omelette
And doesn’t this Charcuterie platter look pretty.   It also had some awesome smoked salmon in the center, you can sort of see them in between the crackers.
Charcuterie platter
Smoked Grouper Cheeks, Smoked Amberjack and Quail Eggs. It has been years since I’ve had quail eggs so seeing them and eating them well, I was a very happy person.    Danes also love smoked fish, well, many of us do, so to have some smoked fish, well, I was in heaven.  I kept heading over to the platter and snatching a bite or two.
I could just envision them with a nice slice of fresh french bread and a glass or two of Akvavit, with a beer chaser. sigh.   Sorry, got side tracked there.
Sliced lunch meats
Stuffed Cherry Tomatoes

There were some stuffed Cherry tomatoes, and they were so tasty as well.   I was in awe that someone sat and did this, but don’t they look pretty?

Smoked Fish, Ciabatta Rolls and dipping oil
Kugel

I love Kugel, and helped myself to a generous spoonful, I tend to eat this whenever I see it.
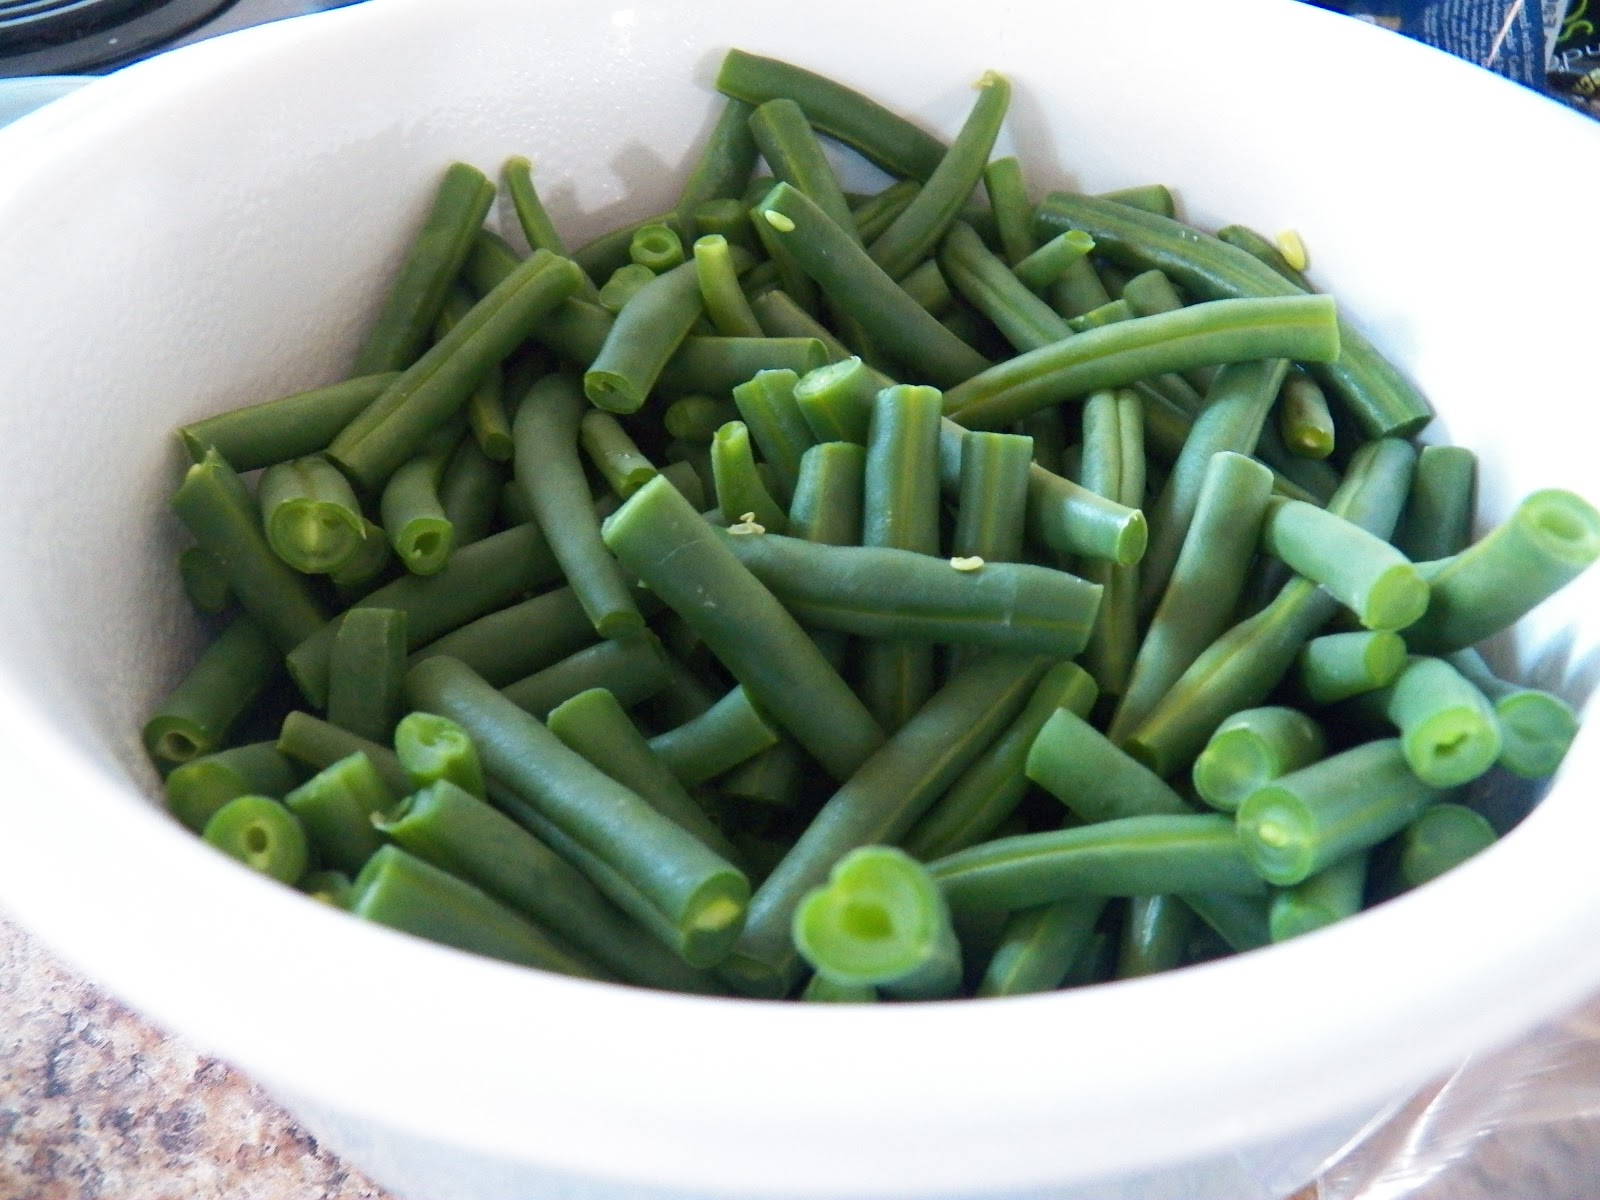
Another friend brought these large beans and told me this is common dish served in Greek taverns, and it was delicious as well.

Greek Taverna Beans

We also had some great dark fudge, which made some of us very happy.

Filled crescent rolls

And these little rolls, with a filling.  I’m such a sucker for, and really enjoyed the one I had.

So now for my contribution.
I had a heck of a time trying to figure out what I wanted to make this month.   I knew it should be something with shrimp, I’ve been craving shrimp lately, but what to do with it?    It wasn’t until I was driving into town to get the shrimp that I finally decided.   What a relief.   I had thought of making Shrimp Scampi, but dismissed that idea.   Then it dawned on me, Shrimp Picatta!  I love Chicken Picatta and make it on a regular basis, and the combination of lemon, butter, capers and shrimp just seemed like it would work.    So I bought three pounds of fresh shrimp, some lemons and went home.

I prepared the shrimp by shelling and de-heading them, and went to make up a nice boil to poach them in.  Realized that I didn’t have any Old Bay seasoning, but I didn’t let that stop me.  Not much stops me anyways, when it comes to cooking something.    While I was preparing the boil, I dumped some ice on top of the shrimp to keep them cold.   (I use a fair amount of disposable aluminum baking pans, you can buy them at Sam’s Club for about $7 for 30 of them.  I use them to cook my dog’s food and to serve them their food, less clean up for me.   And if I use a pan for shrimp, like I did here, I just wash it and use it for the dogs,   I do wash and re-use the pans as much as possible as well, until they break down)

I got out a pot and put some plain water in it, then added some cayenne pepper, a couple of cloves of crushed and roughly chopped garlic, a bottle of beer, a bay leaf and some lemon juice.  Brought it to a boil and let it simmer for a few minutes so that the flavours would infuse together.   Tasted it and it was bland, so I added a small handful of lightly crushed peppercorns and a little salt, maybe a half teaspoonful, and some more lemon.   Let that come to a boil and tasted it again.  This time it had flavour.
While it was boiling I got a bowl out and put some ice into it, because after poaching the shrimp for a couple of minutes, I wanted to dump the shrimp into some ice water to stop the cooking process.   Nothing worse than a chewy over cooked shrimp.

You can see the bowl behind the pot of water.

I them dumped the shrimp into the boiling liquid, turned down the heat a little, let the shrimp turn pink and removed them with a slotted spoon and placed them on ice.   Very important to not over cook shrimp, they turn tough and rubbery.   You want them to ‘pop’ a little when you bite into them.   Only cook them for a minute or two.

Since my guests weren’t expected for another hour or so, I just quick cooled the shrimp, by tossing them with the ice,  then placed them into the fridge so I could finish them off later.   Oh and by the way, I did devein them as well after they cooled down.  (Note to self, next time, you need a lot more shrimp than you realize when you have to prepare them this way,   I may just buy them already deviened and shelled the next time.)

Before the guests arrived I made the sauce I wanted to reheat the shrimp in.    I melted one stick of butter in the pan, added a couple of cloves of minced garlic, a half cup of white wine, juice of one lemon and about 2 tablespoons of capers.  Also added a half a lemon in slices.   Let that simmer for a couple of minutes, tasted it and added another half cup of wine and more butter.   And it was good.

I then placed the shrimp in the butter sauce and let it warm over low heat until the shrimp were warmed through before I served it.   And it was popular.   I even caught a person dipping some of the slice Ciabatta rolls in the sauce and eating that.  OK, so it was me dipping the bread, but hey, the sauce was that good.  And there weren’t any shrimp left anyway.

Here’s the recipe for the boil and the Picatta Sauce

Boil
1 quart water
1 bottle beer
1 teaspoon crushed red pepper flakes
1/2 teaspoon cayenne
2 cloves garlic, crushed and roughly chopped
1 bay leaf
Juice from one lemon
1 tablespoon peppercorns
1/2 teaspoon salt, if desired.

Bring to a boil and simmer for about 10 minutes so that the spices can infuse into the water, taste and adjust the seasonings.   This will taste spicy, but it really doesn’t make the shrimp all that spicy, just adds a nice kick.    You can also use this spice mixture for a peel and eat shrimp boil.   Add the shrimp and let it come to a boil, but only cook the shrimp for a minute or two,  they just need to turn pink.

Piccata Sauce *

12 tablespoons butter
1/2 cup white wine plus 1/2 cup white wine **
juice of one lemon
2 tablespoons capers
2 minced garlic cloves
6 lemon slices

Simmer all of this together until the wine reduces by half, then add another half cup white wine, let that reduce a little, add the shrimp and stir it together until the shrimp warms through.   You don’t need to cook the shrimp, just warm it up in the sauce.   Serve immediately.

*I would serve this with a nice basmati rice or short grain rice or some bow tie pasta for a meal.  And you can use the sauce for chicken as well.  Nothing like a multi purpose sauce. giggle.
** You can substitute chicken stock here as well, the wine adds a nice note of flavour however.   And if you use chicken stock, use the low sodium.

Judging by how quickly the shrimp disappeared, I would say people liked this.

And I also served some sliced Ciabatta Rolls with some dipping oil and some sliced lunch meat, for those who wanted something more.

As usual, we had a great time, and got to try some good food as well.

‘Faux’ Roasted Garlic and a couple of other tips


I need to clarify here, it’s really not fake garlic, but a faux ‘roasted’ garlic.   That didn’t come out right either.   So it’s real garlic cloves, but they’re not roasted in the oven for an hour, but instead are cooked in Olive Oil on top of the stove, til they’re soft and a little bit browned.   And so darn yummy.    I’ve actually been making them this way for years.   I was given the tip by a woman at a day old bakery outlet during a conversation about garlic bread.   She told me she used to work in an Italian restaurant and they would go through a lot of garlic, but the owner would ‘boil’ the garlic cloves in oil, on top of the stove over low heat, and then use the softened, very flavourful garlic for his garlic bread, or wherever he needed garlic.   And with the summer heat upon us, well, in this area at least, it makes sense to make garlic this way and not have the oven on for an hour.   And really, this takes very little time on top of the stove.   Another added benefit, you have some lovely garlic infused oil you can use to drizzle over spaghetti, add to some butter for garlic bread, or anyplace you want a hint or touch of garlic flavour.

I like to have a whole bulb of garlic done this way, then I just place the leftover garlic cloves into an empty glass bottle, (washed out of course), cover them with the oil and place it in the fridge to use later on.  Empty spice bottles are great for this, or just a small glass jar.   They will keep for about a month, if they last  that long.   The olive oil will solidify, but it only takes a few minutes on the countertop to liquify again, and you are good to go.

And since I’m just full of tips today, how about making some chicken stock and freezing it in ice cube trays, I know I’ve talked about this before, but really, having  a cube of frozen chicken stock you can add to some packaged gravy to amp up the flavour, so much better.   I was making some rice the other night and wanted to get another layer of flavour so I grabbed a cube of my home made chicken stock, (which I’d frozen in ice cube trays), and added it to the rice.   So easy and quick.   If you’re in the habit of buying rotisserie chickens for an occasional quick meal, then cover the bones that are left with some water, add a carrot or onion, then just let it simmer for an hour.  Cool it down and strain the stock and VOILA!!!! you have some home made chicken stock.    I find most commercial stock is way too salty for my taste, so I do make my own.   It really doesn’t take that long.   I’ve even been known to keep a chicken carcass or turkey carcass in my freezer and then cook up a big pot of stock from that.   And here’s another hint, those leftover chicken bones, roast them in the oven with a couple of onions and carrots til they brown a little, then add them to pot with some water, lots more flavour that way.  Oh and if you have any of the ‘roasted’ garlic in your fridge add a couple of cloves.

And last but not least, if you purchase ground beef in those large trays, and divide up the ground beef for separate meals, freeze the meat in a freezer bag, and flatten it, it will thaw much faster.   Better yet, if you’re browning meat for one meal, brown enough for two meals and freeze the remainder.   You can always add it to spaghetti sauce, sloppy joes, make taco’s, or whatever you use ground meat for.    Why not make it easier to get a meal on the table on those days when you are rushed anyway.   I’ve been able to get a meal on the table within half an hour using my pre-cooked ground beef and just adding some taco seasoning  and we’re good to go.

Roasted Garlic and Mushroom Hummus


Hummus is good food. Really, it is. It’s good for you, tastes great and is a snap to make. That is if you have all the ingredients to hand, and I usually do. I think I’ve written about this before, but I like to keep some stuff on hand so I can throw together a quick appetizer or two, or just keep a can or three of say Black Olives, Garbanzo Beans, Pinto Beans, on hand. There are so many things you can make with a can of beans as the basis of a dish. Or a can of Black Olives. But I’ve posted about my Black Olive Tapenade before so you should have that recipe memorized by now. Last weekend I decided to make some Hummus for our monthly Tapa’s night get together. I got out my can of Garbanzo Beans, took out the Tahini from the fridge, when I spotted the mushroom stems I’d saved from the Stuffed Mushrooms I made last week. A little light went on in my head and I got one of those AHA moments, and I thought I can brown those mushroom stems and puree them, and if I add them to the Hummus they will add a lovely earthy note to the hummus. I already had my garlic cloves in a pan with some olive oil (my quick and easy approach to roasted garlic), so I added the mushroom stems and let them cook over low, low heat with the garlic cloves until the garlic was softened and browned just a smidgen. Then I took the garlic out and browned the mushroom stems a little more.   Hint:   If you add a little more olive oil and let the garlic cook very slowly in the oil, you have some lovely garlic infused oil you can use for other stuff.   And if you happen to make too much garlic, just submerge that garlic in the oil in a little spice jar in the fridge for up to a month and use it in other recipes.

While that was cooking I put the garbanzo beans or chick peas if you like the other name better,  in my handy dandy little hand operated food processor.    I actually got this many years ago to use while camping, and it is a wonder .   You can make salsa quick as can be in this.   And it did a great job of breaking up the beans and mushrooms.


But it didn’t get the beans as smooth as I wanted so I got out my little electric 2 cup processor and finished the Hummus in there.    The flavor was wonderful, but I outsmarted myself on the mushroom stems, I could not get them to process down as much as I wanted.   The Hummus was lumpy, well more fibrous.  Sigh.   So out came the sieve and I pressed the hummus through that and got my silky hummus.

I did say I would tell you about my triumphs as well as my failures.   Well, this wasn’t a failure, but an interesting detour.   Mushroom stems are rather fibrous and don’t process down all that well.   However, once I got the Hummus through the sieve, it was wonderful.

I served it with some Pita Crackers and some warmed Naan.

And it was yummy, silky, full flavoured and everyone ate it.   I only got one taste of it.    But that’s OK, I have more beans in the cupboard, and I can make some later on and I’m not sharing.

Recipe
1 can Garbanzo Beans, drained, reserve the liquid
2 teaspoons Tahini paste
2 cloves roasted garlic
1/2 cup browned mushrooms
2 teaspoons olive oil, divided, reserving one teaspoon oil for top of hummus.

Process the above ingredients in a food processor until smooth, use some of the reserved liquid from the can of beans if needed.   Drizzle one teaspoon of olive oil over the top before serving.

Home Made Spaghetti Sauce


Have you ever looked at the labels on commercial Spaghetti Sauce?   Next time you’re out shopping, pick up a can or jar of it and read the label.    Notice how much sugar is in there, whether it’s in the form of sugar or high fructose corn syrup or something else that means sugar.    I don’t know about you but I try not to buy anything with HFCS in it and quite frankly, why do you need so much sugar in something that is basically just tomatoes and herbs?   I started making my own spaghetti sauce years ago and we like it better than any of the commercial brands out there.    I also use it as a base for lasagna, so when I make sauce, I make a lot.   I figure if I’m going to be spending time in the kitchen, I am going to make it count for something.     If you have your own home canned tomatoes, tomato sauce and tomato paste, I applaud you, I don’t so I go to the store and buy tomatoes in several different forms.

As you can see from the picture, I open cans, and then add it to the browned meat, and after that, correct for seasonings.   And I only use the No Salt added tomato products.   We don’t need the salt and certainly don’t miss it either in this recipe.    Check out how much sodium is in those other cans of tomatoes.   I think you’ll be surprised.

 Begin by chopping up a large onion, I like a fine dice.   Throw it in the pan with some olive oil and cook it till it just starts to change color, then add a couple or three crushed and chopped cloves of garlic.   I would say put in as much garlic as you like here.   Cook for just a minute or so, and then remove from heat, and reserve in a separate dish.  If using fresh mushrooms, throw them in the pan and just let them cook just for a minute before you add your meat to the pan, brown it and cook until it is no longer pink.   Break it up a little with your spatula and then add the onions and garlic to the meat, let it cook for a few minutes more, then add the Italian herbs to the meat mixture.
Meat with Herbs and Tomato Paste (sorry for the blurry picture)

I just found a great product called Gourmet Garden Italian Herbs blend. Check the link out here, http://www.gourmetgarden.com/us/  It comes in a tube and you can find it in the refrigerated section of the veggie section in your grocery store.   It is a little pricey, but well worth it for the fresh taste.     Or you can add some dried Italian seasoning to the meat as you’re browning it, this seems to help open up the flavour of the dried herbs.     While the meat is browning open up those cans of diced tomatoes, tomato sauce and tomato paste.   If using canned mushrooms, go ahead and add them with the tomatoes.  Dump the tomatoes into a large pot, mix it up with your spoon until the tomato paste is mixed in and when the meat is ready, add it to the pot.   Taste it here to help correct the seasoning, and if necessary add more herbs.  And if it seems to acidic, add a teaspoon of sugar.  I also add a few tbsp. freshly grated parmesan cheese and then simmer for about an hour  or two or three over low heat, stirring from time to time.     Cook up your favourite pasta, whether it be spaghetti, linguine, or angel hair and serve the sauce over the pasta or however you like to serve it.    And it makes a lot.   I freeze the rest and pull it out when we’re in the mood for Spaghetti or Lasagna.   If I’m making Lasagna, I add a can of diced tomatoes and then layer it with cheeses and noodles.

Ready for the freezer.

This is also a very company friendly dish.  You can stretch it with a couple of cans more of tomatoes, a tad more seasoning, cook up lots of spaghetti and serve with a green salad and a loaf or two of garlic bread.

Here’s the recipe;

1 lb. lean ground beef (feel free to use Ground Turkey instead)
1 lb. Italian sausage, removed from casing
1 large. onion, diced
2-5 cloves garlic, minced (to your taste)
8 oz. fresh mushrooms, sliced or 2 small cans mushrooms
3  16 oz. cans diced tomatoes, no salt added  (Marzano Tomatoes if you can get them, they really add to the flavour.)
2-3  6 oz. cans tomato sauce, or 1 large can, no salt added
3 cans regular tomato paste
1 can tomato paste with Italian herbs added
3-4 tbsp.  Gourmet Garden Italian Herbs, or 1-2 tsp.  dried Italian Seasoning.
1-2  tbsp.  Amore Double Concentrated Tomato Paste http://www.amorebrand.com/products/tomato-paste
2-4 tbsp. freshly grated Parmesan Reggiano cheese

Sugar, 1-2 teaspoons, optional

Olive oil for browning.