Tag Archives: Onions

Potcakes (Potato Cakes)


A few years back we were on vacation and happened upon a restaurant called Grannies’s.

With a name like that, we had to try it.

C’mon, Grannie’s?

Visions of a grandmother standing over a stove, stirring something that smelled like heaven and tasted as good as it smelled.

So we went in and looked at the menu.  I like reading menu’s before I try the food out.  Sometimes the menu just gets downright silly with the descriptions, and you wonder why someone will shell out good money for spinach that was harvested using only gently sustainable efforts on the latter side of a new moon..

You’ve read that kind of menu, I know you have.  And maybe you’ve eaten there as well, but I love seeing the descriptions of the food offered at any new restaurant I want to try.

This menu was pretty basic, but they had one item on there that stood out for me.   And that was the Potcakes.  The only other Potcakes I’d ever heard of were the dogs that you find in the Bahamas.

So I ordered them as my side to the meatloaf, and they were so good.   Deep fried potato cakes, crispy and melty and yummy, with little bits of sweet onions mixed in.

I’ve tried to replicate them ever since, with no success.   I’ve actually eaten the evidence of my failures.  Although some have been consigned as offerings to the Kitchen Goddess. sigh

I finally done did it.   Made them, just the way I remember those Potcakes from so long ago.   And all it took was me messing up some mashed potatoes and deciding to take that failure and make a potato cake for lunch.    I’d made the mashed taters with new Yukon Gold potatoes and they didn’t have the starch in them like russets, and quite frankly they were a little gluey.  I ate a bit of them, then consigned the rest to the fridge.

I didn’t measure out exactly, but I had about 1 1/2 cups of mashed potatoes (made with fresh gold potatoes, not russet.   I just added an egg, about 1/2 cup of Wondra flour, mixed that all up with half a chopped onion and then fried them in a little hot oil.

I then glopped (technical term here) some Creme Fraiche on top of them and proceeded to eat three of them.  I left one for later.

OK, so I ate the first one I took a picture of, then proceeded to eat two more.

But they were worth it.

So, the next time you make gluey mashed taters, try adding a little Wondra Flour, a chopped onion and an egg to them, and frying them up as Potcakes.

Oxtails and Onions


I got so excited the other day when I went to the grocery store and found Oxtails on special. giggle.  So I bought a couple of packages.

I have no idea how other people make them, but I like them prepared very simply.  Two main ingredients, time and a little salt and pepper.  That’s it.

Oxtails and Onions.  Oh wait a minute, I think I have a recipe title.  Excuse me for a minute, I’m just going to change it.  Done.

As I think I said before, this is so darn simple, and so very, very good.  The only real trick to making this, is the time factor.   It takes hours, but I guess you could also make it in a crock pot, however, I never have.

I do it the old-fashioned way, in a pot on top of the stove for a couple of hours and then in the oven for another couple of hours.   Oxtails need to cook low and slow for hours.   This renders the meat so lovely and tender.

I think next time, I’ll start it on top of the stove, and then pop it in the crock pot to finish cooking.   Sorry, got sidetracked there, I started thinking.

To start with, peel 4 (four) onions, and either slice them into rounds or strips or whatever you like.  It really doesn’t matter here.   They just cook down into a luscious mouth-watering topping for the oxtails.

Grease a heavy pot, or saucepan with cooking spray, and add about a tablespoon of EVOO to it.  Heat it a little, then dump in the sliced onions and stir them around until they start to turn translucent.  Add the oxtails, give them a grind or two of pepper and some salt and put a lid on the pot, after you turn it down to medium low.

Next, step away from the pot.    Let it cook for about a half hour then give it a good stir.   You will have noticed that the onions have given off a fair amount of liquid, this is a good thing.  Stick the lid back on and let it cook for another half hour or so, and stir.  All you really want to do is make sure that nothing is sticking too much to the bottom of the pot and that it isn’t burning.

At this point I usually just turn it down to low and let it cook for another half hour before I check it again.  If you’re a little nervous here, you can add up to a half cup of water, but unless you have really dry onions, you probably don’t need it.    And the fat that has rendered off of the oxtails, which also contributes  to the liquid.

After it’s cooked down a bit, transfer it to a covered casserole dish and put into the oven at 300 degrees for another hour or two.

See what I mean, the onions are just cooked to bits.  And so good.

Serve with rice or noodles or potatoes or a piece of that wonderful No-Knead Bread you baked yesterday and the leftover mushrooms from the night before.  Well, that’s how I had mine.   And it was good.

I ate my fill, then divided it up into a couple of servings and froze the rest.   I had so many onions that I also put some into a container and froze them separately and will be adding them to the French Onion Soup I’m making soon.

I just love this stuff.

However, Oxtails also make an awesome beef stock for soup.    And I think the next time I find them on special, I’m going to do just that, make a soup and  of course will share the how-to’s here.

Garden Dip


I think I’ve told you about the weekly get- together most Friday nights, just to chat and socialize with some women.   We discuss world affairs, local affairs, and general chit-chat.   We also bring snacks, and since I love to experiment play in the kitchen, I have fun most Friday’s.

I’ve made hummus and brought it, last week I brought this killer Feta Dip, and this week I brought this:
Garden Dip.

Well it got renamed last night, I had it in my recipe file as Garbage Dip, but they all decided it was too good to be called that.   And of course me being me, I had to play with the original recipe, which is simplicity itself, well it is if you have all the right ingredients to hand.  Which I sorta did.

Here is the recipe with the original ingredients to the side in parenthesis and in blue.

1 cup light sour cream                (1 pint sour cream)
1 sweet onion, finely chopped     (1 small onion, chopped)
1 1/2 tomato, finely chopped      (1 tomato, chopped)
1/2 cup ranch dressing               (1 package dry ranch dressing)
2 cloves garlic, minced               (1/2 tsp. Garlic Salt)
1/2 teaspoon Cavenders Greek Seasoning
1/4 package Sazon Tropical Seasoning, this could be optional

Mix all ingredients together and let sit for an hour, in the fridge before serving with either chips or with some fresh bread.

I thought I’d made a lot, but most of it was eaten and enjoyed.

I will make this again, and maybe add some cilantro, which was a suggestion made by one of the ladies.  At any rate, have fun with it yourself.

Now to go and figure out what I’m making for Tapas this week, gotta think on that one.

Kro Pork with Grapes


In Denmark a Kro is an inn which offers not only lodging but also meals.    Some Kro’s are just inns, whereas others offer meals which can be, like many restaurants either really good or just so so.   Many years ago I was lucky enough to taste this dish.   My cousin got the recipe from a Kro they liked to go to from time to time, and she recreated it.

Well, I was young then, but not a dummy.   I wrote down the recipe, and somewhere in the process of living, I managed to misplace it.

Well, you move a couple of times, put stuff in storage, it’s easy to lose stuff.  I’m still searching for some stuff I know I had.  One of these days, I’ll find it or not.

In the meantime, I was looking for my mom’s recipe for Asier a few weeks ago, and guess what I found instead.  A whole file full of recipes.  At one time I had the delusion I’d actually write a cookbook and I’d actually made a good start on it, and this recipe was in that file.

And when I read it again, my mouth started to water and I knew I had to make it.  Could not find tenderloin that wasn’t already seasoned, so I got a nice piece of loin instead, and that was alright.   And I found some nice red grapes, on sale so I used them as well.   I think green grapes do work better, at least visually.

I made this last week, and you know, it was as good as I remembered it.   I think though, I will add some herbs to it the next time I make it, I think that would send it over the top.  But in the meantime, this works.

1 whole pork tenderloin (about 2 pounds) cut into medallions (I used a Loin cut this time)
2 tomatoes, cut into eights
1 large onion, quartered and then cut again into eights (I think you could also use small onions here)
1 1/2 cups water
1 lb.  seedless green grapes, cut in half
salt and pepper to taste
1 tbsp. olive oil
1 tablespoon butter

Heat olive oil and butter in a skillet til hot, then brown the pork medallions in small batches, setting them aside to rest while you brown the rest.

Add water to pan, and scrape up all the little bits of browned goodies at the bottom.  Add the meat,  and let simmer for about  ten minutes.  Next up, add the onion, and simmer an additional ten minutes, then add the tomatoes and let cook another 5-7 minutes.   Thicken the sauce with a little cornstarch and water slurry, then add the grapes and bring to a simmer.    Simmer a couple of minutes and dish this up with some rice, either white or brown.

This really is a quick and easy meal, and you can get the rice on and let it cook while the meat is simmering.

The next time I make this, I am going to add some marjoram and savoury to the simmering meat.   I think it will really punch up the flavour and make this even better.

I really enjoyed my meal, I even remembered to take pictures of it.    (and best of all, there were leftovers, so I threw them in the freezer for lunch in the future.  )

Home Made Spaghetti Sauce


Have you ever looked at the labels on commercial Spaghetti Sauce?   Next time you’re out shopping, pick up a can or jar of it and read the label.    Notice the presence of sugar in there, whether it’s in the form of sugar or high fructose corn syrup or something else that means sugar.    I don’t know about you, but I try not to buy anything with HFCS in it and quite frankly, why do you need so much sugar in something that is basically just tomatoes and herbs?

I started making my own spaghetti sauce years ago and we like it much better than any of the commercial brands out there.    I also use it as a base for lasagna, so when I make sauce, I make a lot.   I figure if I’m going to be spending time in the kitchen, I am going to make it count for something.     If you have your own home canned tomatoes, tomato sauce and tomato paste, I applaud you, I don’t so I go to the store and buy tomatoes in several different forms.

As you can see from the picture, I open cans, and then add it to the browned meat, and after that, correct for seasonings.   And I only use the No Salt added tomato products.   We don’t need the salt and certainly don’t miss it either in this recipe.    Check out how much sodium is in those other cans of tomatoes.

I’m waiting.      Surprised?

Now add that to the sugar in prepared sauce, yuck, right?

Begin by chopping up a large onion, I like a fairly fine dice.   Throw it in the pan with some olive oil and cook it till it just starts to change color, then add a couple or three crushed and chopped cloves of garlic.  Put in as much garlic as you like here.   Cook for just a minute or so, and then remove from heat, and reserve in a separate dish.  If using fresh mushrooms, throw them in the pan and just let them cook just for a minute before you add your meat to the pan, brown it and cook until it is no longer pink.   Break it up a little with your spatula and then add the onions and garlic to the meat, let it cook for a few minutes more, then add the Italian herbs to the meat mixture.

Sorry, blurry picture, but you get the drift.

I just found a great product called Gourmet Garden Italian Herbs blend. Check the link out here, http://www.gourmetgarden.com/us/  It comes in a tube and you can find it in the refrigerated section of the veggie section in your grocery store.   It is a little pricey, but well worth it for the fresh taste.     Or you can add some dried Italian seasoning to the meat as you’re browning it, this seems to help open up the flavour of the dried herbs.     While the meat is browning open up those cans of diced tomatoes, tomato sauce and tomato paste.   If using canned mushrooms, go ahead and add them with the tomatoes.  Dump the tomatoes into a large pot, mix it up with your spoon until the tomato paste is incorporated and when the meat is ready, add it to the pot.   Taste it here to help correct the seasoning, and if necessary add more herbs.  You can also add a rich full bodied red wine at this point, just a cup or two.   Add a few tbsp. freshly grated parmesan cheese and then simmer for about an hour over low heat, stirring from time to time.     Cook up your favourite pasta, whether it be spaghetti, linguine, or angel hair and serve the sauce over the pasta or however you like to serve it.    And it makes a lot.

I freeze the remainder and pull it out when we’re in the mood for Spaghetti or Lasagna.

HINT: If using plastic dishes to freeze in, line them with some plastic wrap, this keeps the sauce from staining, plus when it’s frozen, throw that block into a plastic bag, and save the plastic container for something else.  Or just spoon the sauce into a ziploc bag, squeeze out the excess air and freeze flat.
If I’m making Lasagna, I add an additional can of diced tomatoes and then layer it with cheeses and noodles.

This is also a very company friendly dish.  You can stretch it with a couple cans more of tomatoes, a tad more seasoning, cook up lots of spaghetti and serve with a green salad and a loaf or two of garlic bread.

Here’s the recipe;

1lb. lean ground beef (feel free to use Ground Turkey instead)
1 lb. Italian sausage, removed from casing
1 lg. onion, diced
2-5 cloves garlic, minced (to your taste)
8 oz. fresh mushrooms, sliced or 2 small cans mushrooms
3  16 oz. cans diced tomatoes, no salt added
2-3  6 oz. cans tomato sauce, or 1 lg. can, no salt added kind
3 cans regular tomato paste
1 can tomato paste with Italian herbs added
1/4 tsp. (or more) red pepper flakes to taste.
3-4 tbsp.  Gourmet Garden Italian Herbs, or 1-2 tsp.  dried Italian Seasoning.
1-2  tbsp.  Amore Double Concentrated Tomato Paste 
2-4 tbsp. freshly grated Parmesan Reggiano cheese
Olive oil for browning.

You can also add a couple of cups of a good red wine to the sauce, my DH doesn’t care for the taste, but it does add a richness that can’t be beat.

Spanakopita Bites


I found some Phyllo tart shells on sale a while back and bought them without knowing just what I was going to make with them.   And then I remembered my friend Debi and the great Stuffed Grape Leaves she showed us how to make.   Well, that day we also made some Baklava and since there was a bunch of Phyllo dough scraps left over, Debi made some Spanakopita tarts.  And they were so good and disappeared so fast.

So, guess what?   I was totally shameless and stole her idea so I made some for the Boat Club Potluck this month.   I’m not using leftover phyllo dough, but I am using the phyllo or fillo if you insist, pre-made tart shells I bought.

It just so happened I also had some Feta Cheese in the fridge, as well as some Parmesan Cheese and the tart shells, and onions, and eggs, and I found a package of frozen spinach buried in the bottom of the freezer as well.   I had all the ingredients.    Don’tcha just love it when it all comes together?

   Nice little bites of goodness, well, I thought they were.   Although Debi did tell me I didn’t put enough onion in them, so next time, I’ll up the onion, or better yet remember to put the minced onion and garlic in them in the first place.  I don’t know what I was thinking, but I sautéed the green onions, and totally spaced the minced onion  and the garlic clove,   sitting on the counter all by its lonesome afterwards as well.  sigh.   I was in a hurry to get these made and I forgot stuff.  So here’s the real recipe and do as I tell you, not as I did.  However, the Spanakopita Bites, still tasted good, just not as good as they could have.

30 Mini Fillo Shells, brushed with butter and set aside.

1 8 oz package of Frozen Spinach
4 oz. Feta Cheese, either the block or crumbles
1/2 cup grated Parmesan Cheese
4 green onions
1/2 cup onion
2 cloves garlic
2 eggs
2 tablespoons milk
1 tablespoon Olive Oil

Preheat the oven to 350 deg.
Thaw the spinach and put into a colander to drain, then squeeze out the liquid.  Do a rough chop if needed, makes it easier to fill the tart shells if you don’t have to deal with a bunch of stems.
Saute’ the onions til they have softened about 5 minutes, then add the garlic, stir around for about 30 seconds, take off the heat and set aside.
Place the spinach, cheeses, onions and garlic into a bowl, then pour over the lightly beaten eggs and milk, mix together.

Spoon some of the filling into the tart shells, and bake for about 20 minutes or so until they have browned  and the egg has cooked through.

Don’t forget to sample one as you take them out of the oven, you need to make sure they are edible after all.

Serve warm or at room temperature.    You can also make these ahead of time, and just warm them in the oven for a few minutes, they are very forgiving that way.

Totally Awesome Green Bean Casserole


Hi, I know we just had Thanksgiving, and all that fun stuff is over with, including the infamous Green Bean Casserole.    You know the one I mean, it’s got canned Mushroom Soup, canned Green Beans and is topped with French Fried Onions.   Which actually is probably the only thing I like about it.    However, a few years ago I stumbled on this recipe at the Pioneer Woman’s website.   It changed my opinion about Green Bean Casserole forever.    And if you happen to have a vegetarian or two to serve, this can be adapted for them.   For me, I’m  a hopeless carnivore and also love my bacon so I make it as written.    Oh, and if you’re doing it Gluten Free, just thicken the Bechamel sauce with some cornstarch or potato starch.

Wash your beans and then chop off the ends and stems, and either cut them in half or leave them whole, it’s your call.   (forgot to take pictures of this, but you can figure it out, right?)

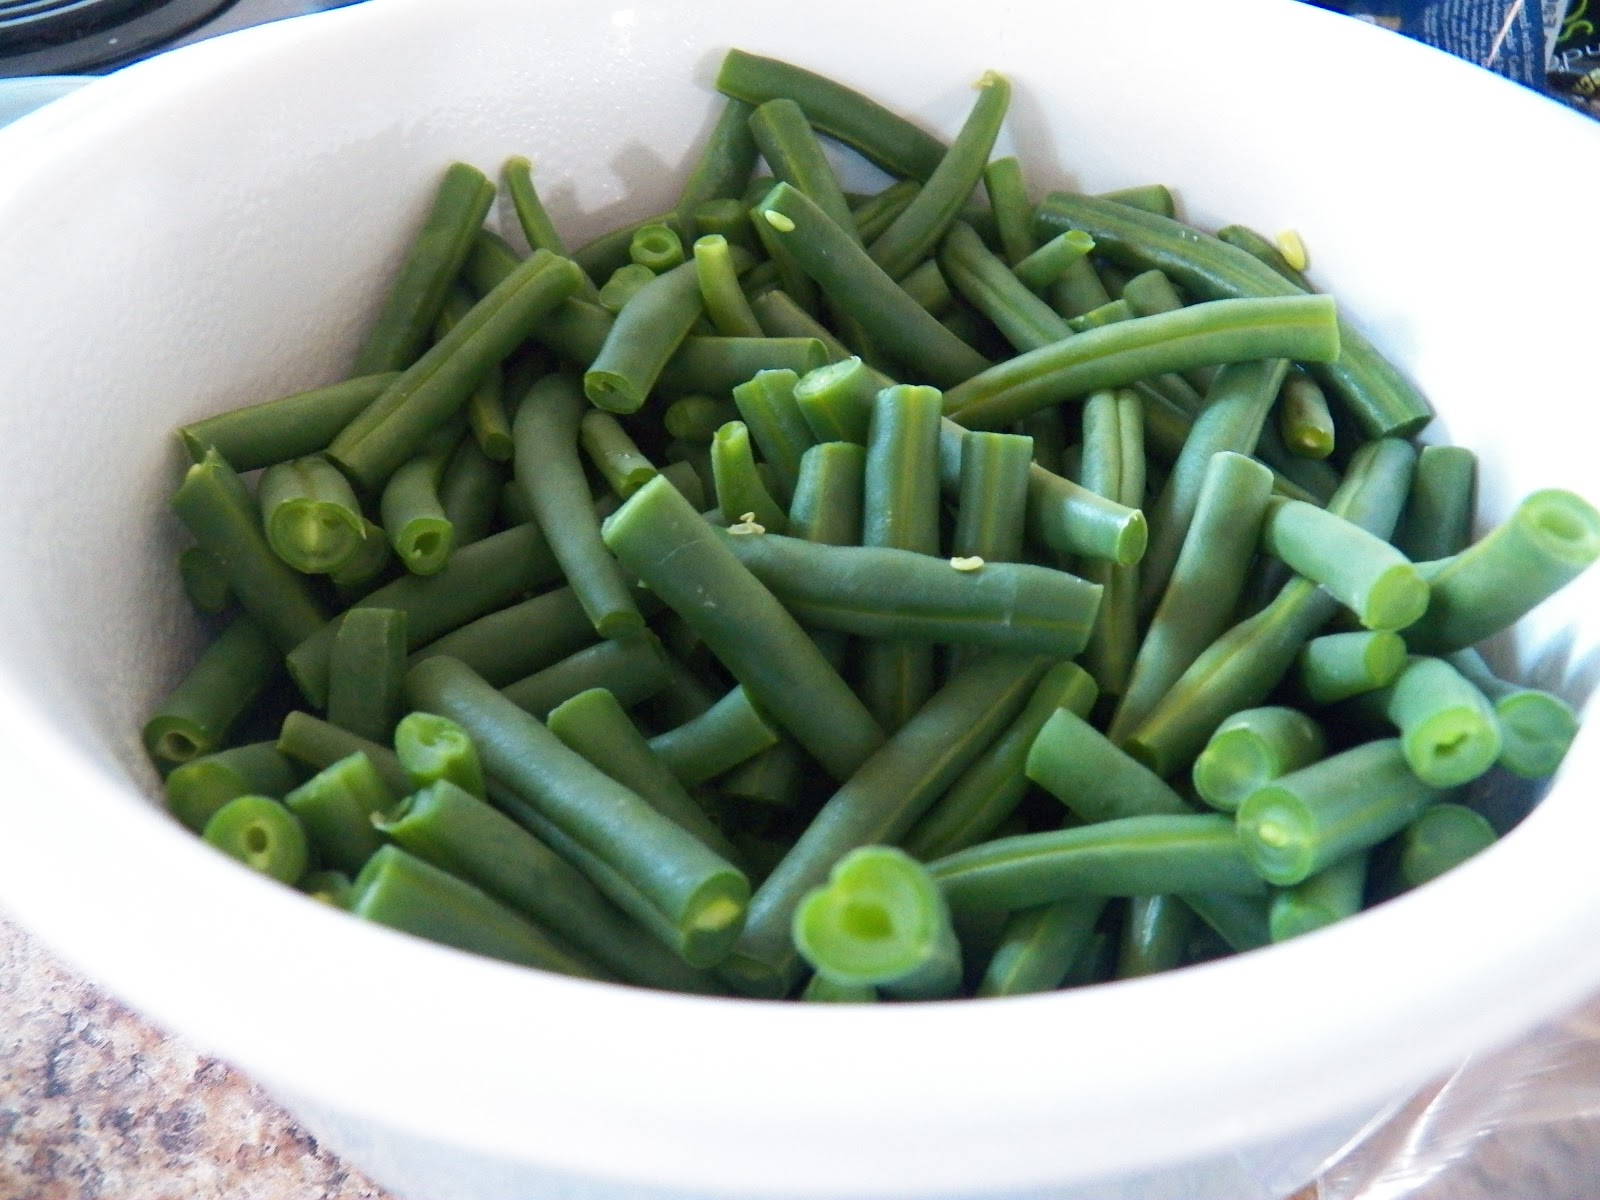
Blanch your beans for a couple of minutes, then take them off the heat and cool them down with some ice water.     Set them aside while you get the rest together.   And then put them into a greased casserole dish.


Cut the bacon into lardons and cook in a skillet until they start to brown, then add a chopped onion, cook until the onions start to carmelize, and turn a lovely shade of caramel, then add the garlic and cook another minute or so.    Set aside.

Grate two cups of cheese, cheddar, sharp cheddar, colby Jack, whatever you like.  Personally I prefer Colby Jack cheese.  Set aside while you make a basic white sauce.(a lot of setting asides here, huh?)    A couple cups of milk or half and half, some butter and flour (or cornstarch if you are gluten free).

Cook until thick, then add the grated cheese, stir that around until the cheese is melted, than add the bacon and onion you just cooked.  Taste it, then add some cayenne and some salt and pepper to taste.   I usually put in 1/4 teaspoon of Cayenne to start with, then add more if I think it needs it.   You can also use mustard instead.   Both of them will ‘amp up’ or intensify the cheese flavour.  Give it a stir and for the final touch, add some chopped pimento’s.  Just for color, and they do add a little flavour as well.

Now for the final step, well next to last, well OK, so there is a couple more steps here.   Sheesh, stop counting.

Pour the sauce over the cooked beans and give them a stir so that the sauce coats each bean with love and cheese.

Spread some buttered Panko bread crumbs over the top, (omit this if you’re going gluten free, or use gluten free bread crumbs).   Or just dot it with some butter like this.

Place in a hot oven, about 350 degrees for 30-45 minutes.   Remove and serve.   Oh and don’t get surprised if even your kids love this, it is that good.

.

The first time I made this, there were six of us at dinner, and this is all that was left

Almost half of it eaten.   The next time I made it,  I took it to a potluck and people were scraping the bowl, personally I think they would have picked it up and licked it, the sauce is so good.

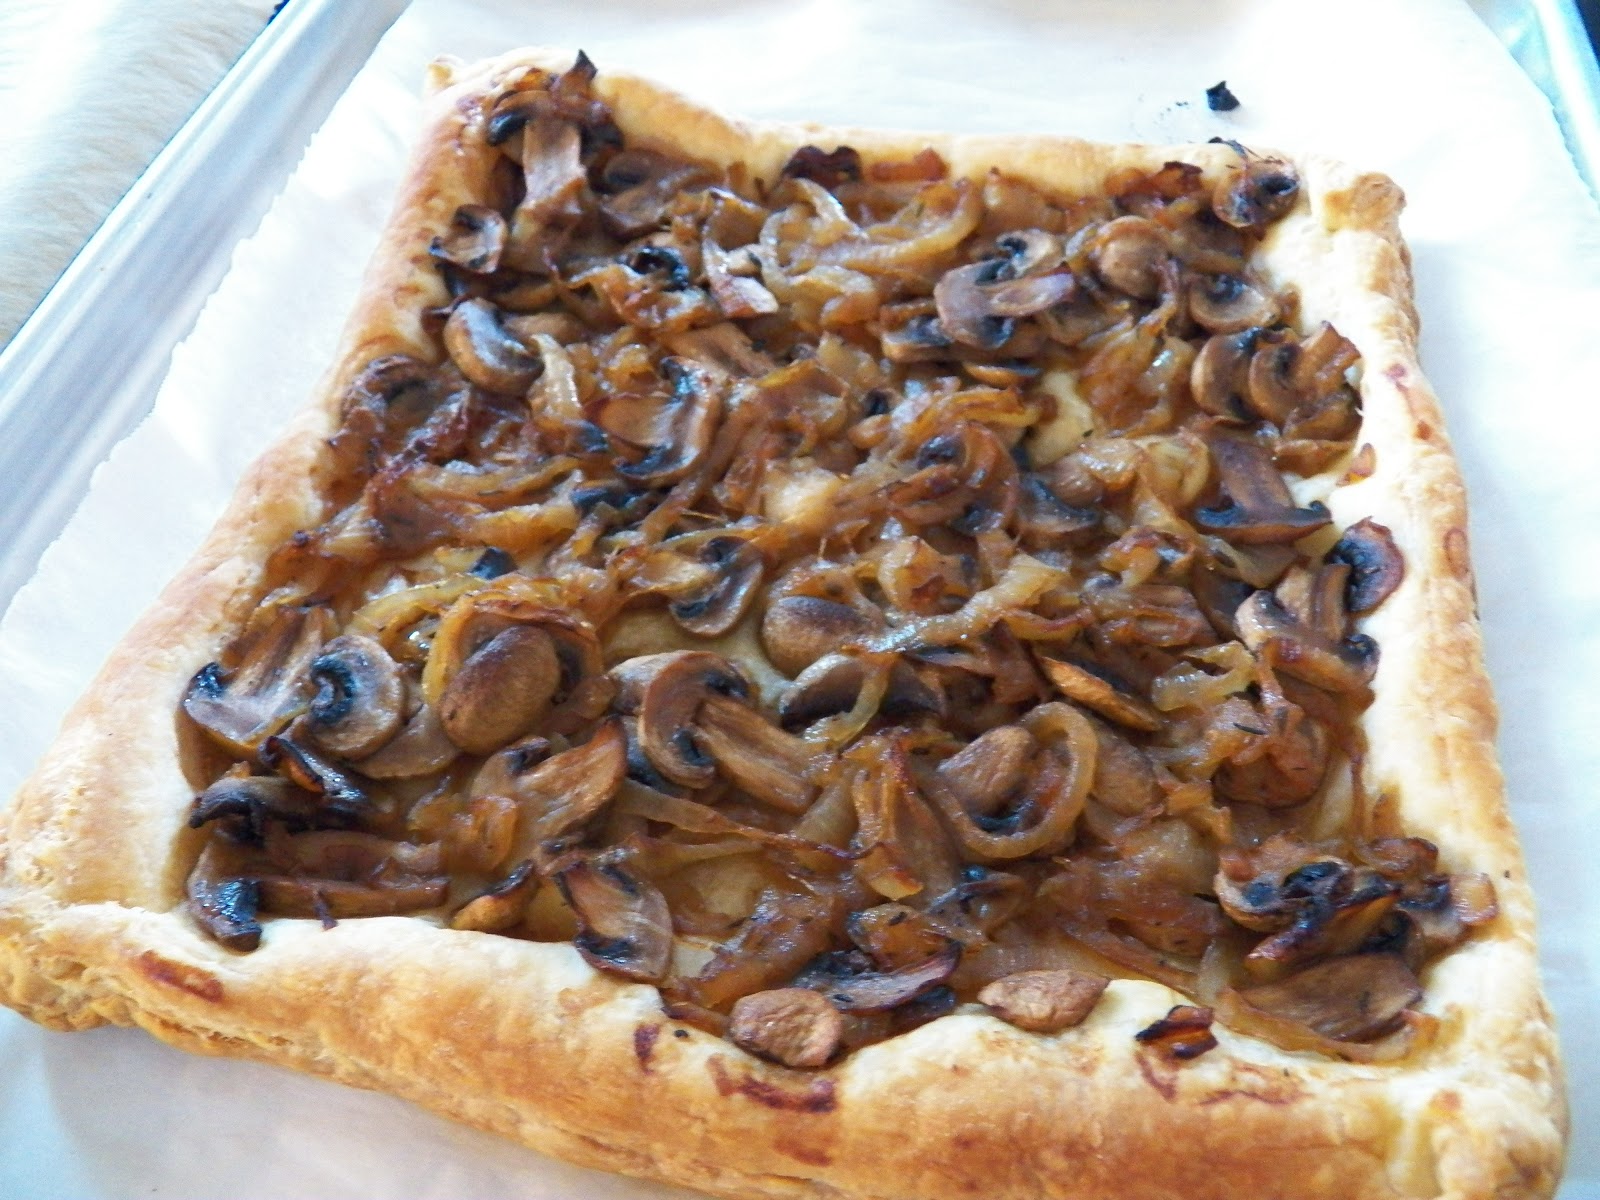
I just had a thought.  Make the sauce by itself and serve over some baked potatoes.   Now that would be an awesome meal.

Here’s the recipe.

2 pounds Fresh Green Beans, ends cut off
4 slices bacon, cut into lardons or strips    *** Vegetarian instructions at bottom
1 small onion, diced
3 cloves garlic, minced
4 tablespoons butter
4 tablespoons flour  ** or 2 tablespoons Corn or Potato Starch
2 1/2 cups whole milk
1/2 cup half and half
1/2 teaspoon salt or to taste
Fresh ground pepper to taste
1/8-1/4 teaspoon cayenne pepper, to taste
1 cup grated Monterey Jack Cheese (or a little more if you like, which I do)
1 jar sliced pimento’s, drained (4 oz. jar)
extra milk for thinning if necessary
1 cup Panko Bread Crumbs
2 tablespoons butter

Cook the beans for about 4 minutes, drain and dump into some ice water to stop the cooking process, then drain and place in a well greased casserole dish.
Cook the bacon until almost done, then add the onions, continuing to cook them until they begin to caramelize a little.   Add the garlic and cook for another minute or so.    Set aside while you make the sauce.

Make the white sauce, melting the butter and whisking flour into the butter, letting it cook a minute or so to get the raw taste of the flour out.  ** Gluten Free instructions at end.   Then add a half cup of milk, whisk that in, then add the rest of the milk and half and half, whisking it well.  Let it cook, continuing to stir until the sauce thickens.    After it has thickened, continue to cook for another minute or two, then add the cheese, pimento’s, cooked bacon and onions, and the seasonings.  Stir together and pour over the green beans.  Stir to combine, and top with the Panko bread crumbs and dot with butter.  Or melt the 2 tablespoons of butter in a pan, then stir in the bread crumbs and combine.   Sprinkle on top of casserole and bake for 30-45 minutes in a 350 degree oven.   Serve.

** Gluten Free.   If you’re making this gluten free, whisk the Corn or potato starch into the milk and heat, until thickened.   You can also add a couple of tablespoons of butter towards the end.  If you need it a little thicker, add a little more cornstarch mixed in with some cold milk,  and whisk it in.

***  Vegetarian, substitute Mushrooms for the bacon and follow the other instructions.

Mushroom and Onion Tart with Goat Cheese


I had fun making stuff for Saturday’s Tapas get together, but I just couldn’t make up my mind just what I wanted to make so I ended up with a couple of different dishes.    All right, I made four separate appetizers, sigh.
This one though was a big hit, and I loved it.   Onion and Mushroom Tart with Goat Cheese.  And I will make it again, and again and again.

I was just lucky I actually got to taste it, it disappeared so fast.   And this is so easy to make.  I mean, easy,  5 ingredients easy.  Onions, mushrooms, thyme, puff pastry and goat cheese.

To start with, take your puff pastry sheets out of the freezer and place in the fridge.   I like them to thaw in the fridge for a couple of hours, before taking them out and letting them finish thawing on the counter.   Cause if your kitchen is too warm, the pastry gets warm and it just doesn’t rise.   Now if you’re crazy like me, and make your own puff pastry, you’ll have some already in the fridge or freezer waiting for you.  Although I didn’t have any made up, I just used Pepperidge Farms Puff Pastry Sheets.   And they do work well.
Next up, cut some onions up, and cook them slowly and gently in some EVOO until they are nice and brown and caramelized.   I love slowly cooked onions.  If you have some fresh thyme, strip off a couple of sprigs and sprinkle the leaves over the onions and let them cook a minute or so more.  Or just sprinkle in about a half teaspoon of thyme and stir that in.  Remove the onions to a separate bowl while you cook the mushrooms.   Let them cook until the liquid has evaporated then add the onions back in to the pan, sauté them a little more and set aside to cool.

Preheat the oven to 350 degrees.

Pull out the puff pastry sheet and fold over the edges to make a pretty border, and also to be able to contain the onion/mushroom mixture.    Place the mushroom onion mixture in the middle of the tart and spread out evenly.

Bake for 25 minutes, or until the edges of the tart are nice and brown.

Take out and let cool just a little before dotting the top with some goat cheese.   You can make this earlier and just warm it a little in the oven before serving by the way.

Cut into pieces, and stand back cause your guests are going to love this, and will be trying to get just a taste before you get it on a platter.    I put this plate down and before I could get back to it with the camera, there were pieces missing.  But it’s all good.  And very tasty, and best of all easy.

Mushroom and Onion Tart

2 onions, sliced thinly, I used sweet onions
8 oz. sliced mushrooms
1/2 teaspoon dried thyme
2 oz. block goat cheese
1 sheet frozen puff pastry
1-2 tablespoons EVOO

Heat a good sauté pan with one tablespoon of EVOO and add the sliced onions, cooking them over a low heat for about 20-25 minutes.   Stirring from time to time.  Slow cooking means that the sugar really comes out in the onions.  You want them a nice golden color. Add the thyme in the last few minutes.   Remove to a separate bowl, and sauté the mushrooms in an extra tablespoon of EVOO until they have released their liquid and then add the onions back in.  Continue to cook until all the liquid has evaporated, then take the pan off of the heat and let them cool.
Turn oven on to 350 degrees to preheat.

Prepare the puff pastry sheet as per instructions, and then make a lip around the edges of the sheet by folding the puff pastry over just a little.  (I forgot to take pictures, again).   Place the mushroom/onion mixture in the middle and spread out.   Place in the preheated oven and cook for about 25 minutes or until the edges are a nice golden color.   Take out and let cool for just a couple of minutes before dotting the tart with some of the goat cheese.   Cut and serve immediately or you could also let it cool, and then warm it a little before serving.    This really is very tasty.

Gazpacho and Courgette’s Couscous Recipes


I neglected to post the recipe for the Gazpacho Couscous the other day, on purpose.  I thought the blog post was getting a little long so decided to just post the pictures from Tapas night .  But, I took a lot of pictures for the Couscous recipes, and since I did, I want to share with you.

By the way, I have to admit to something here, I was so excited when I saw the package of Israeli Couscous at World Market, I just grabbed it and hurried up and bought it and put it in my pantry to use.  Then when I pulled it out on Saturday to make these dishes, I read the label.

Yup, read the label.

Turns out what I bought was Israeli Couscous with lentils, green peas and orzo.   But since I had the water boiling already, I went ahead and cooked it.  And you know it was good.  I did taste it, and it was a blank slate.   So I decided to go ahead and make the Gazpacho Couscous anyway.   I mean if I didn’t tell people that I hadn’t read the label, they were never going to know it wasn’t quite what I had intended to cook.

Gazpacho Couscous Recipe

1 1/2 Cups uncooked Israeli Couscous, cooked according to package directions.

1/2 red onion, finely diced
1 small green pepper, finely diced
1 cucumber, finely diced
1 container  (8 oz.) grape tomatoes, cut in quarters
1/2 cup EVOO
1/4 cup (approx) Rice Wine Vinegar
Salt and Pepper
2 tablespoons (more or less) finely minced mint leaves.

Toss all together and place in fridge for at least 3 hours, then taste and adjust seasonings.

I have to say this turned out so good, but did make a lot, enough that I was able to share with friends.   In other words, they got to take some home with them.

And I also made some Courgettes and Mushroom Couscous as well.   That wasn’t as photogenic, but it sure tasted good.

Here’s the how to on that one.   Oh and Courgettes, we call them Zucchini on this side of the pond, personally, I’m going to continue to call them Courgettes, cause I think it elevates them, a little.   Makes them just a tad more elegant, and if you think of all the things you can make with a Zuch, well, I just think they deserve to be called something cool.

Courgettes and Mushroom Couscous

1 1/2 cups uncooked Israeli Couscous, prepared according to package directions
1 small courgette, diced  (zucchini)
8 oz. Fresh Mushrooms, diced  (next time I’m going to leave them in slices)
1 small onion, diced  (I used the other half of the red onion from the Gazpacho couscous)
2 tablespoons fresh parsley, chopped.
1/4 cup EVOO (Olive Oil)
2 tablespoons butter mixed with 2 tablespoons EVOO
Lemon juice from one lemon
Salt and Pepper to Taste.


Saute the mushrooms, courgettes and onion in a mixture of 2 tablespoons butter and EVOO, until softened.   Mix with the cooked couscous and then add the Lemon Juice and 1/4 cup EVOO and toss.  Add the the chopped parsley and taste.   Season to taste with salt and pepper.

So there you have it, the two Couscous recipes, that I got from  Chica Andaluza .  You should go by and check out her blog as well.  She’s got some great recipes and stories there.

Shrimp Salad


I had fun playing around with some ideas for Tapa’s night this month, and I finally narrowed it down, and made a final decision, but it wasn’t easy.

I had thought about making some Sausage Rolls, I have some HP sauce in the cupboard and Sausage Rolls and HP sauce are ‘da bomb’ together.  Whoops, did that date me?  Too bad.   Then I had the idea to make some Pizza bites, but…  that really didn’t excite me.    Then I thought, hmmm, Mini Quiché bites.    I have mini tart pans, and can make a bunch up at a time, I can make one batch vegetarian and the other with some lovely ham and bacon pieces in it them.  But it didn’t get me that fired up.  I mean I have to be excited or at the very least somewhat enthusiastic about what I’m making.    Then I had that “AHA, I GOT IT” moment, whew, that one almost hurt.  IGA had some jalapeno’s on sale this week, and they were a decent price and looked good.   And I needed to replenish my stock of Jalapeno’s in my freezer anyways, so Stuffed Jalapeno’s it was.   And I like to make have a choice for my friends who don’t care for meat, so I decided to cook the shrimp I bought the other day, since I didn’t get them cooked and had to freeze them,

Frozen Shrimp,defrosting


Cooled and ready to peel

and make a Shrimp Salad.    And while I didn’t have any crackers for the Shrimp Salad I did have some Fillo dough in the freezer so I made some Fillo cups.

I found out Fillo dough is rather picky.   It likes to be kept moist, dries out faster than I’ve ever seen anything dry out, but once you’ve got some butter brushed across it, it molds like a dream.  Melt some butter, I think I used a quarter of a stick, just make sure you have a pastry brush handy.    Unroll your sheet of Fillo dough, about three inches wide or so and cut into one long length.    Keep the rest rolled up in the plastic wrapper, it does stay together better that way.  (and make sure you take it out of the freezer about an hour before you want to use it.   It  does not unroll easily when frozen.   Please learn from my mistakes.)  Brush butter across one or two sheets of dough at a time, and stack to the side.   I found it was easy to do that.  Then take a sharp knife and cut that length into thirds.   At this point pick up about 4 sheets or so of the dough and place into your mini muffin or tart pan.  Pressing the dough down into the cup, repeat until all cups are done.   Bake in a 350 deg. preheated oven for about 10 minutes or so until the cups are a lovely light brown.

If you have more dough, cover with a damp towel to prevent the dough from drying out.   I think you could also flavor the butter with some garlic or …  just to add a little pizzaz.
Set out with the Shrimp Salad and let your guests spoon the salad into the fillo cups.

As you can see I got to the dish a little late in the day, and most of it was eaten already.

Shrimp Salad

1 lb. Shrimp, peeled, cut into thirds, poached in some seasoned water  (I boiled some water with a bay leaf, some peppercorns, cayenne pepper, Natures Seasons and dill)
4 stalks celery, cut into a fine dice
1 tablespoon onion, minced  (could use red onion here for prettiness sake)
1/2 teaspoon dill
1/2 cup mayonnaise
1 tablespoon mustard
1/4 teaspoon pepper
Mix together and taste for seasoning, then refrigerate.