Tag Archives: mushrooms

Burger Bar Bash planning tips


It’s summertime and grilling season for a lot of people, aka the season to eat and cook outside cause it’s too darn hot to cook inside.

Well, kinda.

Personally I like my air-conditioned kitchen, it’s bug free and convenient, for me.

However, I also love to host parties, as you may have gathered from this blog.    And one of the funnest parties is a Burger Bar Bash.

We used to host these at least once a year when we lived out west, and it was always popular.   We hosted a couple at the campsite when we lived in a RV a few years ago.  I had very generous friends who let me use their BBQ grills, cause I only had a small one.  And I no longer even own that one, but I have my George Forman grill and quite frankly I’m happy with that.

But lately, I’ve been craving a good old fashioned Burger Bar Bash again.

So until I get around to doing it, I thought I would let you in on some planning tips.

First off, depending on your pocketbook and budget, you may only want to make all the toppings and have everyone bring their own meat.

I’m kinda funny that way, but I like to do it all.

From the meat to the toppings to the buns, I’m a bit of a control freak that way.

First off, figure out how many people you can accommodate, budget wise, or space wise.

I used to plan on just over one pound of hamburger meat for every three people.  And as I said, I like to ‘control’ it all so I make my own patties.   Told you I was a control freak on this. I learned that a 6 oz. uncooked patty would fill up most people.   And I always make extras, just in case a teenage boy or three wanders in. Quick math lesson, 15 lbs. of hamburger meat will make 40 patties.  And any leftover patties that aren’t cooked, just go ahead and freeze.
And…  I’m rather picky on the whole fat to lean ration on my hamburgers.  I like a 50/50 ratio of ground chuck and ground round.  I want some fat, but I hate to bite into a grease burger.  ***SHUDDER***  And even though I made a mixture, I did not play in the meat.   You can toss it gently together and then just barely pat the patties together.   I also had turkey burgers for those people who don’t eat red meat, as well as Veggie Burgers for those who don’t eat meat at all.  (I’ve been known to just make those for myself, cause I like them).
You can buy the veggie burger patties or make them yourself.  Your call.

And don’t forget the dimple in the burger when you grill them.   They cook evenly that way.

OK, now we have the meat handled.    Well, kinda, I’ll clue you in on one of my fave burgers later.

Next up is the buns.  And here is where I get super, super picky.  I hate, abhor, despise those buns that fall apart as soon as you bite into it.  They just moosh up and well, I won’t buy them.  And usually, the bun is way too small for my burgers and the toppings.   So, I buy French Hamburger buns.   You know the kind, they’re made from French bread, and they do hold up.  And I’ve also been known to buy a loaf of French Bread and just cut it into 4ths or 5ths and make buns that way.  And I’ve just discovered Pretzel Buns, which seem to be pretty sturdy as well.  A good Kaiser roll can work also.  Your call on that one, but please don’t use those puny little buns that get sold in an 8 pack.  I think they’re only good for those cardboard patties some hamburger chains sell, cause they can only handle a two ounce patty, a small squirt of mayo and mustard.
I’m not opinionated on this subject, at all.  Am I?

Condiments are next.  I have the usual,  Ketchup, yellow mustard, brown mustard, BBQ sauce and Mayo.  And have also been know to put out a couple of bottles of hot sauce as well.  I cater or attempt to cater to most tastes.

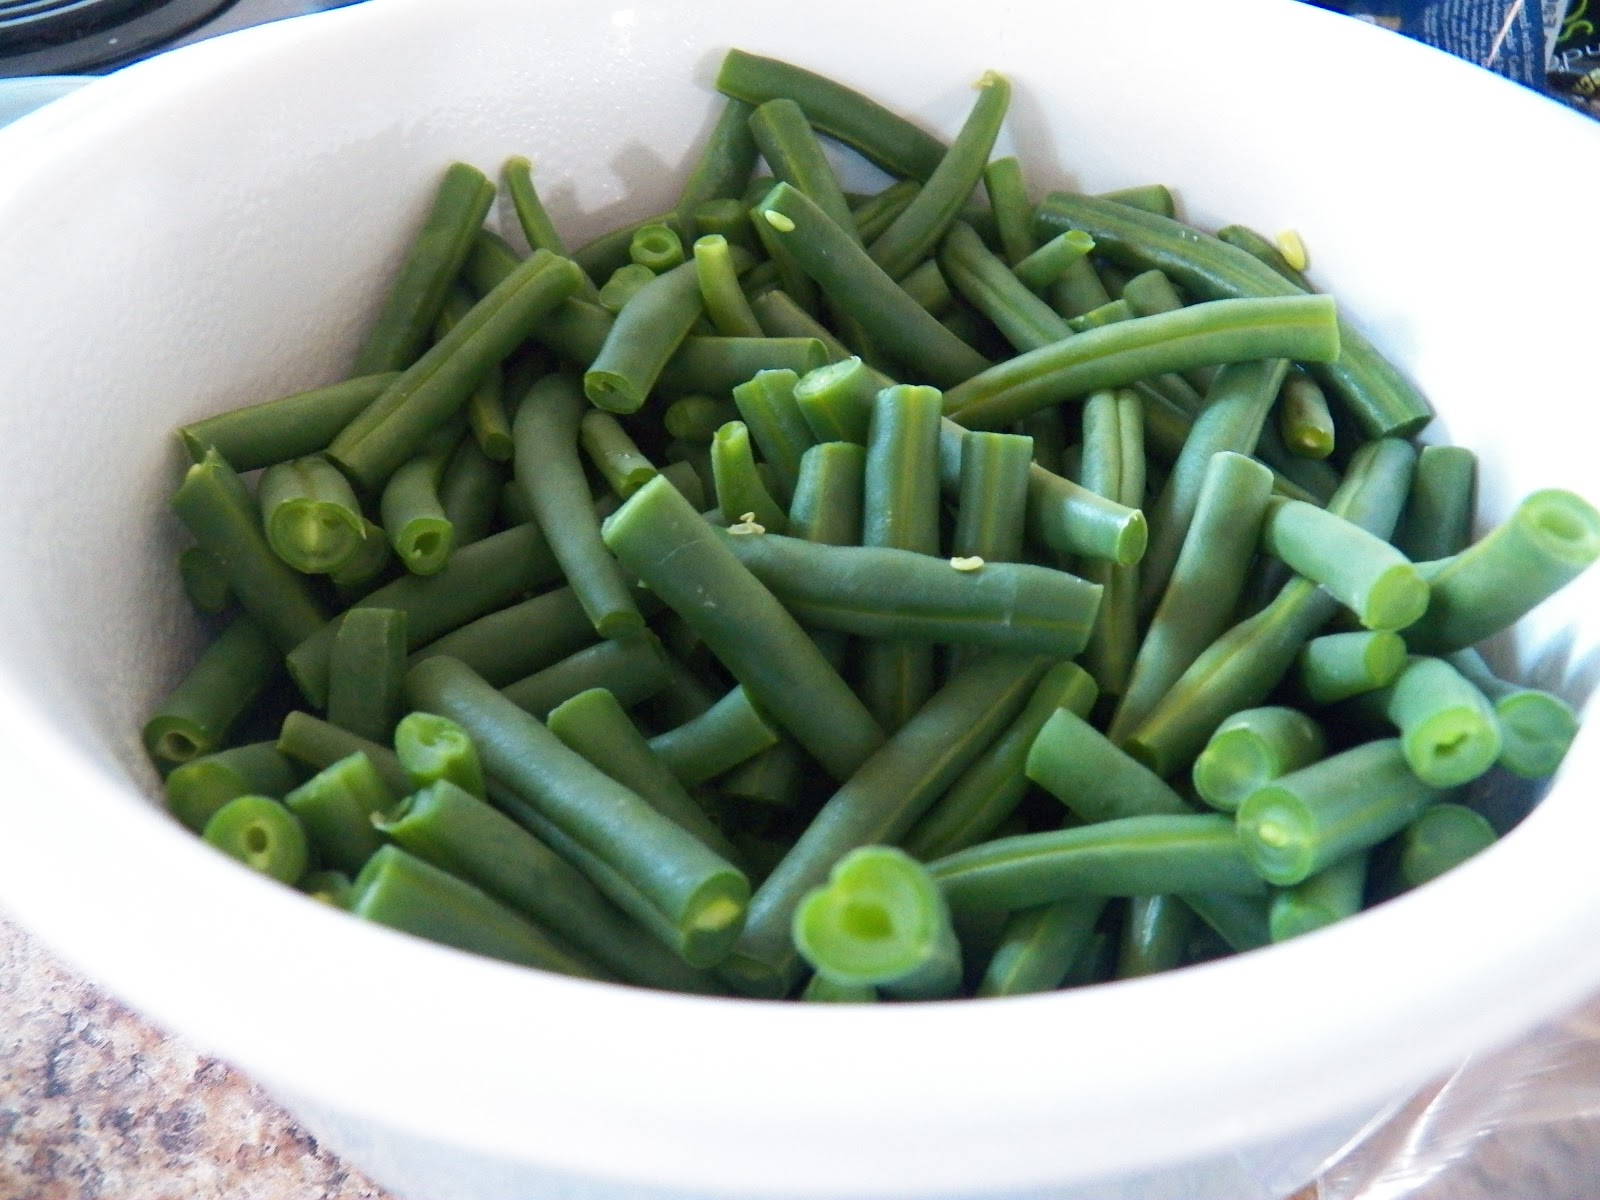
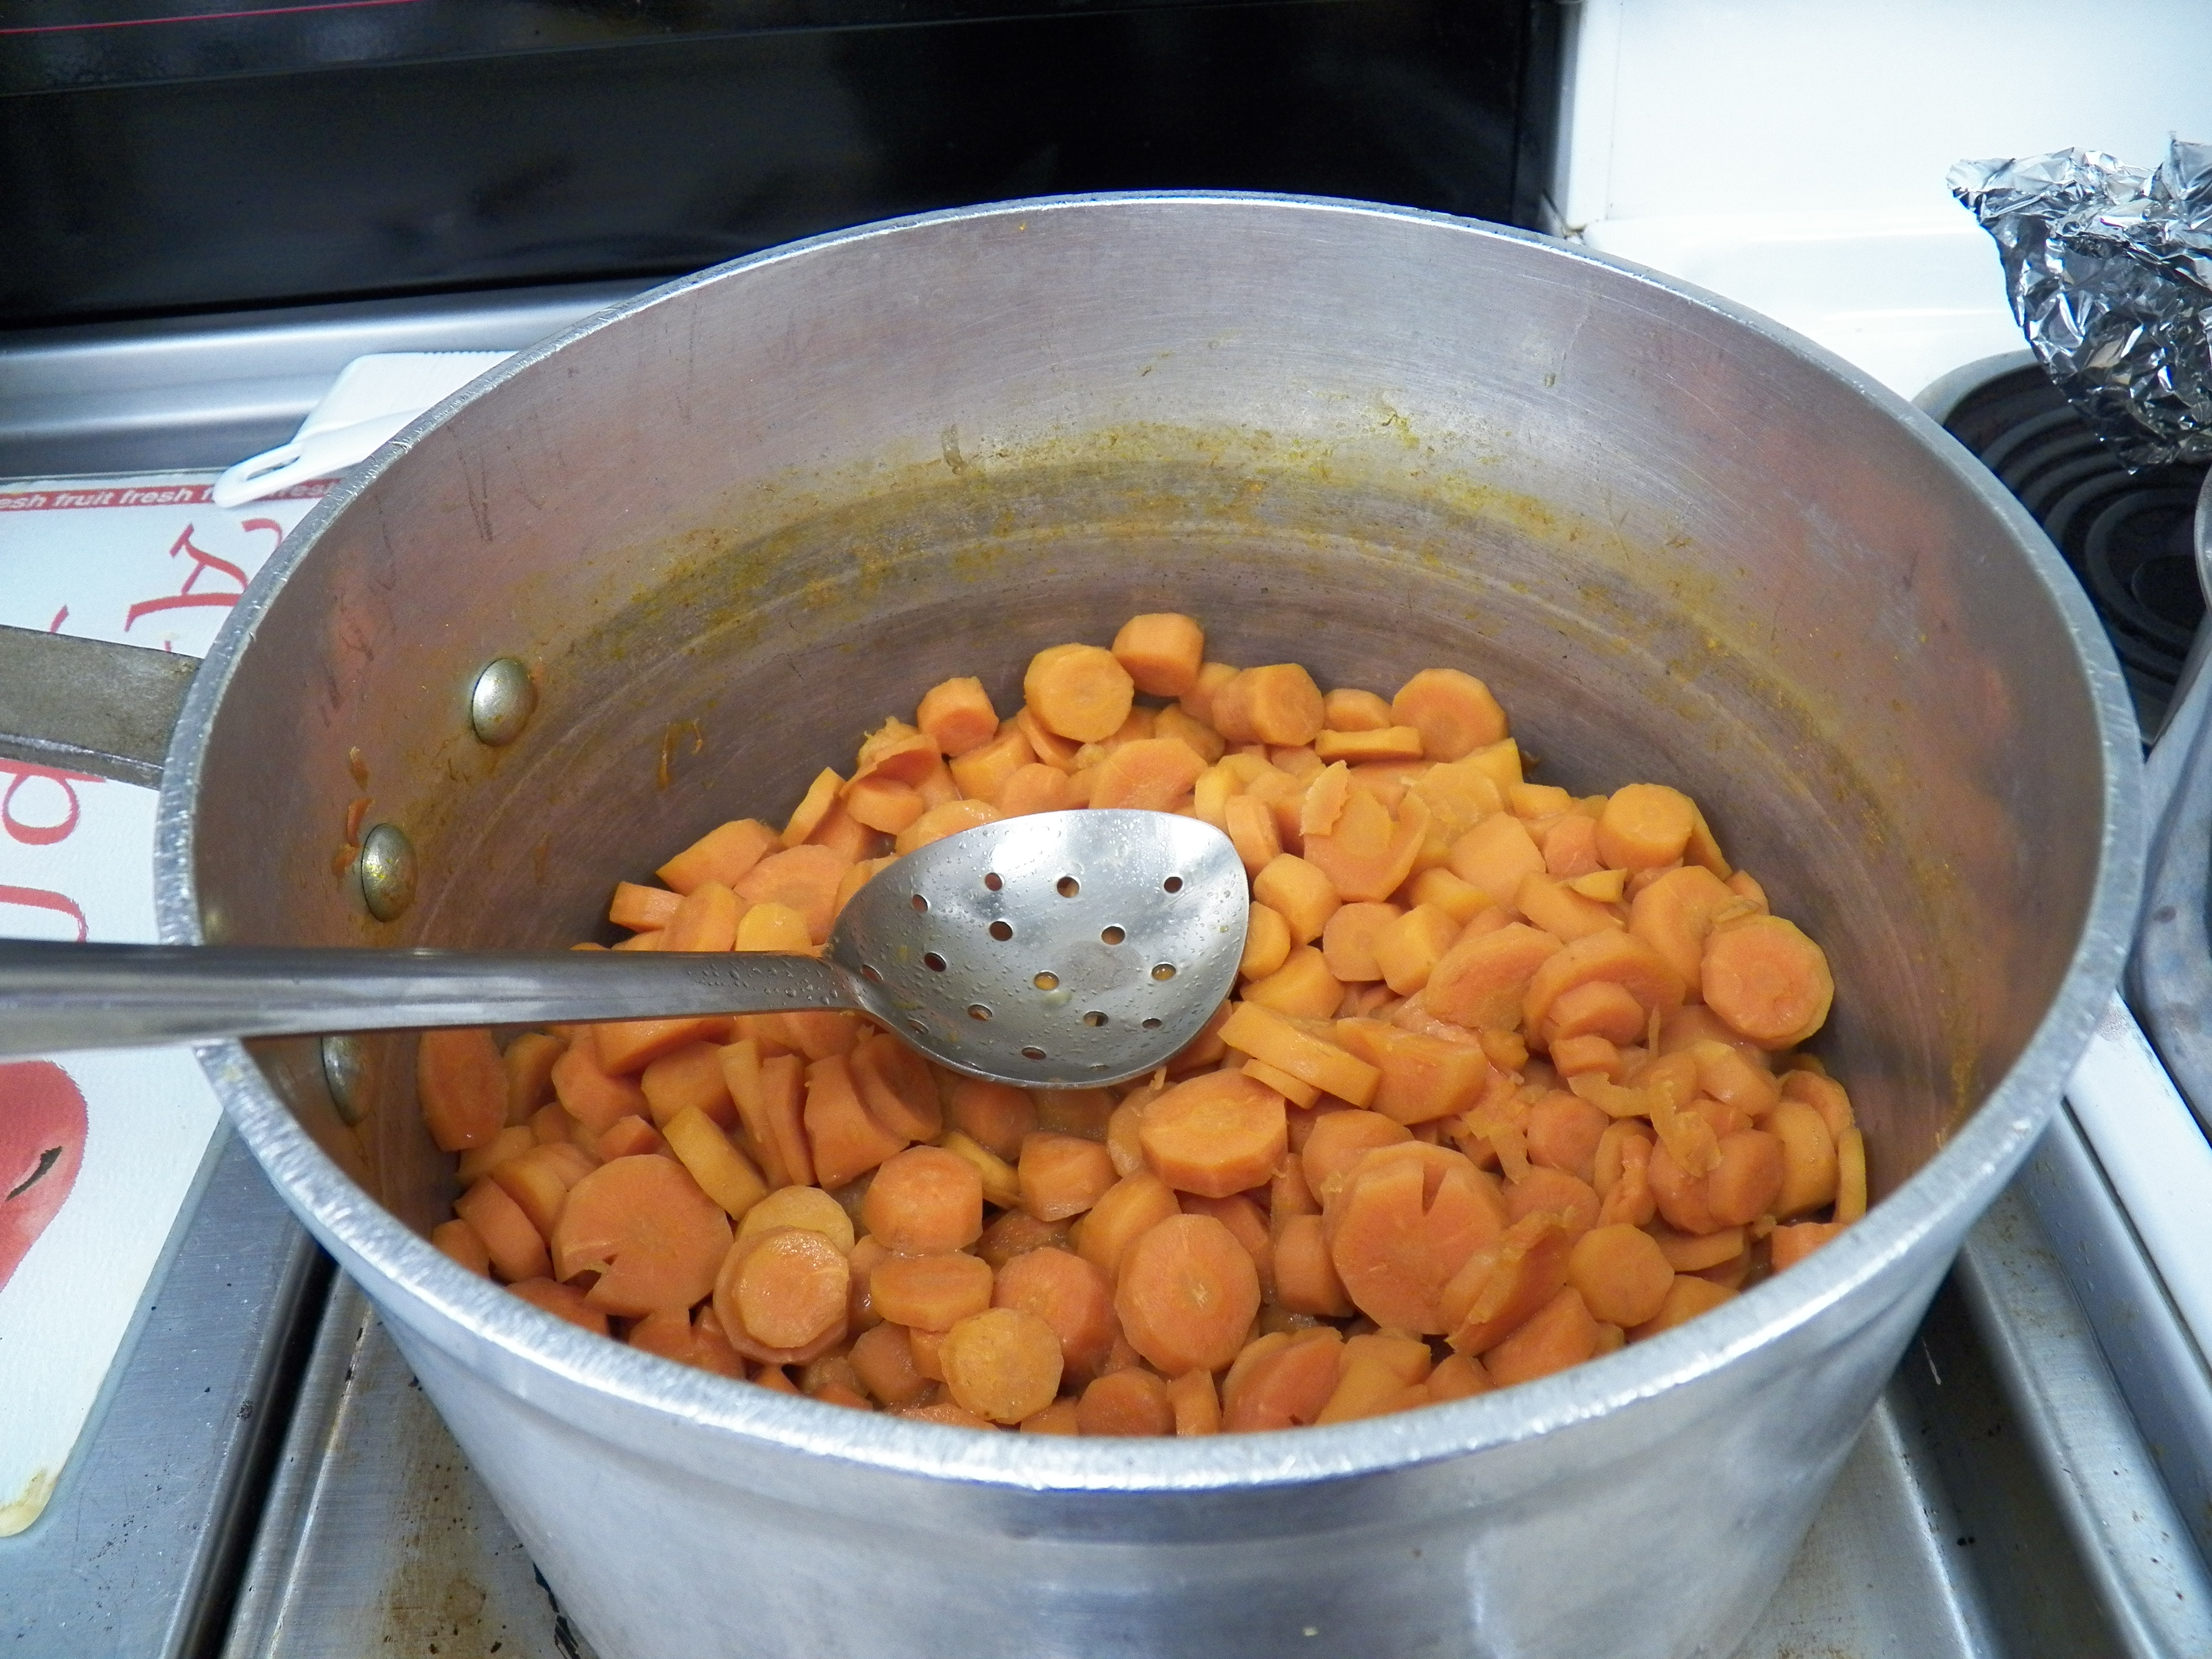
Then there is the lettuce, tomato and pickles and raw onions.  You can shred the lettuce and place it out in a bowl if you like or just tear up the leaves into quarters and pile them loosely onto a platter.  I’ve found that one head of lettuce will do about 20 or 30 burgers.    I also have two kinds of pickles available, as some people like Dill Pickles and others like Bread and Butter pickles.   I can go either way.  But I have to have a large slice of raw onion on my burger, and I don’t care if it makes my breath funny.  I can always pop a mint.

So there are the basic toppings, condiments, etc.   And it works.

But…

I like to go a little further.

A lot further.

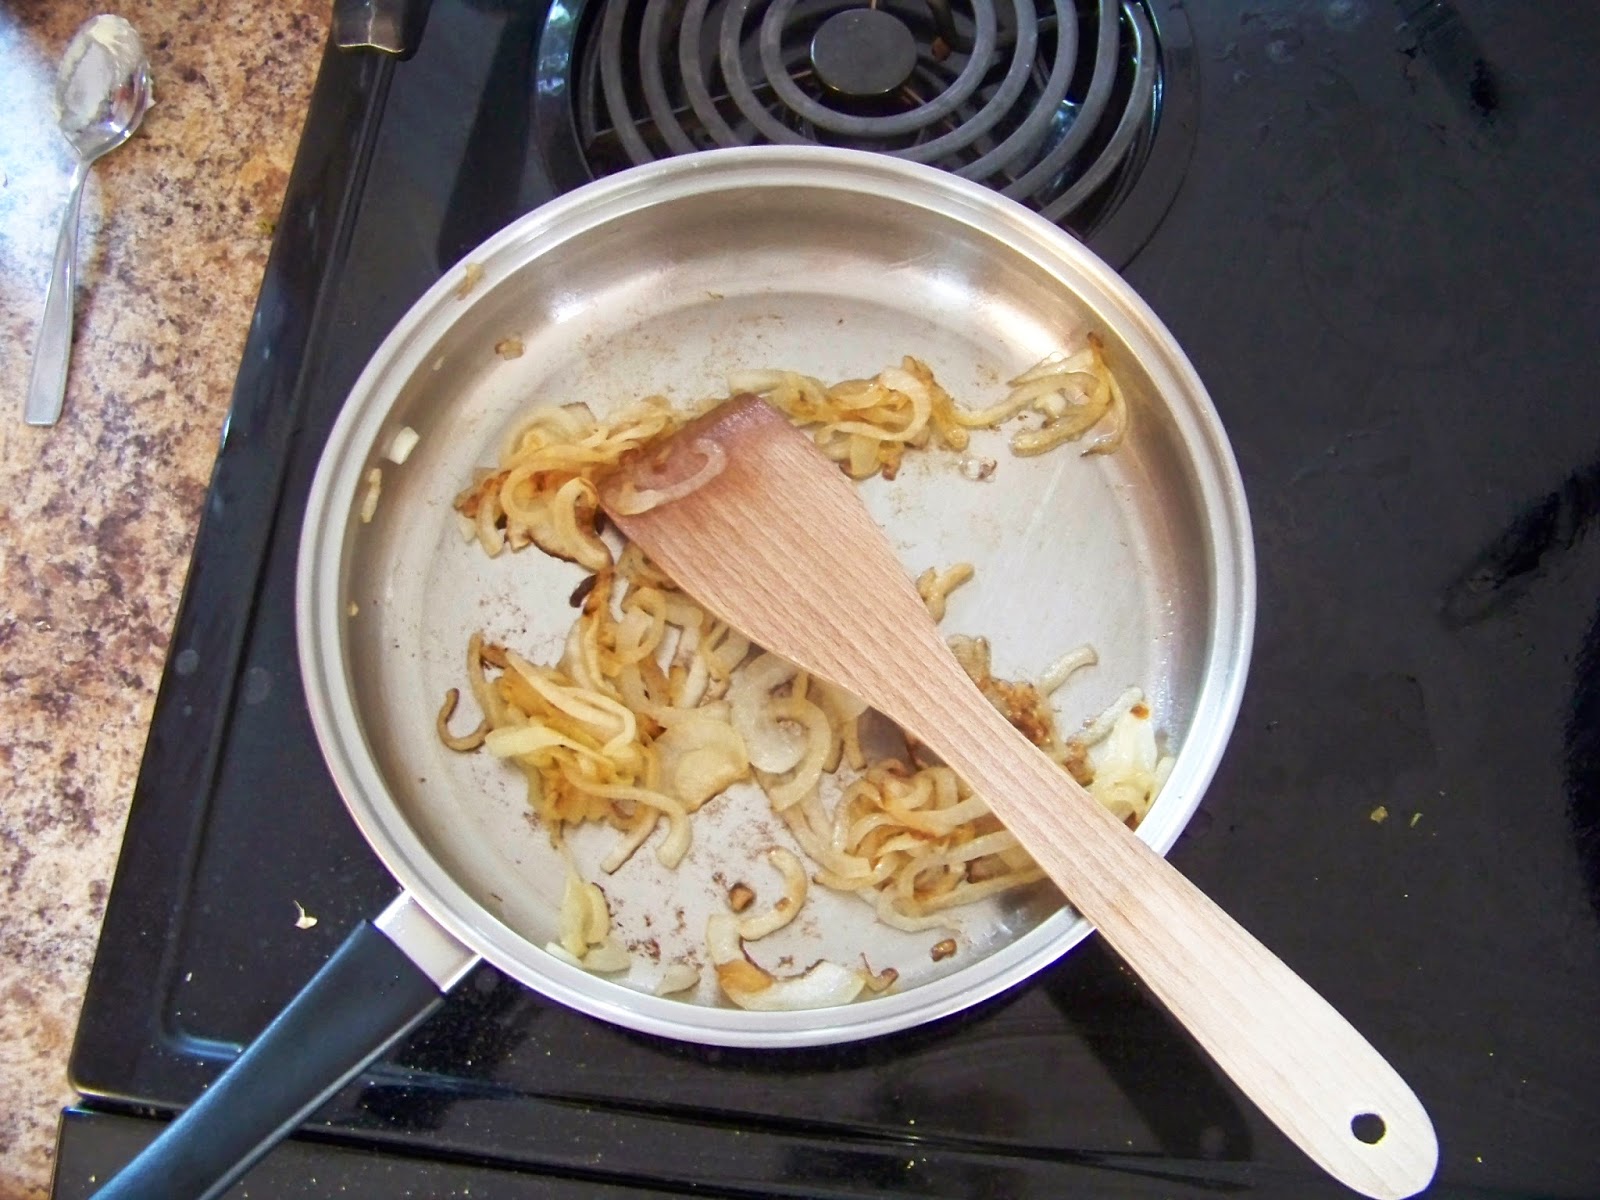
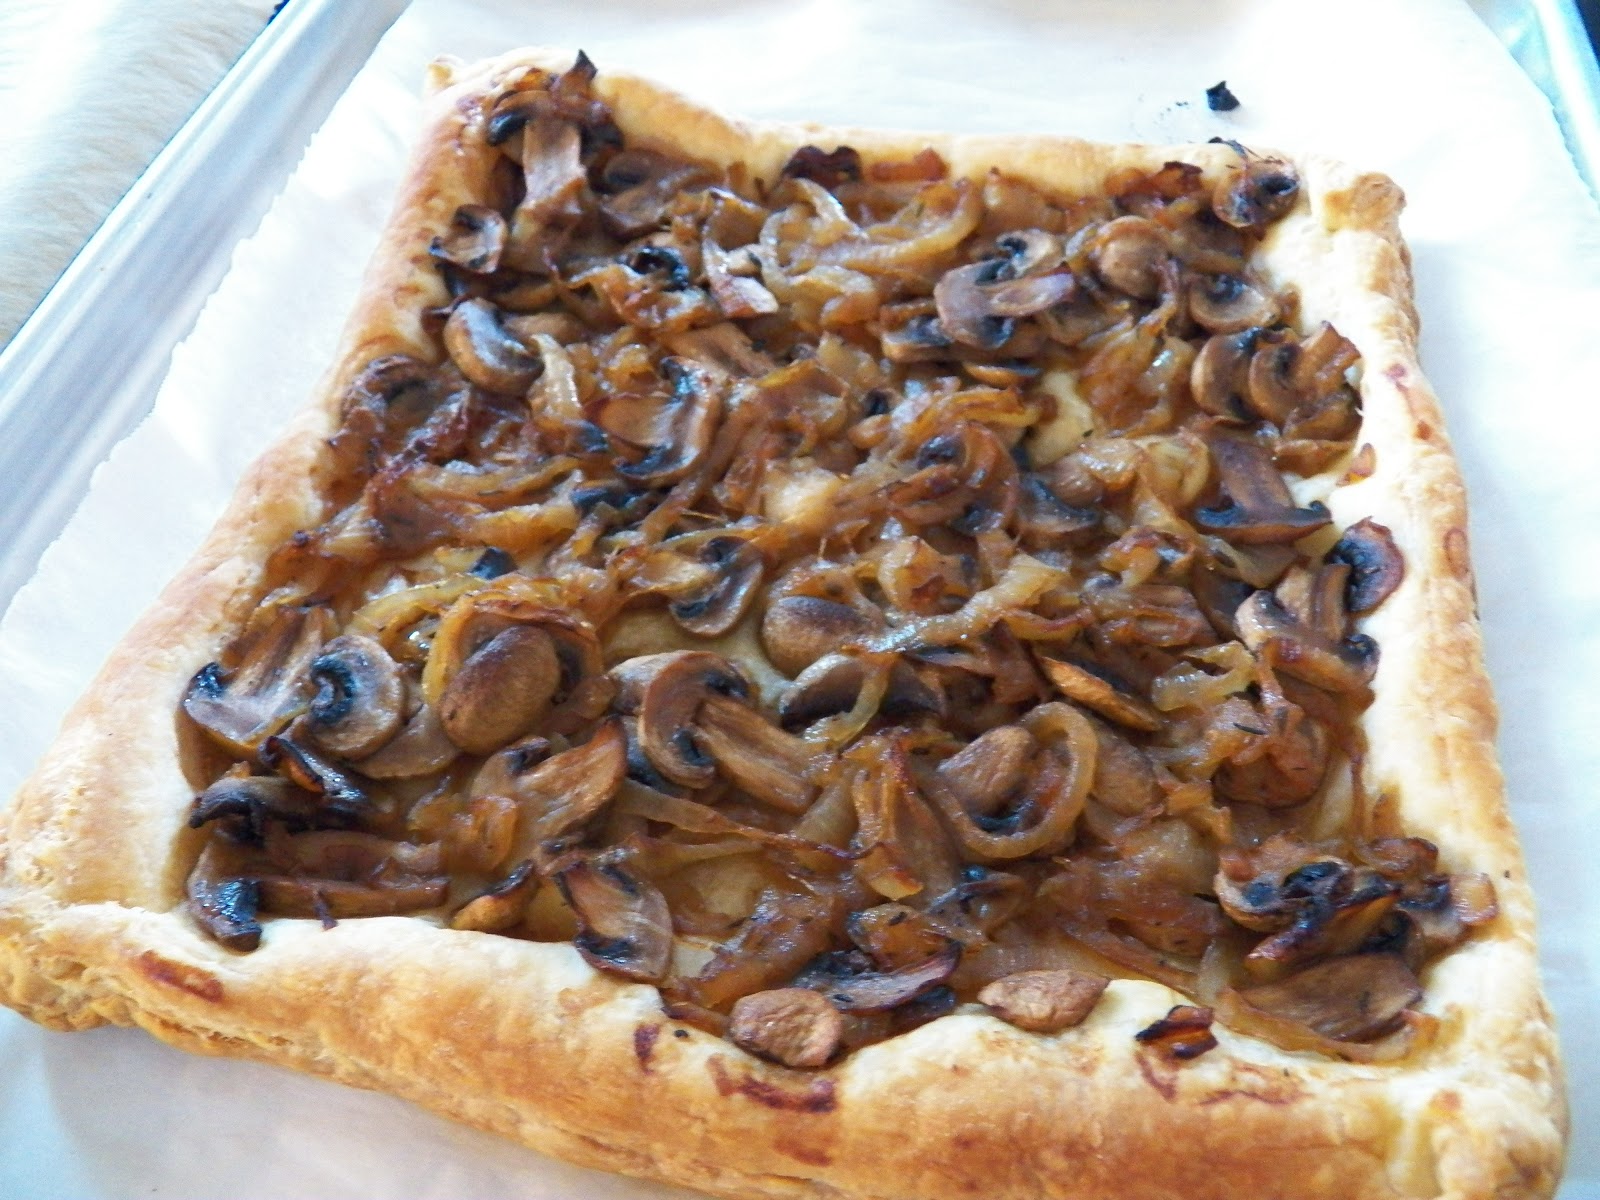
I cook up a pile of bacon, have some good pastrami handy, some sauteed garlic, some caramelized onions, sauteed Mushrooms and two or three kinds of cheese for people to choose from.   I really don’t care for the processed cheese slices, but that’s me.   I usually offer some good Cheddar or Colby Jack, some Provolone and some Blue Cheese.

And here’s where it really gets fun.   Grill your burgers, brown your buns if you like, place them on a big platter and let your guests build their own.

You would be amazed at how much fun that is.
Especially when one of your guests builds a Dagwood style burger and can’t get their mouth around it.

Ummm. that might actually be me.

Ramp and Mushroom Tart


I told you about my incredibly generous and thoughtful friend who gave me some Ramps earlier last week.   And they were so good with a simple scrambled egg and toast.  Sublime in their simplicity.

Well, I still had a few ramps left and thought they would be good with some mushrooms, so I googled ramps and mushrooms and came up with a bunch of ideas.   Amazing how many great minds think alike about stuff like this.   Here’s the link to my inspiration for this tart.   I got it from Saveur but there were a couple of issues with the recipe.  However, I persevered.

I had some goat cheese already and I always have puff pastry in the freezer, whether it be commercial or home-made.  This time of the year it’s the commercial stuff, cause it’s too hot to make my own.

And wow, it just so happened that all this came together in time for our June Tapas Night.   How fortuitous is that?

Of course I did make a few changes, but honestly, I don’t think anyone would have noticed.    I did not use as much olive oil as the original recipe called for and I did not have fresh thyme.  (note to self, get that plant started, sheesh) .   And my ramps did not have the green tops, so they were sliced and sauteed.

2 tbsp. olive oil
10 oz. button mushrooms, thinly sliced
1 shallot, minced (I used a bottled one I had on hand.)
Kosher salt and freshly ground black pepper, to taste
1 tsp. finely chopped thyme leaves, plus whole leaves to garnish
2 tbsp. unsalted butter
20 ramps (about 4 oz.), trimmed
4 oz. goat cheese, softened
½ cup freshly grated parmesan
2 tbsp. sour cream
2 tbsp. lemon zest, divided
1 egg yolk
1 sheet frozen, thawed puff pastry
Fleur de sel, to taste

1. Heat 1 tbsp. oil  plus one tbsp. butter in a 12″ skillet over medium-high heat. Add mushrooms, shallot, and salt and pepper; stir to coat in oil, and cover skillet. Cook until mushrooms release most of their liquid, about 5 minutes. Uncover and continue cooking, stirring occasionally, until all liquid is evaporated and mushrooms are browned, about 10 minutes more. Transfer to a bowl and set aside to cool.

2. Return skillet to heat along with remaining oil and butter. Add ramps; cover, and cook until barely tender, about 8 minutes. Uncover and cook, tossing occasionally, until lightly browned, about 5 minutes more. Transfer to a plate and let cool.

3. Heat oven to 375°. In a medium bowl, stir together goat cheese, parmesan, cream, 1 tbsp. lemon zest, egg yolk, and salt and pepper until smooth; set aside.

Place puff pastry on a floured work surface and roll into a 16″-long rectangle. Transfer dough to large cookie sheet.   Spread mushrooms over bottom of dough;

place dollops of cheese mixture over mushrooms and using your fingers or a spatula, spread cheese as much as possible over mushrooms.

Arrange ramps over cheese and mushrooms,

and then fold and crimp edges of the pastry, to form a rim.   Bake tart until crust is golden brown, about 30 minutes.

4. Transfer tart to a wire rack and let cool.  Slice and transfer to a serving platter.

Sprinkle remaining lemon zest over the top of the tart along with thyme leaves and fleur de sel. Serve at room temperature.

I just thought I’d leave you with a shot of my counter.   I’m not one of your neat and tidy cooks.  sigh.   I try, but gee, I just get too many things going on at once and then you have this.


I had a bunch onions I’d sliced and caramelized for my Mushroom and Caramelized Onion Tart, plus of course I was also prepping the ramps, and mushrooms and trying to stand on my head while answering the phone and ….   You get the drift.

Home Made Spaghetti Sauce


Have you ever looked at the labels on commercial Spaghetti Sauce?   Next time you’re out shopping, pick up a can or jar of it and read the label.    Notice the presence of sugar in there, whether it’s in the form of sugar or high fructose corn syrup or something else that means sugar.    I don’t know about you, but I try not to buy anything with HFCS in it and quite frankly, why do you need so much sugar in something that is basically just tomatoes and herbs?

I started making my own spaghetti sauce years ago and we like it much better than any of the commercial brands out there.    I also use it as a base for lasagna, so when I make sauce, I make a lot.   I figure if I’m going to be spending time in the kitchen, I am going to make it count for something.     If you have your own home canned tomatoes, tomato sauce and tomato paste, I applaud you, I don’t so I go to the store and buy tomatoes in several different forms.

As you can see from the picture, I open cans, and then add it to the browned meat, and after that, correct for seasonings.   And I only use the No Salt added tomato products.   We don’t need the salt and certainly don’t miss it either in this recipe.    Check out how much sodium is in those other cans of tomatoes.

I’m waiting.      Surprised?

Now add that to the sugar in prepared sauce, yuck, right?

Begin by chopping up a large onion, I like a fairly fine dice.   Throw it in the pan with some olive oil and cook it till it just starts to change color, then add a couple or three crushed and chopped cloves of garlic.  Put in as much garlic as you like here.   Cook for just a minute or so, and then remove from heat, and reserve in a separate dish.  If using fresh mushrooms, throw them in the pan and just let them cook just for a minute before you add your meat to the pan, brown it and cook until it is no longer pink.   Break it up a little with your spatula and then add the onions and garlic to the meat, let it cook for a few minutes more, then add the Italian herbs to the meat mixture.

Sorry, blurry picture, but you get the drift.

I just found a great product called Gourmet Garden Italian Herbs blend. Check the link out here, http://www.gourmetgarden.com/us/  It comes in a tube and you can find it in the refrigerated section of the veggie section in your grocery store.   It is a little pricey, but well worth it for the fresh taste.     Or you can add some dried Italian seasoning to the meat as you’re browning it, this seems to help open up the flavour of the dried herbs.     While the meat is browning open up those cans of diced tomatoes, tomato sauce and tomato paste.   If using canned mushrooms, go ahead and add them with the tomatoes.  Dump the tomatoes into a large pot, mix it up with your spoon until the tomato paste is incorporated and when the meat is ready, add it to the pot.   Taste it here to help correct the seasoning, and if necessary add more herbs.  You can also add a rich full bodied red wine at this point, just a cup or two.   Add a few tbsp. freshly grated parmesan cheese and then simmer for about an hour over low heat, stirring from time to time.     Cook up your favourite pasta, whether it be spaghetti, linguine, or angel hair and serve the sauce over the pasta or however you like to serve it.    And it makes a lot.

I freeze the remainder and pull it out when we’re in the mood for Spaghetti or Lasagna.

HINT: If using plastic dishes to freeze in, line them with some plastic wrap, this keeps the sauce from staining, plus when it’s frozen, throw that block into a plastic bag, and save the plastic container for something else.  Or just spoon the sauce into a ziploc bag, squeeze out the excess air and freeze flat.
If I’m making Lasagna, I add an additional can of diced tomatoes and then layer it with cheeses and noodles.

This is also a very company friendly dish.  You can stretch it with a couple cans more of tomatoes, a tad more seasoning, cook up lots of spaghetti and serve with a green salad and a loaf or two of garlic bread.

Here’s the recipe;

1lb. lean ground beef (feel free to use Ground Turkey instead)
1 lb. Italian sausage, removed from casing
1 lg. onion, diced
2-5 cloves garlic, minced (to your taste)
8 oz. fresh mushrooms, sliced or 2 small cans mushrooms
3  16 oz. cans diced tomatoes, no salt added
2-3  6 oz. cans tomato sauce, or 1 lg. can, no salt added kind
3 cans regular tomato paste
1 can tomato paste with Italian herbs added
1/4 tsp. (or more) red pepper flakes to taste.
3-4 tbsp.  Gourmet Garden Italian Herbs, or 1-2 tsp.  dried Italian Seasoning.
1-2  tbsp.  Amore Double Concentrated Tomato Paste 
2-4 tbsp. freshly grated Parmesan Reggiano cheese
Olive oil for browning.

You can also add a couple of cups of a good red wine to the sauce, my DH doesn’t care for the taste, but it does add a richness that can’t be beat.

Tarteletter med Kylling, Svampe og Asparges (Patty Shells with Chicken, Mushrooms and Asparagus)


It was Tapas Night again this week, and I made Tarteletter med Kylling og Svampe og Asparagus.     OK, so it’s Patty Shells with Chicken,  Mushroom and Asparagus filling, if you insist on a translation.   And according to this website Danes are known to consume 40 million tartaletter (patty shells)  a year.    And I can believe it.   There are also over 100 different filling recipes as well.   I just use one basic recipe, and I will vary it from time to time, but it’s pretty basic.

Personally I love this, and probably could eat it a couple, three, five times a week.  But Mom only made it once in a while and it was a special occasion kind of dish.

The original recipe calls for white asparagus, but my mom made it with mushrooms, so that’s the way I do it as well.  However, she also added Asparagus from time to time as well.   So, it’s up to you.  Gee you could also go wild and add both to it, trust me it tastes wonderful.   And I know this, cause I just did it.

And I use a couple of shortcuts as well.  You can do it this way as well, or make your own sauce.

Basic Recipe.

Puff Pastry Sheets  (I’m using the frozen stuff for this recipe)
Chicken
Mushrooms
Asparagus (optional)
Sauce

Too basic?   I know, but since I already know how to make it, I don’t need more than that.  But if you like, I’ll share the step by step.

To start with, cook your chicken breasts til they are tender.  Believe it or not a good hour in the pot with some carrots, onions, or leeks and celery to flavour the stock, and just let them simmer.   When the chicken is tender, take them out and chop them up.   Then strain the stock, and reserve a couple of cups for the sauce and freeze the rest, you just got a good base for home made soup.  (nothing like a multi purpose dish).    You can also use a whole chicken, cooked and cut up for this, or even a rotisserie chicken.   I’ve done it all the ways.

For the sauce, you could use canned Mushroom Soup for this (and yes, I’ve used Canned Mushroom soup for this many times, just don’t dilute it,  or just make your own soup.  Or you can do the following.   I believe in options, lots of options.

1 cup chicken broth
1 cup half and half
8 oz sauteed mushrooms, chopped or sliced, you choose
1/4 cup finely chopped onion, sauteed
1 garlic clove, minced, sauteed
1 tablespoon each, butter and olive oil
1/4 cup cornstarch mixed with 1/4 cup chicken broth or be really decadent and
mix 1/4 cup flour or cornstarch with 2 tablespoons butter and stir that in.
2 cups cooked, diced chicken

Saute the sliced mushrooms and onions til they are just cooked through and the onion is softened in a tablespoon of butter and a tablespoon of olive oil.     Add the garlic and saute an additional minute or so, set aside.   I don’t let any of them get brown, you just want them cooked through.

Heat broth and half and half to just under boiling, then add the thickening agent, either the cornstarch and broth or the roux, and stir it in.   Let it come to a low simmer, and let it cook for a couple of minutes to get the raw taste out, then add the mushrooms and onion, continue to let it simmer for a few more minutes.

Then you add the chicken, mushrooms and let it heat up.   At the end add a can of asparagus, and just let it heat through a little.   The asparagus breaks up very easily, so you don’t want to stir it in.

Now for the fun part, the tarts.   I outsmarted myself this time.   I thought, ooh, I can make teeny little bites using the pastry and baking them in my mini tart pans.  Well, let me just show you what happened.

Before baking…

After baking.   Kinda hard to fill those up.   (although I did cut them in half later on, and use the top and bottom to put filling in, hey, life hands you lemons, make lemonade or in this case, tart shells).

So then I went a more labor intensive route.   But the end result, well worth it.

Using a pretty shaped round cookie cutter, I cut out two rounds for each tart.

Then I cut out the center of the second round, and placed it on top of the first round.

You have to kind of noodge the rounds together.  Oh you do need to brush the bottom round with a lightly beaten egg, it helps it to stick together.   I did take out the center cut, and baked them separately.

As you can see, these worked.   I even took more out of the center with a sharp paring knife, cutting very carefully around and prying out that center bit.   Made more room for the filling.   Very important that, the ratio of filling to tart.

These had the chicken, mushroom and asparagus mixture (and the picture is fuzzy, bad picture taking night I guess)

These were the vegetarian ones.   I did the whole kit and caboodle on these.   Made some veggie stock from scratch, simmered a mixture of vegetable stock and cream together and then thickened them with a roux, and added the mushrooms and asparagus.

And just to let you know, you can buy the Puff Pastry tart shells already made, just bake them off in a hot oven, 400 degrees, for about 18 minutes or until browned, pull out the little cap, and then place them back in the oven for a few minutes to finish cooking.   While they are baking, heat up a can or two of Cream of Mushroom soup, add a cup or two of cooked chopped chicken, and some sauteed mushrooms or even a can or two of mushrooms.  Heat together and spoon into the baked pastry shells.    Now, how easy is that?  hmmm, and to think I played in the kitchen with the tart shells, and chicken mixture for over an hour, sigh.  But it was good and worth it.

There were a few leftovers, but I’m enjoying them for lunch this week.   Like I said before, I could eat this two, three, five times a week.

Totally Awesome Green Bean Casserole


Hi, I know we just had Thanksgiving, and all that fun stuff is over with, including the infamous Green Bean Casserole.    You know the one I mean, it’s got canned Mushroom Soup, canned Green Beans and is topped with French Fried Onions.   Which actually is probably the only thing I like about it.    However, a few years ago I stumbled on this recipe at the Pioneer Woman’s website.   It changed my opinion about Green Bean Casserole forever.    And if you happen to have a vegetarian or two to serve, this can be adapted for them.   For me, I’m  a hopeless carnivore and also love my bacon so I make it as written.    Oh, and if you’re doing it Gluten Free, just thicken the Bechamel sauce with some cornstarch or potato starch.

Wash your beans and then chop off the ends and stems, and either cut them in half or leave them whole, it’s your call.   (forgot to take pictures of this, but you can figure it out, right?)

Blanch your beans for a couple of minutes, then take them off the heat and cool them down with some ice water.     Set them aside while you get the rest together.   And then put them into a greased casserole dish.


Cut the bacon into lardons and cook in a skillet until they start to brown, then add a chopped onion, cook until the onions start to carmelize, and turn a lovely shade of caramel, then add the garlic and cook another minute or so.    Set aside.

Grate two cups of cheese, cheddar, sharp cheddar, colby Jack, whatever you like.  Personally I prefer Colby Jack cheese.  Set aside while you make a basic white sauce.(a lot of setting asides here, huh?)    A couple cups of milk or half and half, some butter and flour (or cornstarch if you are gluten free).

Cook until thick, then add the grated cheese, stir that around until the cheese is melted, than add the bacon and onion you just cooked.  Taste it, then add some cayenne and some salt and pepper to taste.   I usually put in 1/4 teaspoon of Cayenne to start with, then add more if I think it needs it.   You can also use mustard instead.   Both of them will ‘amp up’ or intensify the cheese flavour.  Give it a stir and for the final touch, add some chopped pimento’s.  Just for color, and they do add a little flavour as well.

Now for the final step, well next to last, well OK, so there is a couple more steps here.   Sheesh, stop counting.

Pour the sauce over the cooked beans and give them a stir so that the sauce coats each bean with love and cheese.

Spread some buttered Panko bread crumbs over the top, (omit this if you’re going gluten free, or use gluten free bread crumbs).   Or just dot it with some butter like this.

Place in a hot oven, about 350 degrees for 30-45 minutes.   Remove and serve.   Oh and don’t get surprised if even your kids love this, it is that good.

.

The first time I made this, there were six of us at dinner, and this is all that was left

Almost half of it eaten.   The next time I made it,  I took it to a potluck and people were scraping the bowl, personally I think they would have picked it up and licked it, the sauce is so good.

I just had a thought.  Make the sauce by itself and serve over some baked potatoes.   Now that would be an awesome meal.

Here’s the recipe.

2 pounds Fresh Green Beans, ends cut off
4 slices bacon, cut into lardons or strips    *** Vegetarian instructions at bottom
1 small onion, diced
3 cloves garlic, minced
4 tablespoons butter
4 tablespoons flour  ** or 2 tablespoons Corn or Potato Starch
2 1/2 cups whole milk
1/2 cup half and half
1/2 teaspoon salt or to taste
Fresh ground pepper to taste
1/8-1/4 teaspoon cayenne pepper, to taste
1 cup grated Monterey Jack Cheese (or a little more if you like, which I do)
1 jar sliced pimento’s, drained (4 oz. jar)
extra milk for thinning if necessary
1 cup Panko Bread Crumbs
2 tablespoons butter

Cook the beans for about 4 minutes, drain and dump into some ice water to stop the cooking process, then drain and place in a well greased casserole dish.
Cook the bacon until almost done, then add the onions, continuing to cook them until they begin to caramelize a little.   Add the garlic and cook for another minute or so.    Set aside while you make the sauce.

Make the white sauce, melting the butter and whisking flour into the butter, letting it cook a minute or so to get the raw taste of the flour out.  ** Gluten Free instructions at end.   Then add a half cup of milk, whisk that in, then add the rest of the milk and half and half, whisking it well.  Let it cook, continuing to stir until the sauce thickens.    After it has thickened, continue to cook for another minute or two, then add the cheese, pimento’s, cooked bacon and onions, and the seasonings.  Stir together and pour over the green beans.  Stir to combine, and top with the Panko bread crumbs and dot with butter.  Or melt the 2 tablespoons of butter in a pan, then stir in the bread crumbs and combine.   Sprinkle on top of casserole and bake for 30-45 minutes in a 350 degree oven.   Serve.

** Gluten Free.   If you’re making this gluten free, whisk the Corn or potato starch into the milk and heat, until thickened.   You can also add a couple of tablespoons of butter towards the end.  If you need it a little thicker, add a little more cornstarch mixed in with some cold milk,  and whisk it in.

***  Vegetarian, substitute Mushrooms for the bacon and follow the other instructions.

Mushroom and Onion Tart with Goat Cheese


I had fun making stuff for Saturday’s Tapas get together, but I just couldn’t make up my mind just what I wanted to make so I ended up with a couple of different dishes.    All right, I made four separate appetizers, sigh.
This one though was a big hit, and I loved it.   Onion and Mushroom Tart with Goat Cheese.  And I will make it again, and again and again.

I was just lucky I actually got to taste it, it disappeared so fast.   And this is so easy to make.  I mean, easy,  5 ingredients easy.  Onions, mushrooms, thyme, puff pastry and goat cheese.

To start with, take your puff pastry sheets out of the freezer and place in the fridge.   I like them to thaw in the fridge for a couple of hours, before taking them out and letting them finish thawing on the counter.   Cause if your kitchen is too warm, the pastry gets warm and it just doesn’t rise.   Now if you’re crazy like me, and make your own puff pastry, you’ll have some already in the fridge or freezer waiting for you.  Although I didn’t have any made up, I just used Pepperidge Farms Puff Pastry Sheets.   And they do work well.
Next up, cut some onions up, and cook them slowly and gently in some EVOO until they are nice and brown and caramelized.   I love slowly cooked onions.  If you have some fresh thyme, strip off a couple of sprigs and sprinkle the leaves over the onions and let them cook a minute or so more.  Or just sprinkle in about a half teaspoon of thyme and stir that in.  Remove the onions to a separate bowl while you cook the mushrooms.   Let them cook until the liquid has evaporated then add the onions back in to the pan, sauté them a little more and set aside to cool.

Preheat the oven to 350 degrees.

Pull out the puff pastry sheet and fold over the edges to make a pretty border, and also to be able to contain the onion/mushroom mixture.    Place the mushroom onion mixture in the middle of the tart and spread out evenly.

Bake for 25 minutes, or until the edges of the tart are nice and brown.

Take out and let cool just a little before dotting the top with some goat cheese.   You can make this earlier and just warm it a little in the oven before serving by the way.

Cut into pieces, and stand back cause your guests are going to love this, and will be trying to get just a taste before you get it on a platter.    I put this plate down and before I could get back to it with the camera, there were pieces missing.  But it’s all good.  And very tasty, and best of all easy.

Mushroom and Onion Tart

2 onions, sliced thinly, I used sweet onions
8 oz. sliced mushrooms
1/2 teaspoon dried thyme
2 oz. block goat cheese
1 sheet frozen puff pastry
1-2 tablespoons EVOO

Heat a good sauté pan with one tablespoon of EVOO and add the sliced onions, cooking them over a low heat for about 20-25 minutes.   Stirring from time to time.  Slow cooking means that the sugar really comes out in the onions.  You want them a nice golden color. Add the thyme in the last few minutes.   Remove to a separate bowl, and sauté the mushrooms in an extra tablespoon of EVOO until they have released their liquid and then add the onions back in.  Continue to cook until all the liquid has evaporated, then take the pan off of the heat and let them cool.
Turn oven on to 350 degrees to preheat.

Prepare the puff pastry sheet as per instructions, and then make a lip around the edges of the sheet by folding the puff pastry over just a little.  (I forgot to take pictures, again).   Place the mushroom/onion mixture in the middle and spread out.   Place in the preheated oven and cook for about 25 minutes or until the edges are a nice golden color.   Take out and let cool for just a couple of minutes before dotting the tart with some of the goat cheese.   Cut and serve immediately or you could also let it cool, and then warm it a little before serving.    This really is very tasty.

Gazpacho and Courgette’s Couscous Recipes


I neglected to post the recipe for the Gazpacho Couscous the other day, on purpose.  I thought the blog post was getting a little long so decided to just post the pictures from Tapas night .  But, I took a lot of pictures for the Couscous recipes, and since I did, I want to share with you.

By the way, I have to admit to something here, I was so excited when I saw the package of Israeli Couscous at World Market, I just grabbed it and hurried up and bought it and put it in my pantry to use.  Then when I pulled it out on Saturday to make these dishes, I read the label.

Yup, read the label.

Turns out what I bought was Israeli Couscous with lentils, green peas and orzo.   But since I had the water boiling already, I went ahead and cooked it.  And you know it was good.  I did taste it, and it was a blank slate.   So I decided to go ahead and make the Gazpacho Couscous anyway.   I mean if I didn’t tell people that I hadn’t read the label, they were never going to know it wasn’t quite what I had intended to cook.

Gazpacho Couscous Recipe

1 1/2 Cups uncooked Israeli Couscous, cooked according to package directions.

1/2 red onion, finely diced
1 small green pepper, finely diced
1 cucumber, finely diced
1 container  (8 oz.) grape tomatoes, cut in quarters
1/2 cup EVOO
1/4 cup (approx) Rice Wine Vinegar
Salt and Pepper
2 tablespoons (more or less) finely minced mint leaves.

Toss all together and place in fridge for at least 3 hours, then taste and adjust seasonings.

I have to say this turned out so good, but did make a lot, enough that I was able to share with friends.   In other words, they got to take some home with them.

And I also made some Courgettes and Mushroom Couscous as well.   That wasn’t as photogenic, but it sure tasted good.

Here’s the how to on that one.   Oh and Courgettes, we call them Zucchini on this side of the pond, personally, I’m going to continue to call them Courgettes, cause I think it elevates them, a little.   Makes them just a tad more elegant, and if you think of all the things you can make with a Zuch, well, I just think they deserve to be called something cool.

Courgettes and Mushroom Couscous

1 1/2 cups uncooked Israeli Couscous, prepared according to package directions
1 small courgette, diced  (zucchini)
8 oz. Fresh Mushrooms, diced  (next time I’m going to leave them in slices)
1 small onion, diced  (I used the other half of the red onion from the Gazpacho couscous)
2 tablespoons fresh parsley, chopped.
1/4 cup EVOO (Olive Oil)
2 tablespoons butter mixed with 2 tablespoons EVOO
Lemon juice from one lemon
Salt and Pepper to Taste.


Saute the mushrooms, courgettes and onion in a mixture of 2 tablespoons butter and EVOO, until softened.   Mix with the cooked couscous and then add the Lemon Juice and 1/4 cup EVOO and toss.  Add the the chopped parsley and taste.   Season to taste with salt and pepper.

So there you have it, the two Couscous recipes, that I got from  Chica Andaluza .  You should go by and check out her blog as well.  She’s got some great recipes and stories there.

Spicy Southwest Style Stuffed Mushrooms and July Boat Club


If you read this blog on a regular (or semi-regular) basis, you might have noticed that most of our socializing revolves around food.  Which is not a bad thing, at all.  Not that great for my waistline, but, hey, life is good, mostly.
Last night was our monthly Boat Club get together, and as usual lots of fun dishes.   I think because of the heat, many of the dishes brought were on the lighter side.   I know I had a nice elaborate dish planned, but realized that I didn’t have all the ingredients for it, and really, I didn’t want to drive 7 miles into town, and then back again just for two things.

So I went into the pantry for inspiration.   And found it in the freezer.   Something about that cool air moving across my face, just inspired me.  Cool air does that when it’s 90+ degrees outside.   I’ll post the recipe that the cool air inspired at the end.
But in the meantime…  the cast of characters, parade of dishes, yada, yada, yada…

Black Olive Tapenade with Bagel Chips
Spicy Southwest Stuffed Mushrooms
Coconut and plain fried Shrimp
Hummus with Sriacha Sauce and Sesame Oil
Tabbouli
Garlic and Artichoke Hummus
Marinated pork Tenderloin
Strawberry dessert
Cheese dip

And now for the Southwest Stuffed Mushroom recipe.
I had a pound of fresh mushrooms I’d purchased a couple of days ago and I thought they would be great served as stuffed mushrooms.  And here’s where the cool air from the freezer helped, giggle.   I found a package of Spicy Black Bean Burgers and got an AHA! moment.   And it didn’t even hurt.   I used my trusty little hand operated food processor to make some fresh bread crumbs out of some almost stale bread and set them aside while I got the mushrooms ready.

I popped out the stems and set them aside, while I put the mushrooms on a rimmed baking tray, upside down.   Hint:  If you pop the mushrooms in the oven for about 10 minutes or so, they will par cook and release a lot of liquid, which you can then use in the filling or…

See that lovely liquid?   That is what comes off of the mushrooms when they’ve been roasted just a few minutes.   Also that liquid can make your filling soggy.   I pour the mushroom juice into the filling, it adds a nice boost of flavour.

I chopped up the mushroom stems, sautéed them in some butter and olive oil, until they had released their liquid, then dumped them on top of the bread crumbs and mixed them all together.   I had grated 6 oz. of Monterey Jack cheese while the mushrooms and stems were all cooking.  Sometimes I can multi-task without burning stuff.  At any rate, I also sautéed the Black Bean burger in the butter/olive oil mixture, just until it was hot all the way through, took it out and did a rough chop and added that along with the cheese into the breadcrumbs.

I tasted the filling at this point and decided it was missing something.

The spice and flavor were good but it needed to be amped up a little, so I grabbed a jalapeño, minced it finely, threw it into the pan with a touch more EVOO, and let it saute’ for a couple of minutes.   Added that into the bread crumb mixture, tasted it and pronounced myself satisfied.

So I stuffed the mushrooms and threw them into the oven to cook.

And when they came out, I sprinkled a little more cheese on top, I mean, you can’t have too much cheese, put them into my to go container and headed off to Boat Club.


Recipe:   Southwest Style Stuffed Mushrooms

1-2 lbs Fresh Mushrooms, stems removed

4 slices fresh bread made into soft bread crumbs
Stems from the mushrooms, chopped
2-3 Spicy Black Bean Burgers  (Morningstar Black Bean Burgers)
1 finely minced Jalapeño
3 Tablespoons Butter
2 Tablespoons EVOO
6 -8 ounces shredded Monterey Jack Cheese, reserve 2 ounces set aside

Cook the chopped mushroom stems in the butter and EVOO, add the Black Bean burgers and cook until the burgers are heated through.  Add the jalapeno at the end, just long enough to release their flavour, a minute or so.   Chop up the burger.
Prepare the breadcrumbs while the mushroom stems and burgers are cooking, then mix them all together
Mix the breadcrumbs, mushrooms stems, Black Bean Burgers,cheese and jalapeño together.  Set aside.

Par cook the mushrooms for a few minutes, then take out of oven, flip right side up and fill with the bread crumb mixture.   Place into oven and bake at 350 degrees for about 15 minutes, or until browned a little.   Sprinkle with the reserved cheese and pop back into oven for a just a minute or so until the cheese melts.   Serve.
I filled 24 mushrooms, but had enough filling left over for about another 20 or so mushrooms, so it’s sitting in the freezer waiting til I get some more mushrooms, then I’ll make more, giggle.

Squash Medley and more….


I love this dish, so much so I’ve introduced it to the Seniors as one of the dishes I make from the bounty of squash we’re given as part of Farmshare.  I’ve made it a few times, and each time it is eaten and appreciated.   (this week I actually got a taste of it, giggle, it’s usually gone by the time lunch is over).    One of the best things about this recipe is the fact you can make it with whatever variety of summer squash you have available.  This week we had a bunch of yellow crookneck squash given to us, and even though they were a little ‘tired’, we still were able to use them.   So, since I scored on a good deal for mushrooms, and we had some lovely onions, I decided to go ahead and make what I call Squash Medley.   I usually like a mixture of zucchini and yellow squash for this, but if you only have one kind, go ahead and make it.   Here’s the quantity I made this week, but you can cut it down very easily.   And I’ll tell you how much of each at the end of the big recipe.Image

 20 small Yellow Crookneck squash, cut into small strips.    I like to julienne them, as I think it looks better, and they cook fast that way. 

2 lbs. Fresh Mushrooms, cut into slices

6 Sweet Onions, cut into strips. 

Olive Oil for sauteeing the vegetables.

4-6 teaspoons Toasted Sesame Seed Oil (add at the end)

Saute the mushrooms in about a teaspoon of olive oil, just til they are cooked, no need to brown them, put aside.

Saute the onions in a little olive oil, just until they are done, and are translucent.   Set aside with the mushrooms. Add  a little more oil, and then start to saute the squash, in small batches, you don’t need to over crowd the pan, you want them to be sauteed, not fried.   As each pan is finished add it to the mushrooms and onions.   When all the squash is sauteed, then toss them with the onions and mushrooms.   To finish it off, drizzle the sesame seed oil over the entire dish and toss gently again.  Serve right away.   This is also great mixed with some cooked linguine or pasta.   

*Now for the home cook.   This is so easy, just saute 8 oz. mushrooms, 1 onion, one each, zucchini (the small ones), and yellow crookneck squash. Then, drizzle with a half teaspoon toasted sesame seed oil, or to taste, and if you like, mix in some cooked pasta at the end.   And Voila!  you have a wonderful side dish or main dish even.   I’ve added chicken strips to this dish as well.   And if you notice, no seasonings other than the Sesame Seed Oil, you don’t need salt for this.  So it’s also great for anyone watching their salt intake. 


Now for the rest of the dishes we served.   We had Mojo Pork,which is pork marinated in  a Mojo Criollo sauce, served that with Yellow Rice and Black Beans.  

ImageImage

We also had our Cabbage, Smoked Sausage and Potato boil.   We still haven’t figured out what to call it, but it is so good. Image


I made some Glazed Carrots, Image

and can’t forget Dot’s Deviled Eggs,

Image

they’re always a hit, plus fresh sliced tomatoes out of our little garden.    And of course Biscuits with our own Home Made Butter.     Plus the desserts of course.  Which I neglected to get a picture of. 

So, there you have it, one more week of great food served to people who deserve the best we can offer.

Roasted Garlic and Mushroom Hummus


Hummus is good food. Really, it is. It’s good for you, tastes great and is a snap to make. That is if you have all the ingredients to hand, and I usually do. I think I’ve written about this before, but I like to keep some stuff on hand so I can throw together a quick appetizer or two, or just keep a can or three of say Black Olives, Garbanzo Beans, Pinto Beans, on hand. There are so many things you can make with a can of beans as the basis of a dish. Or a can of Black Olives. But I’ve posted about my Black Olive Tapenade before so you should have that recipe memorized by now. Last weekend I decided to make some Hummus for our monthly Tapa’s night get together. I got out my can of Garbanzo Beans, took out the Tahini from the fridge, when I spotted the mushroom stems I’d saved from the Stuffed Mushrooms I made last week. A little light went on in my head and I got one of those AHA moments, and I thought I can brown those mushroom stems and puree them, and if I add them to the Hummus they will add a lovely earthy note to the hummus. I already had my garlic cloves in a pan with some olive oil (my quick and easy approach to roasted garlic), so I added the mushroom stems and let them cook over low, low heat with the garlic cloves until the garlic was softened and browned just a smidgen. Then I took the garlic out and browned the mushroom stems a little more.   Hint:   If you add a little more olive oil and let the garlic cook very slowly in the oil, you have some lovely garlic infused oil you can use for other stuff.   And if you happen to make too much garlic, just submerge that garlic in the oil in a little spice jar in the fridge for up to a month and use it in other recipes.

While that was cooking I put the garbanzo beans or chick peas if you like the other name better,  in my handy dandy little hand operated food processor.    I actually got this many years ago to use while camping, and it is a wonder .   You can make salsa quick as can be in this.   And it did a great job of breaking up the beans and mushrooms.


But it didn’t get the beans as smooth as I wanted so I got out my little electric 2 cup processor and finished the Hummus in there.    The flavor was wonderful, but I outsmarted myself on the mushroom stems, I could not get them to process down as much as I wanted.   The Hummus was lumpy, well more fibrous.  Sigh.   So out came the sieve and I pressed the hummus through that and got my silky hummus.

I did say I would tell you about my triumphs as well as my failures.   Well, this wasn’t a failure, but an interesting detour.   Mushroom stems are rather fibrous and don’t process down all that well.   However, once I got the Hummus through the sieve, it was wonderful.

I served it with some Pita Crackers and some warmed Naan.

And it was yummy, silky, full flavoured and everyone ate it.   I only got one taste of it.    But that’s OK, I have more beans in the cupboard, and I can make some later on and I’m not sharing.

Recipe
1 can Garbanzo Beans, drained, reserve the liquid
2 teaspoons Tahini paste
2 cloves roasted garlic
1/2 cup browned mushrooms
2 teaspoons olive oil, divided, reserving one teaspoon oil for top of hummus.

Process the above ingredients in a food processor until smooth, use some of the reserved liquid from the can of beans if needed.   Drizzle one teaspoon of olive oil over the top before serving.